VR And Back Again: An XRobots Tale

Our friend [James Bruton] from XRobots has engaged in another bit of mixed-reality magic by showing how one can seamlessly step from the virtual world into the real world, and back again. Begone, green screens and cumbersome lighting!

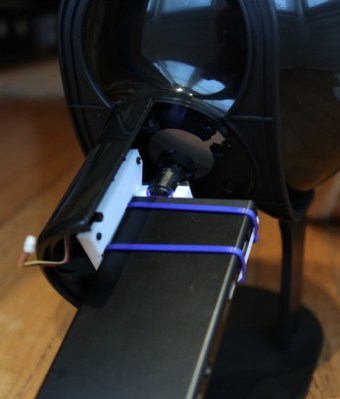
Now, most of what you’re seeing is really happening in post-production — for now — but the test footage is the precursor for a more integrated system down the road. As it works now, a GoPro is attached to the front of a HTC Vive headset, allowing [Bruton] to record in both realities at the same time. In the VR test area he has set up is a portal to a virtual green room — only a little smaller than a wardrobe — allowing him to superimpose the GoPro footage over everything he looks at through that doorway, as well as everything surrounding him when he steps through. Unfortunately, [Bruton] is not able to see where he’s going if he is to wear the headset, so he’s forced to hold it in one hand and move about the mixed-reality space. Again, this is temporary.

In action — well, it gets a little surreal when he starts tossing digital blocks through the gateway ‘into’ the real world.

Continue reading “VR And Back Again: An XRobots Tale”

Vintage Portable TV Turned Retro Gaming System

When [FinnAndersen] found an old TV set by the side of the road, he did what any self-respecting DIY/gaming enthusiast would do: He took it apart and installed a Raspberry Pi 3 running RetroPie in it in order to play retro games on a retro TV!

[Finn] took the CRT out of the TV before realizing that it actually worked. It was already too late, so [Finn] ordered a 12″ LCD screen to put in its place. He liked the idea of the curved screen the CRT had, though, so he molded a piece of acrylic around the CRT and, after some cutting and grinding, had it fitting in the screen’s space.

[Finn] also liked the idea of the TV still being able to view a television signal, so he bought a TV tuner card. After a couple of mods to it, he could control the card with the TV’s original channel changer. He used an Arduino to read the status of the rotary encoders the original TV used. After some trial and error, [Finn] was able to read the channel positions and the Arduino would send a signal to the channel up and down buttons on the tuner card in order to change the channel.

Next up was audio. [Finn] found a nicer speaker than came with the TV, so he swapped them and added an amplifier. The original volume knob is still used to control the volume. A USB Hub is hidden in the side of the TV at the bottom, to allow controllers to connect and finally, a power supply converts the mains voltage to 12V DC which runs both the Raspberry Pi and the TV Tuner.

[FinnAndersen] has built a great RetroPie cabinet reusing a great looking vintage TV. It’s unfortunate that he removed the CRT before figuring out that he could use it, but the replacement looks pretty darn good! And the added advantage? It’s portable, sort of. At least, without the CRT inside, it’s much lighter than it was. Here‘s another retro console inside an old TV, and this article is about connecting a Raspberry Pi to every display you can get your hands on.

Continue reading “Vintage Portable TV Turned Retro Gaming System”

Mangling Images With Audio Effects

Ever wonder what those snapshots you took of your trip to Paris would look like if you ran them through a Proco RAT or a Boss Overdrive? How about a BF-3 flanger? [Robert Foss] wrote in with this nifty little script (GitHub) that processes images as if they were audio files so that you can try it out without investing in a rack of analog pedals. Test your audio/visual DSP intuition and see if you can name the images without looking at the effects.

If you know your Linux command-line utilities, there’s really not much to it — scroll down to the very bottom of the script to see how it’s done. ffmpeg converts the images to YUV format, which works much better than RGB for audio processing, and then sox adds the audio effects. Another trip through ffmpeg gets you back to an image or video.

OK, it’s cheating because it’s applying the audio effects inside the computer, but nothing’s stopping you from actually taking the audio out and running it through that dusty Small Stone. Of course, once you’ve got audio outside of the computer, the world is your oyster. Relive the glorious 70’s when video artists made works using souped-up audio synthesizers. If you haven’t seen the Sandin Image Processor or the Scanimate in action, you’ve got some YouTubing to do.

Dartboard Watches Your Throw; Catches Perfect Bullseyes

Some people really put a lot of effort into rigging the system. Why spend years practicing a skill and honing your technique to hit a perfect bullseye in darts when you can spend the time building an incredibly complicated auto-bullseye dartboard that’ll do it for you?

In fairness, what [Mark Rober] started three years ago seemed like a pretty simple task. He wanted to build a rig to move the dartboard’s bullseye to meet the predicted impact of any throw. Seems simple, but it turns out to be rather difficult, especially when you choose to roll your own motion capture system.

That system, built around the Nvidia Jetson TX1, never quite gelled, a fact which unfortunately burned through the first two years of the project. [Mark] eventually turned to the not inexpensive Vicon Vantage motion capture system with six IR cameras. A retroreflector on the non-regulation dart is tracked by the system and the resulting XY data is fed into MATLAB to calculate the parabolic path of the dart. An XY-gantry using six steppers quickly shifts the board so the bullseye is in the right place to catch the incoming dart.

It’s a huge amount of work and a lot of money to spend, but the group down at the local bar seemed to enjoy it. We wonder if it can be simplified, though. Perhaps tracking just the thrower’s motions with an IMU-based motion capture system and extrapolating the impact point would work.

Continue reading “Dartboard Watches Your Throw; Catches Perfect Bullseyes”

Light Replaces Electrons For Giant Vector-Graphics Asteroids Game

For all its simplicity, the arcade classic Asteroids was engaging in the extreme, with the ping of the laser, the rumble of the rocket, the crash of crumbling space rocks, and that crazy warble when the damn flying saucers made an appearance. Atari estimates that the game has earned operators in excess of $500 million since it was released in 1979. That’s two billion quarters, and we’ll guess a fair percentage of those coins came from the pockets of Hackaday’s readers and staff alike.

One iconic part of Asteroids was the vector display. Each item on the field was drawn as a unit by the CRT’s electron beam dancing across the phosphor rather than raster-scanned like TV was at the time. The simple graphics were actually pretty hard to create, and with that in mind, [standupmaths] decided to take a close look at the vector display of Asteroids and try to recreate it using a laser.

To be fair, [Seb Lee-Delisle] does all the heavy lifting here, with [standupmaths] providing context on the history and mathematics of the original vector display. [Seb] is a digital artist by trade, and has at the ready a 4-watt RGB laser projector for light shows and displays. Using the laser as a replacement for the CRT’s electron beam, [Seb] was able to code a reasonably playable vector-graphic version of Asteroids on a large projections screen. Even the audio is faithful to the original. The real treat comes when the laser is slowed and a little smoke added to show us how each item is traced out in order.

All [Seb]’s code is posted on GitHub, so if you have a laser projector handy, by all means go for it. Or just whip up a custom vector display for your own tabletop version of Asteroids.

Continue reading “Light Replaces Electrons For Giant Vector-Graphics Asteroids Game”

Glitchy Synthesizer Meets Honeycomb LED Matrix

Don’t watch [Jason Hotchkiss]’s video if flashing lights or bleepy-bloopy synthesizer noises give you seizures. Do watch, however, if you’re interested in a big honeycomb-shaped LED matrix being driven at audio frequencies through a dedicated square-wave synthesizer that’s built in.

The LED panel in question is housed in a snazzy laser-cut, honeycomb-shaped bezel: a nice change from the standard square in our opinion. The lights are 1/2 watt (whoa!) whites, and the rows and columns are driven by transistor drivers that are in turn controlled by shift registers. We’re not entirely sure how the matrix is driven — we’d love to see a circuit diagram — but it looks like it’s some kind of strange, non-scanning mode where all of the column and row drives are on at once. Whatever, it’s art.

And it’s driven by logic chips making audio-frequency square waves. Two of these are fed into an LFSR and into an R-2R DAC and then into the shift registers. The output is chaos, but the audio and the visuals do seem to influence each other. It’s an audio-visual embodiment of some of my wildest Logic Noise fantasies. Pretty cool. Enjoy the video.

Continue reading “Glitchy Synthesizer Meets Honeycomb LED Matrix”

Own The Night With This Open Source Night Vision Monocular

If you’ve always wanted to see in the dark but haven’t been able to score those perfect Soviet-era military surplus night vision goggles, you may be in luck. Now there’s an open-source night vision monocular that you can build to keep tabs on the nighttime goings-on in your yard.

Where this project stands out is not so much the electronics — it’s really just a simple CCD camera module with the IR pass filter removed, an LCD screen to display the image, and a big fat IR LED to throw some light around. [MattGyver92] seemed to put most of his effort into designing a great case for the monocular, at the price of 25 hours of 3D printer time. The main body of the case is nicely contoured, the eyepiece has a comfortable eyecup printed in NinjaFlex, and the camera is mounted on a ball-and-socket gimbal to allow fine off-axis angle adjustments. That comes in handy to eliminate parallax errors while using the monocular for nighttime walks with both eyes open. One quibble: the faux mil-surp look is achieved with a green filter over the TFT LCD panel. We wonder if somehow eliminating the red and blue channels from the camera might not have been slightly more elegant.

Overall, though, we like the way this project came out, and we also like the way [MattGyver92] bucked the Fusion 360 trend and used SketchUp to design the case. But if walking around at night with a monocular at your face isn’t appealing, you can always try biohacking yourself to achieve night vision.