Solving The Final Part Of The IClicker Puzzle

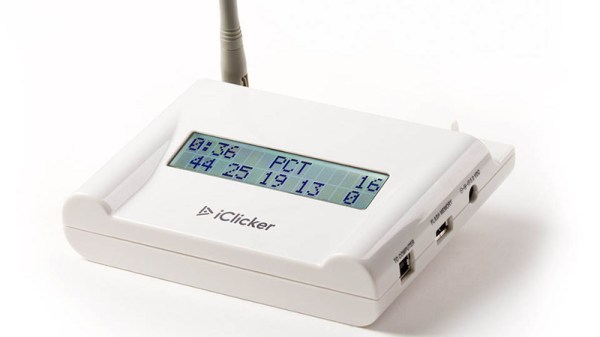
The regular Hackaday reader might remember the iClicker from our previous coverage of the classroom quiz device, or perhaps you even had some first hand experience with it during your university days. A number of hackers have worked to reverse engineer the devices over the years, and on the whole, it’s a fairly well understood system. But there are still a few gaps in the hacker’s map of the iClicker, and for some folks, that just won’t do.

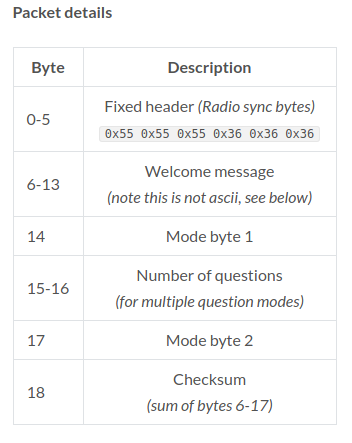
[Ammar Askar] took it upon himself to further the state of the art for iClicker hacking, and has put together a very detailed account on his blog. While most efforts have focused on documenting and eventually recreating how the student remotes send their responses to the teacher’s base station, he was curious about looking at the system from the other side. Specifically, he wanted to know how the base station was able to push teacher-supplied welcome messages to the student units, and how it informed the clients that their answers had been acknowledged.

He started by looking through the base station’s software update tool to find out where it was downloading the firmware files from, a trick we’ve seen used to great effect in the past. With the firmware in hand, [Ammar] disassembled the AVR code in IDA and got to work piecing together how the hardware works. He knew from previous group’s exploration of the hardware that the base station’s Semtech XE1203F radio is connected to the processor via SPI, so he started searching for code which was interacting with the SPI control registers.

This line of logic uncovered how the radio is configured over SPI, and ultimately where the data intended for transmission is stored in memory. He then moved over to running the firmware image in simavr. Just like Firmadyne allows you to run ARM or MIPS firmware with an attached debugger, this tool allowed [Ammar] to poke around in memory and do things such as simulate when student responses were coming in over the radio link.

At that point, all he had to do was capture the bytes being sent out and decode what they actually meant. This process was complicated slightly by the fact the system uses to use its own custom encoding rather than ASCII for the messages, but by that point, [Ammar] was too close to let something like that deter him. Nearly a decade after first hearing that hackers had started poking around inside of them, it looks like we can finally close the case on the iClicker.

Tracking Stolen Bikes With Narrowband IoT

For his entry into the 2019 Hackaday Prize, [Marin Vukosav] is working on an ambitious project to create a small GPS tracking device which utilizes Narrowband IoT (NB-IoT) for long range communications. Rather than using a GSM modem which would suck the batteries dry in short order, NB-IoT can theoretically maintain a connection within a 10 to 15 kilometer range while keeping the energy consumption low enough that the tracker could go up to a year before needing to be recharged.

At this point, the hardware is still in the proof of concept phase. [Marin] is using an Arduino with a GPS shield and a SIM7000 NB-IoT module to experiment with the concept, but ultimately says he wants to shrink the hardware down to the point it could fit inside of a bike light. Looking even farther ahead, he’d like to make deals with bike manufacturers so the module could be integrated into the frame itself, where a thief wouldn’t be able to access it at all.

Of course, nothing says this technology has to be limited to bikes. If [Marin] can get it small enough, and reach even half of his goal battery life, he’d have a very compelling product on his hands. Who wouldn’t want to add something like this to their long-range drone in case it gets lost?

There’s still a long way to go on this project, and it’s not all hardware. [Marin] will also have to create the software side of things, a site where you can register your tracker and be able to view its near real-time position on the map. It’s a lot of work, especially if you’re planning on turning it into a commercial product, and we’re very interested to follow along and see where the project goes throughout the year.

Perfecting The Open Source RC Controller

Over the last few months we’ve seen an influx of homebrew RC controllers come our way, and we’re certainly not complaining. While the prices of commercial RC transmitters are at an all-time low, and many of them can even run an open source firmware, there’s still nothing quite like building the thing yourself. How else are you going to get exactly what you want?

For this entry into the 2019 Hackaday Prize, [Vitor de Miranda Henrique] is working on his own version of the ultimate open source remote control. His design follows some of the trends we’ve already seen in terms of outward design and hardware expandability, but also branches off into some new territory with features such as dual integrated displays.

Why does your controller need two displays? The top 4.3 inch TFT is linked up to a 5.2 GHz video receiver, which makes it perfect for controlling vehicles in “first-person” view, such as drones. The lower screen is a 2.8 inch touch screen from Adafruit, which is intended to be used for navigating through menus and options once the firmware is fully fleshed out.

Powering the controller is a ESP32 and dual MCP23017 GPIO expanders to connect up to the array of input devices available to the user. The current iteration of the controller has ten switches, two encoders, some buttons, and a pair of scroll wheels for good measure. Oh, and of course there are a couple of joysticks in the mix as well. All the devices terminate at a custom PCB in the back of the controller which looks to make modifying and adding input devices simple and neat.

We’ve previously seen the Alpha V1, an open source controller with a fairly similar setup, albeit without the dual displays. If even that one is a bit more complex than you’d like, you can always just do it with an Arduino.

The Great Ohio Key Fob Mystery, Or “Honey, I Jammed The Neighborhood!”

Hack long enough and hard enough, and it’s a pretty safe bet that you’ll eventually cause unintentional RF emissions. Most of us will likely have our regulatory transgression go unnoticed. But for one unlucky hacker in Ohio, a simple project ended up with a knock at the door by local authorities and pointed questions to determine why key fobs and garage door remotes in his neighborhood and beyond had suddenly been rendered useless, and why his house seemed to be at the center of the disturbance.

Few of us want this level of scrutiny for our projects, so let’s take a more in-depth look at the Great Ohio Key Fob Mystery, along with a look at the Federal Communications Commission regulations that govern what you can and cannot do on the airwaves. As it turns out, it’s easy to break the law, and it’s easy to get caught.

Continue reading “The Great Ohio Key Fob Mystery, Or “Honey, I Jammed The Neighborhood!””

Open Hardware E-Ink Display Just Needs An Idea

Its taken awhile, but thanks to devices like the Amazon Kindle, the cost of e-ink displays are finally at the point where mere mortals such as us can actually start using them in our projects. Now we’ve just got to figure out how to utilize them properly. Sure you can just hook up an e-ink display to a Raspberry Pi to get started, but to truly realize the potential of the technology, you need hardware designed with it in mind.

To that end, [Mahesh Venkitachalam] has created Papyr, an open hardware wireless display built with the energy efficiency of e-ink in mind. This means not only offering support for low-energy communication protocols like BLE and Zigbee, but keeping the firmware as concise as possible. According to the documentation, the end result is that Papyr only draws 22 uA in its idle state.

So what do you do with this energy-sipping Bluetooth e-ink gadget? Well, that part is up to you. The obvious application is signage, but unless you’re operating a particularly well organized hackerspace, you probably don’t need wireless dynamic labels on your part bins (though please let us know if you actually do). More likely, you’d use Papyr as a general purpose display, showing sensor data or the status of your 3D printer.

The 1.54 inch 200×200 resolution e-ink panel is capable of showing red in addition to the standard grayscale, and the whole thing is powered by a Nordic nRF52840 SoC. Everything’s provided for you to build your own, but if you’d rather jump right in and get experimenting, you can buy the assembled version for $39 USD on Tindie.

3D Printed Weather Station Gets A Wireless Upgrade

A weather station can be anything from a fun home science exercise, all the way up to a useful tool for planning and weather prediction. [Rob Ward] is one such person who has developed their own weather station, and it recently got a wireless upgrade.

We first featured [Rob]’s work back in 2018, noting that a largely 3D-printed weather station was a particularly useful tool for the home experimenter. The utility of this is now improved, with the addition of a 433 MHz wireless link from the weather sensors back to the base station. Over on Github, [Rob] does a great job of explaining the basics of the Manchester encoding scheme used, and has developed a system that can decode signals from Oregon Scientific weather stations, too.

[Rob] uses the weather station to report weather conditions at Lake Tyers Beach, providing useful information for anyone in the area who might be considering a visit to the coast. It’s not quite as fun as asking whoever’s around on the CB road channel, but it’s a darn sight more accurate for your trouble. Video after the break.

Continue reading “3D Printed Weather Station Gets A Wireless Upgrade”

Simple, Self-Contained LoRa Repeater In About An Hour

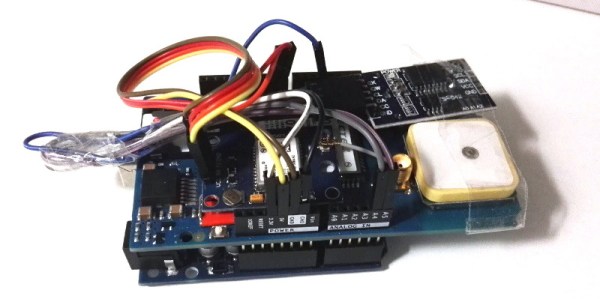
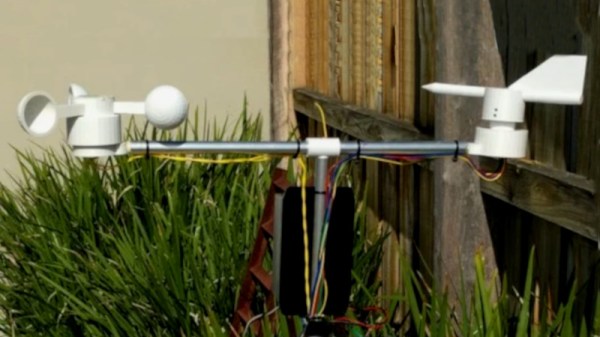
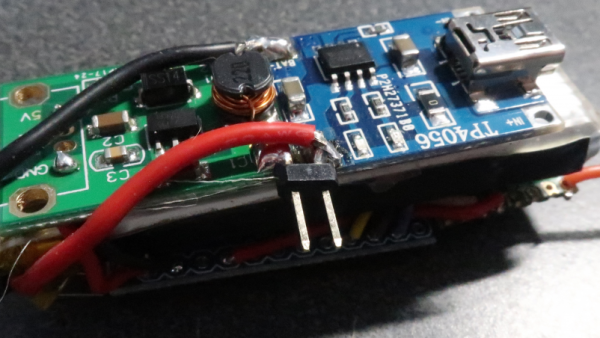
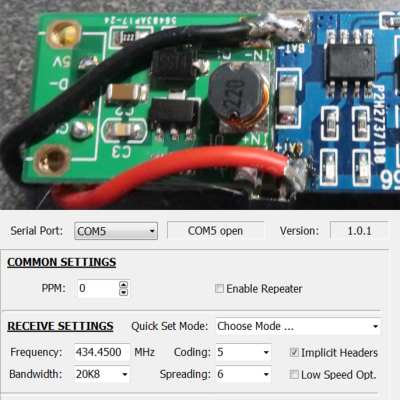
[Dave Akerman]’s interest in high-altitude projects means he is no stranger to long-range wireless communications, for which LoRa is amazingly useful. LoRa is a method of transmitting at relatively low data rates with low power over long distances.

Despite LoRa’s long range, sometimes the transmissions of a device (like a balloon’s landed payload) cannot be received directly because it is too far away, or hidden behind buildings and geography. In these cases a useful solution is [Dave]’s self-contained LoRa repeater. The repeater hardware is simple, and [Dave] says that if one has the parts on hand, it can be built in about an hour.

The device simply re-transmits any telemetry packets it receives, and all that takes is an Arduino Mini Pro and a small LoRa module. A tiny DC-DC converter, battery, and battery charger rounds out the bill of materials to create a small and self-contained unit that can be raised up on a mast, flown on a kite, or carried by a drone.

The repeater’s frequency and other settings can even be reprogrammed (using a small windows program) for maximum flexibility, making the little device invaluable when going hunting for landed payloads like the one [Dave] used to re-create a famous NASA image using a plastic model and a high-altitude balloon. Check out the details on the GitHub repository for the project and start mashing “add to cart” for parts at your favorite reseller.