An E-Bike Battery Pack Without Spot Welding

In somewhat of a departure from their normal fare of heavy metal mods, [Make It Extreme] is working on a battery pack for an e-bike that has some interesting design features.

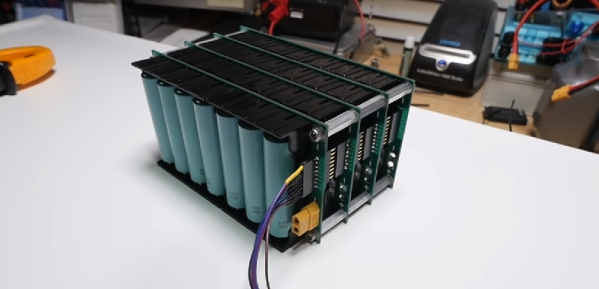
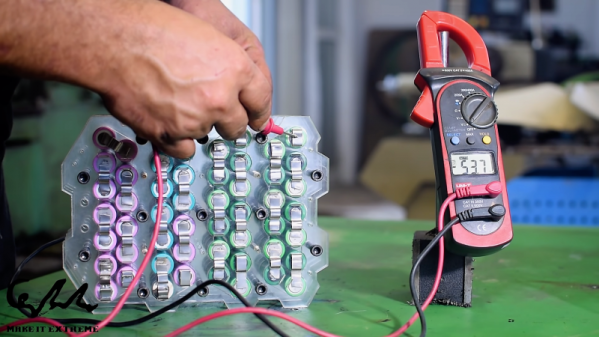
The guts of the pack are pretty much what you’d expect – recovered 18650 lithium-ion cells. They don’t go into details, but we assume the 52 cells were tested and any duds rejected. The arrangement is 13S4P, and the cells are held in place with laser-cut acrylic frames. Rather than spot weld the terminals, [Make It Extreme] used a series of strategically positioned slots to make contacts from folded bits of nickel strip. Solid contact is maintained by cap screws passing between the upper and lower contact frames. A forest of wires connects each cell to one of four BMS boards, and the whole thing is wrapped in a snappy acrylic frame. The build and a simple test are in the video below.

While we like the simplicity of a weld-less design, we wonder how the pack will stand up to vibration with just friction holding the cells in contact. Given their previous electric transportation builds, like this off-road hoverbike, we expect the pack will be put to the test soon, and in extreme fashion.

Continue reading “An E-Bike Battery Pack Without Spot Welding”

Beats An Extension Cord

What does your benchtop power supply have that [Pete Marchetto]’s does not? Answer: an extension cord draped across the floor. How often have you said to yourself, “I just need to energize this doodad for a couple seconds,” then you start daisy chaining every battery in the junk drawer to reach the necessary voltage? It is not uncommon to see battery packs with a single voltage output, but [Pete] could not find an adjustable one, so he built his own and put it on Tindie.

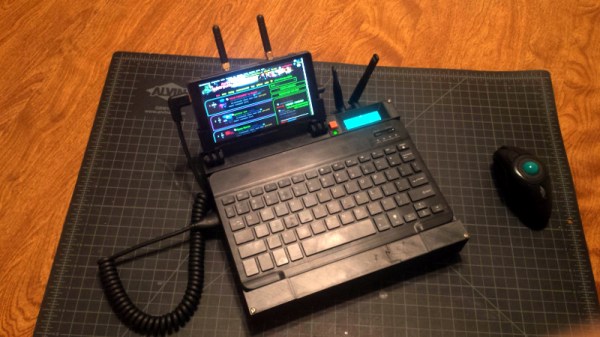
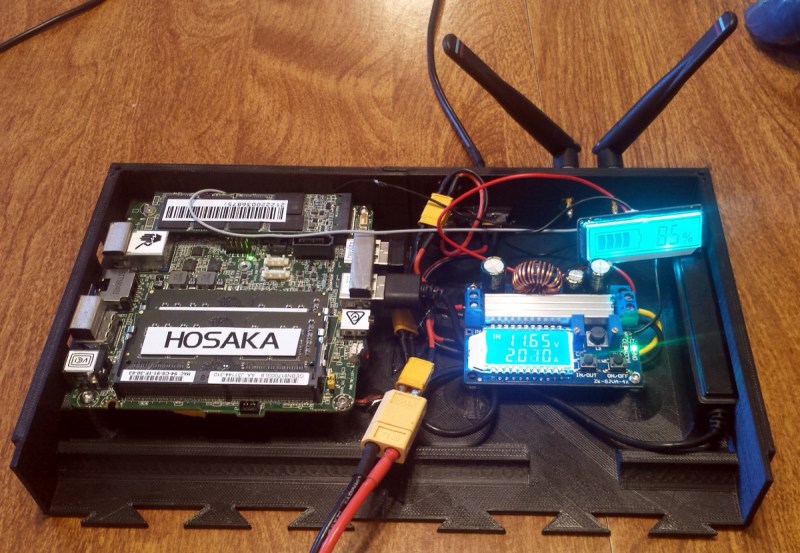
Presumably, the internals are not going to surprise anyone: an 18650 battery, charging circuit, a voltage converter, display, adjustment knob, and a dedicated USB charging port. The complexity is not what intrigues us, it is the fact that we do not see more of them and still wind up taping nine-volt batteries together. [Editor’s note: we use one made from an old laptop battery.]

This should not replace your benchtop power supply, it does not have the bells and whistles, like current regulation, but a mobile source of arbitrary voltage does most of the job most of the time. And it’s what this build hasn’t got (a cord) that makes it most useful.

Bike Helmet Plays Music Via Tiny Motors For Bone Conduction

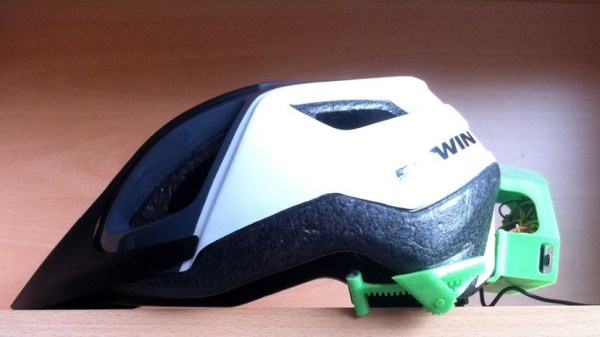
[Matlek] had an interesting problem. On one hand, a 40 minute bike commute without music is a dull event but in France it is illegal for any driver to wear headphones. What to do? Wanting neither to break the law nor accept the risk of blocking out surrounding sounds by wearing headphones anyway, and unwilling to create noise pollution for others with a speaker system, [Matlek] decided to improvise a custom attachment for a bike helmet that plays audio via bone conduction. We’ll admit that our first thought was a worrisome idea of sandwiching metal surface transducers between a helmet and one’s skull (and being one crash away from the helmet embedding said transducers…) but happily [Matlek]’s creation is nothing of the sort.

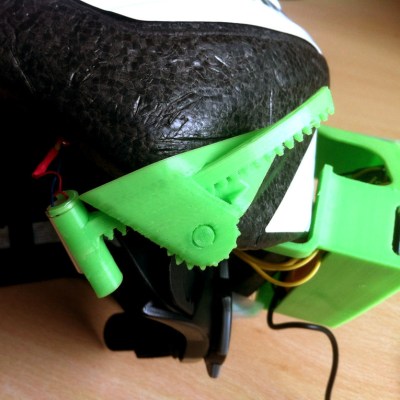
A 3D printed rack and pinon provides adjustability and stable contact with the “sweet spot” behind each ear.

The bone conduction is cleverly achieved by driving small DC motors with an audio signal through a TPA2012 based audio amplifier, which is powered by a single 18650 cell. By using motors in place of speakers, and using a 3D printed enclosure to hold the motors up to a sweet spot just behind the ears, it’s possible to play music that only the wearer can hear and does not block environmental sounds.

[Matlek] didn’t just throw this together, either. This design was the result of researching bone conduction audio, gathering a variety of different components to use as transducers, testing which performed best, and testing different locations on the body. Just behind the ear was the sweet spot, with the bony area having good accessibility to a helmet-mounted solution. Amusingly, due to the contact between the motors and the rest of the hardware, the helmet itself acts as a large (but weak) speaker and faint music is audible from close range. [Matlek] plans to isolate the motors from the rest of the assembly to prevent this.

Another good way to get audio to transmit via bone conduction? Send it through the teeth. While maybe not the best option for a bike rider, biting down on this metal rod sends audio straight to your inner ear.

A Li-Ion Booster Pack, Done Right

We’re all used to battery booster packs containing a Li-ion or Li-poly cell and a little inverter circuit, they are a standard part of 21st century daily survival for those moments when smartphone battery lives don’t perform as advertised. But how many of us have considered what goes into them, and further how many of us have sought to produce the best one possible rather than a unit built at the lowest price?

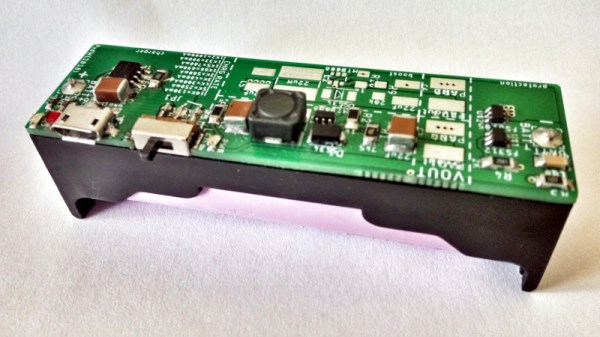
It’s a course [Peter6960] has followed, producing a PCB that sits on the back of an 18650 cell holder. It follows the work of [GreatScott] in particular in its use of the TP4056 charger, MT3608 boost converter, and FS312F protection ICs. Many commercial modules omit any protection circuit, and the FS312F is of particular interest because it has a low 2.9V cut-off voltage that should lengthen the life of the cell. Files for the PCB can be found in a zip file hosted on Google Drive.

You might think that there was nothing new that could be learned about a Li-ion battery booster, but it’s always worth a look at a well-executed piece of work. We noticed he refers to Li-poly cells while using what appears to be a Li-ion 18650 cell. Most likely this is merely an oversight.

There is a lot to know about the characteristics and safety of the lithium-chemistry rechargeables, you may find [Sean Boyce]’s article on the subject to be an interesting read.

Make or buy lithium ion battery pack

Comparing Making To Buying A Lithium Ion Battery Pack

At Hackaday we’re all about DIY. However, projects can have many components, and so there’s sometimes a choice between making something or buying it. In this case, [GreatScott!] wondered if it would be cheaper to make or buy a lithium-ion battery pack for his new eBike kit. To find out, he decided to make one.

After some calculations, he found he’d need thirteen 18650 cells in series but decided to double the capacity by connecting another thirteen in parallel. That gave him a 5 Ah capacity battery pack with a nominal voltage of 48.1 V and one capable of supplying a constant current of 40 A. Rather than connect them by soldering the nickel strips, he purchased a kWeld battery spot welder, adding to the cost of the build. He charged his new battery pack using his bench power supply but being concerned about uneven charging of the cells over the battery pack’s lifetime, he added a Battery Management System (BMS). The resulting battery pack powers his eBike motor just fine.

After adding up all the costs, he found it was only a tiny bit cheaper than prices for comparable battery packs on eBay, which were €24.4 per Ah (US$29.5 per Ah). The only way it would be cheaper is if he made multiple packs, spreading out the one-time cost of the battery spot welder. So that means it’s really up to your preference. See his video below to judge for yourself if you’d rather do it the DIY way. And then let us know what you’d do in the comments below.

Continue reading “Comparing Making To Buying A Lithium Ion Battery Pack”

Vastly Improving The Battery Life On Cheap Action Cams

At one time, GoPro was valued at over eleven Billion dollars. It’s now on the verge of being a penny stock, because if surfers can make action cams and video editing software, anyone can. Action cams are everywhere, and one of the cheapest is the SQ11. It’s a rip-off of the Polaroid Cube, has a non-standard USB socket, a tiny battery, and the video isn’t that great. It only costs eight dollars, though, so [pixelk] decided to vastly expand the abilities of this cheap camera for a Hackaday Prize entry.

The major shortcoming of the SQ11 action cam is the tiny battery. Reportedly, it’s a 200 mAh battery, but the stated 1-2 hours of runtime bears no resemblance to reality. The solution to this problem, as with most things in life, is to throw some lithium cells at the problem.

[pixelk] disassembled the SQ11 action cam and 3D printed a much longer enclosure meant to fit a single 18650 battery. There’s a protection circuit, so that’s fine, but there’s still a problem: the charging circuit in the camera is tailored for a 200 mAh battery — charging an 18650 cell would probably take a day. That’s no problem, because this enclosure leaves the battery removable, for easy recharging in an external device.

Does this make the SQ11 a good camera? Marginally, yes. If you need to record video for hours and hours, you won’t be able to do better than an eight dollar camera and four dollars in parts.

Assemble Your Own Modular Li-Ion Batteries

Low-voltage DC power electronics are an exciting field right now. Easy access to 18650 battery cells and an abundance of used Li-Ion cells from laptops, phones, etc. has opened the door for hackers building their own battery packs from these cheap cells. A big issue has been the actual construction of a pack that can handle your individual power needs. If you’re just assembling a pack to drive a small LED, you can probably get by with spring contacts. When you need to power an e-bike or other high power application, you need a different solution. A spot welder that costs $1000 is probably the best tool, but out of most hackers’ budget. A better solution is needed.

Vruzend v2 Battery Caps.

Enter [Micah Toll] and his Vruzend battery connectors, whose Kickstarter campaign has exceded its goal several times over. These connectors snap onto the ends of standard 18650 cells, and slot together to form a custom-sized battery pack. Threaded rods extend from each plastic cap to enable connection to a bus bar with just a single nut. The way that you connect each 18650 cell determines the battery pack’s voltage and current capability. There are a couple of versions of the connector available through the campaign, and the latest version 2.0 should allow some tremendously powerful battery pack designs. The key upgrade is that it now features corrosion-resistant, high-power nickel-plated copper busbars allowing current up to 20A continuous. A side benefit of these caps instead of welded tabs is that you can easily swap out battery cells if one fails or degrades over time. Continue reading “Assemble Your Own Modular Li-Ion Batteries”