Lithophanes Ditch The Monochrome With A Color Layer

3D printed lithophanes are great, if a bit monochromatic. [Thomas Brooks] (with help from [Jason Preuss]) changed all that with a tool for creating color lithophanes but there’s a catch: you’ll need a printer capable of creating multi-color prints to do it.

A video (embedded below) begins with an intro but walks through the entire process starting around the 1:26 mark. The lithophane is printed as a single piece and looks like most other 3D printed lithophanes from the front, but the back is different. The back (which is the bottom printed layer) is made of up multiple STL files, one for each color, and together creates something that acts as a color filter. When lit from behind, light passes through everything and results in an image that pops with color in ways that lithophanes normally do not.

The demo print was created with a printer equipped with a Palette 2, an aftermarket device that splices together filament from different spools to create multicolored prints, but we think a Prusa printer with an MMU (multi material upgrade) should also do the trick.

[Thomas] already has a lot of ideas on how to improve the process, but these early results are promising. Need a gift? Lithophanes plus LED strips make great lamps, and adding a cheap clock movement adds that little extra something.

Continue reading “Lithophanes Ditch The Monochrome With A Color Layer”

Behold The Crimson Axlef*cker (Do Not Insert Finger)

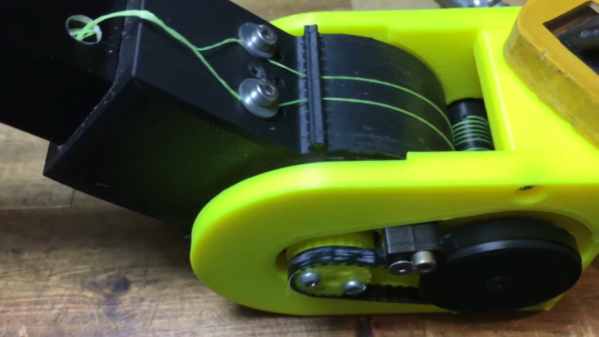
Are your aluminum extrusions too straight? The Crimson Axlef*cker can help you out. It’s a remarkable 3D printed, 4-stage, 125:1 reduction gearbox driven by a brushless motor. Designer [jlittle988] decided to test an early prototype to destruction and while he was expecting something to break, he didn’t expect it to twist the 2020 aluminum extrusion shaft before it did. We suppose the name kind of stuck after that.

Internals of the first prototype, shaft of BLDC motor just visible at top. Twisted 2020 extrusion output shaft at bottom right.

[jlittle988] has been documenting the build progress on reddit, and recently posted a fascinating video (embedded below) of the revised gearbox twisting the output shaft even further. He’s a bit coy about the big picture, saying only that the unit is part of a larger project. In fact, despite the showy tests, his goal is not to simply obtain maximum torque. We can only speculate on what his bigger project is, but in the meantime, seeing the gearbox results is some good clean fun. He first announced the gearbox test results here, and swiftly followed it up with some revisions, then the aforementioned video. There’s also an image gallery of the internals, so check that out.

The Crimson Axlef*cker is driven by an ODrive brushless dual-shaft motor and an ODrive controller as well; that’s the same ODrive whose open source motor controller design impressed us so much in the past.

Between projects like this one and other gearboxes like this cycloidal drive, it’s clear that custom gearbox design is yet another door that 3D printing has thrown wide open, allowing hobbyists to push developments that wouldn’t have been feasible even just a few years earlier.

Continue reading “Behold The Crimson Axlef*cker (Do Not Insert Finger)”

Acoustic Lenses Show Sound Can Be Focused Like Light

Acoustic lenses are remarkable devices that just got cooler. A recent presentation at SIGGRAPH 2019 showed that with the help of 3D printing, it is possible to build the acoustic equivalent of optical devices. That is to say, configurations that redirect or focus sound waves. One fascinating demonstration worked like an acoustic prism, able to send different notes from a simple melody in different directions. Another was a device that dynamically varied the distance between two lenses in order to focus sound onto a moving target. In both cases, the sounds originate from an ordinary speaker and are shaped by passing through the acoustic lens or lenses, which are entirely passive devices.

Researchers from the University of Sussex used 3D printing for a modular approach to acoustic lens design. 16 different pre-printed “bricks” (shown here) can be assembled in various combinations to get different results. There are limitations, however. The demonstration lenses only work in a narrow bandwidth, meaning that the sound they work with is limited to about an octave at best. That’s enough for a simple melody, but not nearly enough to cover a human’s full audible range. Download the PDF for a quick read about the details, it’s only two pages but loaded with enough to whet your appetite to know more.

Directional sound can be done in other ways as well, such as using an array of ultrasonic emitters to create a coherent beam of sound. Ultrasonic emitters can even levitate lightweight objects. Ain’t sound neat?

3D Printing Makes Modular Payload For Model Rocket

Putting payloads into model rockets can be more complex than simply shoving stuff into an open spot, so [concretedog] put some work into making a modular payload tube for his current rocket. The nose cone for his rocket is quite large, so he opted to give it a secure payload area that doesn’t compromise or interfere with any of the structural or operational bits such as the parachute.

The payload container is a hollow tube with a 3D printed threaded adaptor attached to one end. Payload goes into the tube, and the tube inserts into a hole in the bulkhead, screwing down securely. The result is an easy way to send up something like a GPS tracker, possibly with a LoRa module attached to it. That combination is a popular one with high-altitude balloons, which, like rockets, also require people to retrieve them after not-entirely-predictable landings. LoRa wireless communications have very long range, but that doesn’t help if there’s an obstruction like a hill between you and the transmitter. In those cases, a simple LoRa repeater attached to a kite, long pole, or drone can save the day.

We’ve seen [concretedog]’s work before, when he designed stackable PCBs intended to easily fit inside model rocket bodies, allowing for easy integration of microcontroller-driven functions like delayed ignitions or altimeter triggers. Better development tools, hardware, and 3D printing has really helped make smarter rocketry more accessible to hobbyists.

A Better Embroidery Machine, With 3D Printing And Common Parts

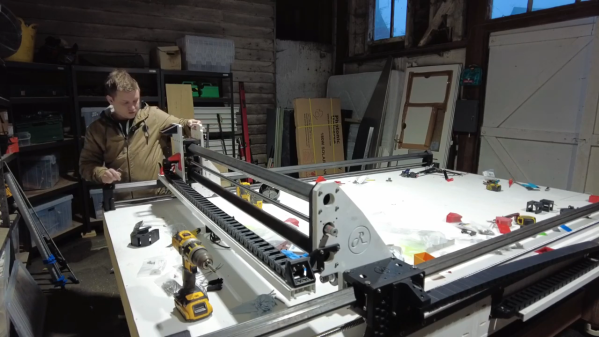
In concept, an everyday sewing machine could make embroidery a snap: the operator would move the fabric around in any direction they wish while the sewing machine would take care of slapping down stitches of colored thread to create designs and filled areas. In practice though, getting good results in this way is quite a bit more complex. To aid and automate this process, [sausagePaws] has been using CNC to take care of all the necessary motion control. The result is the DIY Embroidery Machine V2 which leverages 3D printed parts and common components such as an Arduino and stepper drivers for an economical DIY solution.

It’s not shown in the photo here, but we particularly like the 3D printed sockets that are screwed into the tabletop. These hold the sewing machine’s “feet”, and allow it to be treated like a modular component that can easily be removed and used normally when needed.

The system consists of a UI running on an Android tablet, communicating over Bluetooth to an Arduino. The Arduino controls the gantry which moves the hoop (a frame that holds a section of fabric taut while it is being embroidered), while the sewing machine lays down the stitches.

[sausagePaws]’s first version worked well, but this new design really takes advantage of 3D printing as well as the increased availability of cheap and effective CNC components. It’s still a work in progress that is a bit light on design details, but you can see it all in action in the video embedded below.

Continue reading “A Better Embroidery Machine, With 3D Printing And Common Parts”

Clicky Signspinner Works Just Like A Retractable Pen

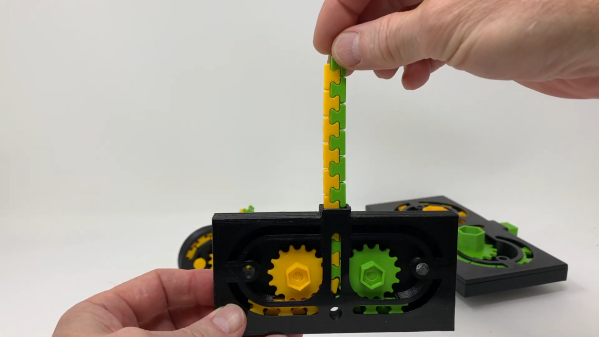
[u407]’s 3D printed Signspinner was created as a clean/dirty indicator for a dishwasher, and at its heart is a mechanism that works a lot like that of a retractable ballpoint pen. Every click of the plunger spins the circular label inside by one-quarter of a rotation. In [u407]’s case it only needs to alternate between showing “clean” and “dirty”, but there are in fact four total label positions.

The entire mechanism including the spring is 3D printed, but the spring is PETG and the rest is PLA. [u407] doubts PLA would work for the spring because of how much it gets compressed, but suggests that ABS might work as an alternative.

If you’re having trouble visualizing how this mechanism works, we covered [Bill Hammack] explaining exactly how retractable ballpoint pens work which should make it perfectly clear. It’s fundamentally the same principle.

[via Reddit]

3D Printed Fan Filter Takes Cues From Costume Scene

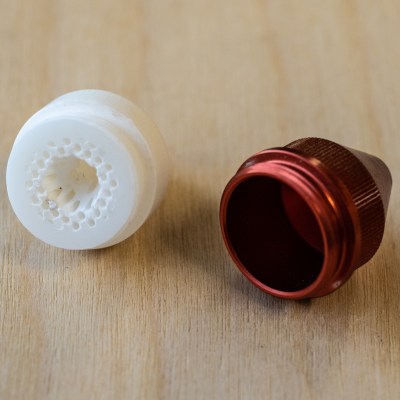
This custom fan filter created by [Kolomanschell] is a clever application of a technique used to create wearable 3D printed “fabrics”, which consist of printed objects embedded into a fine mesh like a nylon weave. The procedure itself is unchanged, but in this case it’s done not to embed 3D printed objects into a mesh, but to embed a mesh into a 3D printed object.

The basic idea is that a 3D print is started, then paused after a few layers. A fine fabric mesh (like tulle, commonly used for bridal veils) is then stretched taut across the print bed, and printing is resumed. If all goes well, the result is 3D printed elements embedded into a flexible, wearable sheet.

The beauty of this technique is that the 3D printer doesn’t need to be told a thing, because other than a pause and resume, the 3D print is nothing out of the ordinary. You don’t need to be shy about turning up the speed or layer height settings either, making this a relatively quick print. Cheap and accessible, this technique has gotten some traction in the costume and cosplay scene.

As [Kolomanschell] shows, the concept works great for creating bespoke filters, and the final result looks very professional. Don’t let the lack of a 3D model for your particular fan stop you from trying it for yourself, we’ve already shared a great resource for customizable fan covers. So if you’ve got a 3D printer and a bit of tulle, you have everything you need for a quick afternoon project.