Dub Siren Synth Does It The Old School Way

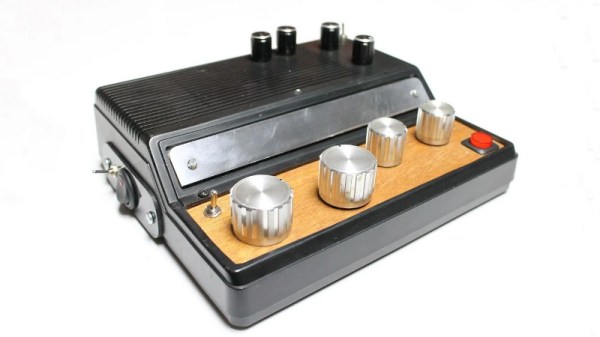
There’s little that can compare to the sheer obnoxious thrill of mashing the DJ siren when its your turn behind the decks. We’ve certainly been guilty of abusing the privilege at local house parties, and unsurprisingly have not been invited back. If we ever get another shot, though, we’d be glad to have [lonesoulsurfer]’s dub siren at the ready.

This is a build for the old-school purists. There’s no microcontrollers or digital hardware here. The synth relies on two 555 timer ICs as the oscillators and an LM741 op-amp. These parts harken right back to the dawn of the integrated circuit era, and still do a great job in this application. There’s also a cheap reverb/echo module added in to fatten up the sound. It’s all laced up in an old CB radio enclosure, with the classic woodgrain applique doing much to add to the aesthetic.

It’s a build that’s simple enough for the electronics beginner, and would make a great tactile, analog addition to any DJ’s rig. If you need some wubwubs to go with your woowoos, then consider building a Ball of Dub, too.

Continue reading “Dub Siren Synth Does It The Old School Way”

A Baby Named DJ

Some of us are guilty of picking up questionable hardware from garage sales, fleamarkets, and well-meaning relatives. There is a balance between turning down a good investment and hoarding, and if we figure out how to tell the difference you will be the first to know. [Clem Mayer] may start on the side of unwise acquisition, but he pushes a broken fetal detector into the realm of awesome by converting it to an analog synthesizer, born to headline at an Eastern European dance party.

He starts with a basic teardown, and we get to see how old hardware was serviceable with only two standard screws. It is a good thing too, because the nickel-cadmium batteries are older than some of you and they are in need of replacement. New nickel-metal hydride batteries got it up and running but [Clem] does not have a baby bump so its functionality turned to Pink Floyd era synthesizer circuit bending. Circuit bending involves modifying a circuit for sound it was not intended to make.

Continue reading “A Baby Named DJ”

Modeling The Classic 555 Timer On A Breadboard

Over the years, readers have often commented that microcontrollers (or more specifically, the Arduino) are overkill for many of the projects they get used in. The admonition that the creator “Should have used a 555” has become something of a rallying cry for those who think modern electronic hobbyists are taking the easy way out.

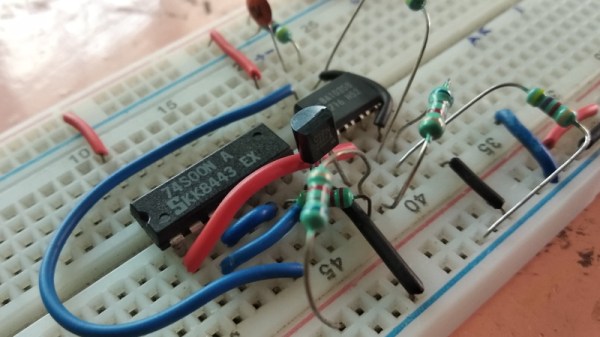
But what if you think even the lowly 555 timer is overkill? In that case, perhaps you’ll be interested in a recent blog post by [TheMagicSmoke], where the reader is walked through the process of creating an analog of the classic integrated circuit on a somewhat larger scale. Finally, we can replace that cheap and handy IC with a mass of wires and components.

Alright, so you’ve probably guessed that there’s no practical reason to do this. Outside of some theoretical MacGyver situation in which you needed to create a square wave using parts salvaged from devices laying around, anyway. Rather, the project is presented as a good way to become more confident with the low-level operation of electronic circuits, which is something we think everyone can agree is a good thing.

The components used include a 74S00 quad NAND gate, a LM358 dual operational amplifier, a 2N2222A transistor, and a handful of passive components. [TheMagicSmoke] not only explains how the circuit is constructed, but shows the math behind how it all works. Finally, an oscilloscope is used to verify it’s operating as expected.

We respect a hacker on a mission, just last month [TheMagicSmoke] put together a similar “back to basics” post on how to interface with an I2C EEPROM.

Freeforming The Atari Punk Console

This stunning piece of art is [Emily Velasco’s] take on the Atari Punk Console. It’s a freeform circuit that synthesizes sound using 555 timers. The circuit has been around for a long time, but her fabrication is completely new and simply incredible!

This isn’t [Emily’s] first rodeo. She previously built the mini CRT sculpture project seen to the left in the image above. Its centerpiece is a tiny CRT from an old video camera viewfinder, and it is fairly common for the driver circuit to understand composite video. And unlike CRTs, small video cameras with composite video output are easily available today for not much money. Together they bring a piece of 1980s-era video equipment into the modern selfie age. The cubic frame holding everything together is also the ground plane, but its main purpose is to give us an unimpeded view. We can admire the detail on this CRT and its accompanying circuitry representing 1982 state of the art in miniaturized consumer electronics. (And yes, high voltage components are safely insulated. Just don’t poke your finger under anything.)

With the experience gained from building that electrically simple brass frame, [Emily] then stepped up the difficulty for her follow-up project. It started with a sound synthesizer circuit built around a pair of 555 timers, popularized in the 1980s and nicknamed the Atari Punk Console. Since APC is a popular circuit found in several other Hackaday-featured projects, [Emily] decided she needed to add something else to stand out. Thus in addition to building her circuit in three-dimensional brass, two photocells were incorporated to give it rudimentary vision into its environment. Stimulus for this now light-sensitive APC were provided in the form of a RGB LED. One with a self-contained circuit to cycle through various colors and blinking patterns.

These two projects neatly bookend the range of roles brass rods can take in your own creations. From a simple frame that stays out of the way to being the central nervous system. While our Circuit Sculpture Contest judges may put emphasis the latter, both are equally valid ways to present something that is aesthetic in addition to being functional. Brass, copper, and wood are a refreshing change of pace from our standard materials of 3D-printed plastic and FR4 PCB. Go forth and explore what you can do!

Continue reading “Freeforming The Atari Punk Console”

LED “Candle” Gets The 555 Treatment

Regular readers may recall we recently covered a neat Arduino trick that allowed you to “blow out” an LED as if it was a candle. The idea was that the LED itself could be used as a rudimentary temperature sensor, and the Arduino code would turn the LED on and off when a change was detected in its forward voltage drop. You need to oversample the Arduino’s ADC to detect the few millivolt change reliably, but overall it’s pretty simple once you understand the principle.

But [Andrzej Laczewski], like many of our beloved readers, feels the Arduino and other microcontrollers can be a crutch if used exclusively. So he set out to replicate this hack with that most cherished of ICs, the 555 timer. In the video after the break, he demonstrates his “old-school” LED candle for anyone who thinks the only way to control an LED is with digitalWrite.

Not to say it’s easy to replicate the original Arduino project with a 555, or that it’s even practical. [Andrzej] simply wanted to show it was possible, which is something we always respect around these parts. He goes into great detail on how he developed and tested the circuit, even including oscilloscope screenshots showing how the different components work together in real-time. But the short version is that a MOSFET is used to turn the LED on and off, a comparator detects change in the LED’s voltage drop, and the 555 is used to control how long the LED stays off for.

Ever the traditionalist, [Andrzej] wrapped up this build by etching his own PCB using a variation of the classic laser toner transfer method. If this all looks a bit too much like Black Magic to you, there’s no shame in sticking with the Arduino version. At 1/20th of the parts count, and with no calibration required, who’s to say which version is “simpler”.

Continue reading “LED “Candle” Gets The 555 Treatment”

The Art Of Blinky Business Cards

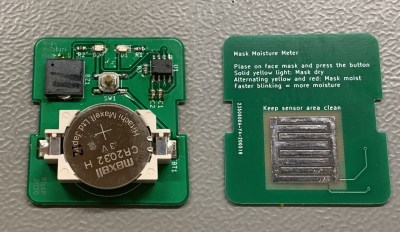
Business cards are stuck somewhere between antiquity and convenience. On one hand, we have very convenient paperless solutions for contact swapping including Bluetooth, NFC, and just saying, “Hey, put your number into my phone, please.” On the other hand, holding something from another person is a more personal and memorable exchange. I would liken this to the difference between an eBook and a paperback. One is supremely convenient while the other is tactile. There’s a reason business cards have survived longer than the Rolodex.

Protocols and culture surrounding the exchange of cards are meant to make yourself memorable and a card which is easy to associate with you can work long after you’ve given your card away. This may seem moot if you are assigned cards when you start a new job, but personal business cards are invaluable for meeting people outside of work and you are the one to decide how wild or creative to make them.

Continue reading “The Art Of Blinky Business Cards”

Music Reading For Machines

“Dammit Jim, I’m a hacker, not a musician!”, to paraphrase McCoy Scotty from the original Star Trek series. Well, some of us are also musicians, some, like me, are also hack-musicians, and some wouldn’t know a whole note from a treble clef. But every now and then the music you want is in the form of sheet music and you need to convert that to something your hack can play. If you’re lucky, you can find software that will read the sheet music for you and spit out a MIDI or WAV file. Or, as with my hand-cranked music player, you may have to read just enough of the music yourself to convert musical notes to frequencies for something like a 555 timer chip. We’ll dive into both cases here.

Continue reading “Music Reading For Machines”