Most of the computers we interact with on a day-to-day basis use an operating system designed for flexibility. While these are great tools for getting work done or scrolling your favorite sites, they have a weakness when it comes to interacting quickly with a real-world environment. For these kinds of low-latency, high-reliability systems you may want to turn to something like freeRTOS which is optimized for this kind of application and which [Parikshit Pagare] has used to build his home automation system.
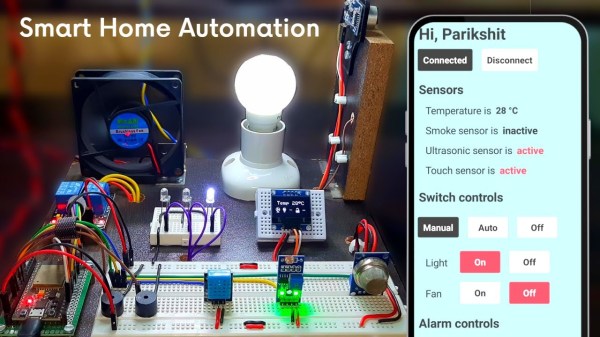
This build is based around an ESP32 for which freeRTOS, designed specifically for embedded systems, is uniquely suited. There are several channels built in capable of monitoring temperature, functioning as a smoke alarm, and sensing whether someone is at the front door. All of these are reported to a small OLED screen but are also updated on an Android app as well, which happens nearly instantaneously thanks to the real-time operating system. There are a number of user-controllable switches as well that are capable of turning lights or fans on and off.
For a home automation system, it’s one of the most low-cost and fully-featured we’ve seen and if you’re still having trouble coming across a Raspberry Pi as they sort out supply issues, something like this might make an excellent substitute at a fraction of the price. If you’re looking to expand even beyond this build, one of the gold standards for ESP32-based automation design is this build from [Marcus] which not only demonstrates how to build a system like this but goes into great detail on the ESPHome environment.
Continue reading “Tiny Microcontroller Uses Real-Time Operating System”