Remoticon Video: How To 3D Print Onto Fabric With Billie Ruben

We’re impressed to see the continued flow of new and interesting ways to utilize 3D printing despite its years in the hacker limelight. At the 2020 Hackaday Remoticon [Billie Ruben] came to us from across the sea to demonstrate how to use 3D printing and fabric, or other flexible materials, to fabricate new and interesting creations. Check out her workshop below, and read on for more detail about what you’ll find.

The workshop is divided into two parts, a hands-on portion where participants execute a fabric print at home on their own printer, and a lecture while the printers whirr away describing ways this technique can be used to produce strong, flexible structures.

The technique described in the hands on portion can be clumsily summarized as “print a few layers, add the flexible material, then resume the printing process”. Of course the actual explanation and discussion of how to know when to insert the material, configure your slicer, and select material is significantly more complex! For the entire process make sure to follow along with [Billie]’s clear instructions in the video.

The lecture portion of the workshop was a whirlwind tour of the ways which embedded materials can be used to enhance your prints. The most glamourous examples might be printing scales, spikes, and other accoutrement for cosplay, but beyond that it has a variety of other uses both practical and fashionable. Embedded fabric can add composite strength to large structural elements, durable flexibility to a living hinge, or a substrate for new kinds of jewelry. [Billie] has deep experience in this realm and she brings it to bear in a comprehensive exposition of the possibilities. We’re looking forward to seeing a flurry of new composite prints!

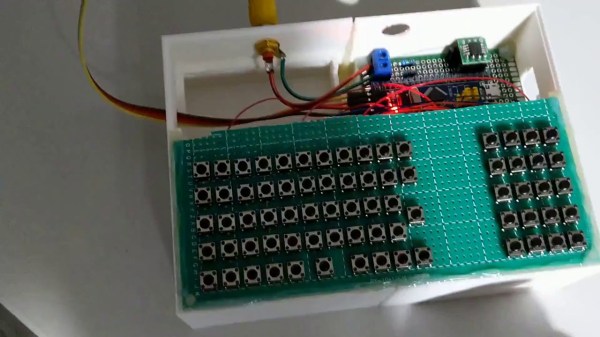
PET 2001 Emulator On $2 Of Hardware

Since the late 60s, Moore’s law has predicted with precision that the number of semiconductors that will fit on a chip about doubles every two years. While this means more and more powerful computers, every year, it also means that old computers can be built on smaller and cheaper hardware. This project from [Bjoern] shows just how small, too, as he squeezes a PET 2001 onto the STM32 Blue Pill.

While the PET 2001 was an interesting computer built by Commodore this project wasn’t meant to be a faithful recreation, but rather to test the video output of the Blue Pill, with the PET emulation a secondary goal. It outputs a composite video signal which takes up a good bit of processing power, but the PET emulation still works, although it is slightly slow and isn’t optimized perfectly. [Bjoern] also wired up a working keyboard matrix as well although missed a few wire placements and made up for it in the software.

With his own home-brew software running on the $2 board, he has something interesting to display over his composite video output. While we can’t say we’d emulate an entire PC just to get experience with composite video, we’re happy to see someone did. If you’d like to see a more faithful recreation of this quirky piece of computing history, we’ve got that covered as well.

Continue reading “PET 2001 Emulator On $2 Of Hardware”

Techniques For Making Complex Carbon Fibre Tube Parts

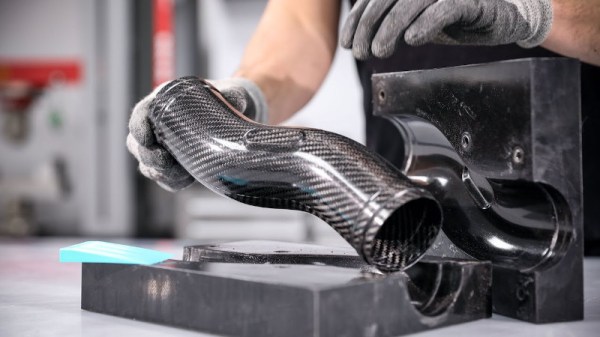
Many a hacker spent their high school years picking up a few new skills in workshop classes. Whether it be woodworking, welding, or the patient, delicate skill of technical drawing, they’ve been a mainstay of secondary education for decades. However, composites are new enough that they aren’t a major feature of the curriculum. For those wishing to fill in a few gaps, [Easy Composites] have some great videos on carbon fibre techniques.

The video in question concerns the manufacture of a complex cross-section tube part, but these techniques can also apply to more complex hollow sections, like a bike frame, for example. Starting with a mold, the first step is to cut a rough template. This is then used to lay down the first layer of pre-preg carbon fibre material, and a more accurate template is made. The rest of the steps involve the production of a secure lap joint between subsequent layers, and how to properly use vacuum bag techniques on hollow parts.

It’s a useful primer on the basics of producing hollow carbon fibre parts with prepreg material. We’ve featured composites before, with this bulletproof armor a particularly good example. Video after the break.

Continue reading “Techniques For Making Complex Carbon Fibre Tube Parts”

Bullet-proofing Your Car With An Affordable Composite Armor

Remember those actions movies like The Fast and the Furious where cars are constantly getting smashed by fast flying bullets? What would it have taken to protect the vehicles from AK-47s? In [PrepTech]’s three-part DIY composite vehicle armor tutorial, he shows how he was able to make his own bulletproof armor from scratch. Even if you think the whole complete-collapse-of-civilization thing is a little far-fetched, you’ve got to admit that’s pretty cool.

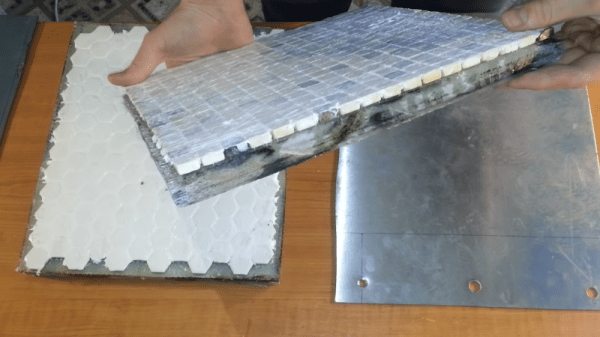
The first part deals with actually building the composite. He uses layers of stainless steel, ceramic mosaic tiles, and fiberglass, as well as epoxy resin in order to build the composite. The resin was chosen for its high three-dimensional cross-linked density, while the fiberglass happened to be the most affordable composite fabric. Given the nature of the tiny shards produced from cutting fiberglass, extreme care must be taken so that the shards don’t end up in your clothes or face afterwards. Wearing a respirator and gloves, as well as a protective outer layer, can help.

After laminating the fabric, it hardens to the point where individual strands become stiff. The next layer – the hard ceramic – works to deform and slow down projectiles, causing it to lose around 40% of its kinetic energy upon impact. He pipes silicone between the tiles to increase the flexibility. Rather than using one large tile, which can only stand one impact, [PrepTech] uses a mosaic of tiles, allowing multiple tiles to be hit without affecting the integrity of surrounding tiles. While industrial armor uses boron or silicon carbide, ceramic is significantly lower cost.

The stainless steel is sourced from a scrap junkyard and cut to fit the dimensions of the other tiles before being epoxied to the rest of the composite. The final result is allowed to sit for a week to allow the epoxy to fully harden before being subject to ballistics tests. The plate was penetrated by a survived shots from a Glock, Škorpion vz. 61, and AK-47, but was penetrated by the Dragunov sniper rifle. Increasing the depth of the stainless steel to at least a centimeter of ballistic grade steel may have helped protect the plate from higher calibers, but [PrepTech] explained that he wasn’t able to obtain the material in his country.

Nevertheless, the lower calibers were still unable to puncture even the steel, so unless you plan on testing out the plate on high caliber weapons, it’s certainly a success for low-cost defense tools.

Continue reading “Bullet-proofing Your Car With An Affordable Composite Armor”

10-Way Game Console Lets Everyone Play

[Bitluni]’s motto seems to be, “When you’re busy, get busier.” At least that would explain adding even more work to his plate in the run-up to the Hanover Maker Faire and coming up with a ten-player game console from scratch.

As for this being extra work, recall that [bitluni] had already committed to building a giant ping pong ball LED wall for the gathering. That consisted of prototyping a quarter-scale panel, building custom tooling to get him past the literal pain point of punching 1200 holes, and wiring, programming and testing the whole display. Building a game console that supports ten players at once seems almost tame by comparison. The console is built around an ESP32 module, either WROOM or WROVER thanks to a clever multifunctional pad layout on the slick-looking white PCBs. [bitluni] went with a composite video output using the fast R-2R ladder network DAC that he used for his ESP32 VGA project. The console supports ten Nintendo gamepads for a simple but engaging game something like the Tron light cycles. Unsurprisingly, players found it more fun to just crash into each other on purpose.

Sure, it could have been biting off more than he could chew, but [bitluni] delivered and we appreciate the results. There’s something to be said for adding a little pressure to the creative process.

Continue reading “10-Way Game Console Lets Everyone Play”

Steamed Hams Localized Entirely Within A Printed Circuit Board

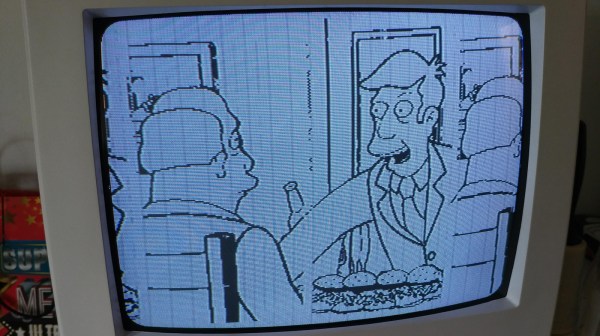
Maybe you’ve heard of a TV show called The Simpsons. Steamed Hams make a one-gag appearance in an unforgettable luncheon where Principal Skinner poker-faces his way out of a disaster with Superintendent Chalmers. Meanwhile, over on imgur, [Agumander] has put a black and white screencap from Steamed Hams in a printed circuit board.

The memory for this chip is an AT28C64, a 64 kilobit or 8 kilobyte steamed RAM. You call it a steamed RAM despite the fact that it is obviously a ROM. There is no microcontroller on this board or really anything resembling programmable logic. Everything is just logic chips. This board displays a 256×256 1 bit per pixel image over composite video. The sync is generated with the help of a 14MHz crystal and some circuitry taken from the original PONG board. Other than that, it’s just a bunch of NANDs and ORs that roll through the address space of the ROM and spit values out over a composite video port.

The build began by breadboarding everything save for a nifty solderless breadboard power adapter. Three ROM chips were programmed with different images — a cat, something to do with vaporwave, and some guy that looks like the poster from Eraserhead. Everything worked on the breadboard — yes, even at 14 MHz — so the build moved on to a printed circuit board.

The result is fantastic, and should work well on anything with a composite video port. We’re awarding bonus points for putting a socket on the ROM, simply so [Agumander] can change the image without whipping out the desoldering braid. If you need a refresher on Steamed Hams, it’s from the 7th season Simpsons episode ’22 Short Films About Springfield’.

A PIC And A Few Passives Support Breakout In Glorious NTSC Color

“Never Twice the Same Color” may be an apt pejorative, but supporting analog color TV in the 1950s without abandoning a huge installed base of black-and-white receivers was not an option, and at the end of the day the National Television Standards System Committee did an admirable job working within the constraints they were given.

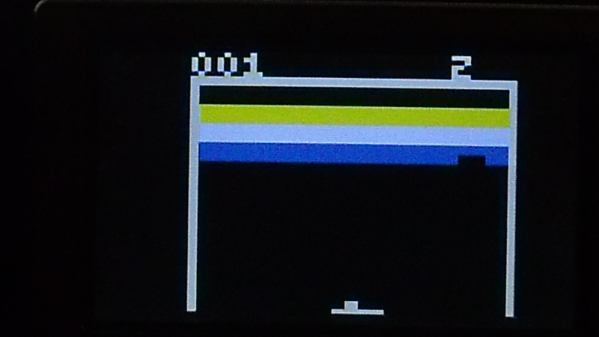
As a result of the compromises needed, NTSC analog signals are not the easiest to work with, especially when you’re trying to generate them with a microcontroller. This PIC-based breakout-style game manages to accomplish it handily, though, and with a minimal complement of external components. [Jacques] undertook this build as an homage to both the classic Breakout arcade game and the color standard that would drive the home version of the game. In addition to the PIC12F1572 and a crystal oscillator, there are only a few components needed to generate the chroma and luminance signals as well as horizontal and vertical sync. The game itself is fairly true to the original, although a bit twitchy and unforgiving judging by the gameplay video below. [Jacques] has put all the code and schematics up on GitHub for those who wish to revive the analog glory days.

Think NTSC is weird compared to PAL? You’re right, and it’s even weirder than you might know. [Matt] at Stand Up Maths talked about it a while back, and it turns out that a framerate of 29.97 fps actually makes sense when you think it through.

Continue reading “A PIC And A Few Passives Support Breakout In Glorious NTSC Color”