Homebrew Relay Computer Looks Like It Could Be A Commercial Product

You may not have noticed, but we here at Hackaday really love our clicky stuff. Clicky mechanical keyboards, unnecessarily noisy flip-dot displays, and pretty much anything made with a lot of relays — they all grab our attention, in more ways than one. So it’s with no small surprise that we appear to have entirely missed perhaps the clickiest build of all: a fully operational 8-bit computer using nothing but relays.

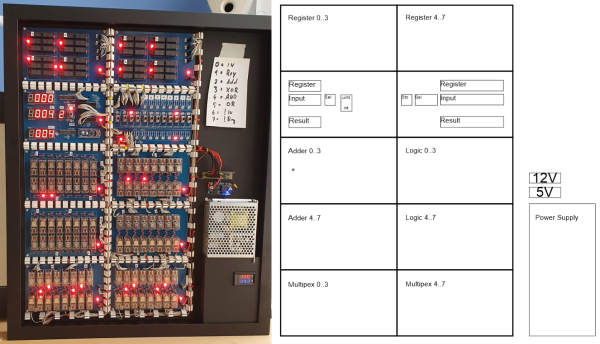
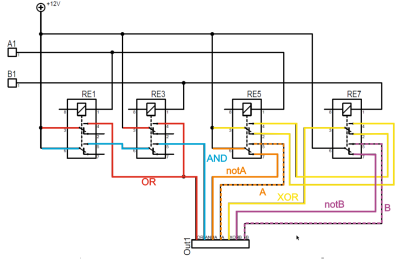
What’s even more amazing about our failure to find and feature [Paul Law]’s excellent work is that he has been at it for the better part of a decade now. The first post on his very detailed and very well-crafted blog describing the build dates from 2013, when he was just testing LEDs in the arithmetic-logic unit (ALU). Since then, [Paul] has made incredible progress, building module after module, each containing a small portion of the computer’s functionality. The modules plug into card cages with backplanes to connect them, and the whole thing lives in an enclosure made from aluminum extrusion and glossy black panels for a truly sleek look. The computer is incredibly compact for something that uses 400+ DPDT relays to do its thinking.

In addition to the blog, [Paul] has a criminally undersubscribed YouTube channel with a quite recent series going over the computer in depth. We included the overall tour below, but you should really check out the rest of the videos to appreciate how much work went into this build. We’ve seen relay computers ranging in size from single-board to just plain ludicrous, but this one really takes the prize for fit and finish as well as functionality.

Continue reading “Homebrew Relay Computer Looks Like It Could Be A Commercial Product”

DIY 8-Bit Computer Knows All The Tricks

Some projects are a rite of passage within their respected fields. For computer science, building one’s own computer from scratch is certainly among those projects. Of course, we’re not talking about buying components online and snapping together a modern x86 machine. We mean building something closer to a fully-programmable 8-bit computer from the ground up, like this one from [Federico] based on 74LS logic chips.

The computer was designed and built from scratch which is impressive enough, but [Federico] completed this project in about a month as well. It can be programmed manually through DIP switches or via a USB connection to another computer, and also includes an adjustable clock which can perform steps anywhere from 1 Hz to 32 kHz. Complete with a 1024 byte memory, a capable ALU, four seven-segment LEDs and (in the second version of the computer) a 2×16 LCD disply, this 8-bit computer has it all.

Not only is this a capable machine designed by someone who clearly knows his way around a logic chip, but [Federico] has also made the code and schematics available on his GitHub page. It’s worth a read even without building your own, but if you want to go that route without printing an enormous PCB you can always follow the breadboard route.

Thanks to [killergeek] for the tip!

Continue reading “DIY 8-Bit Computer Knows All The Tricks”

A CPU-Less Computer With A Single NOR-Gate ALU

We see a lot of discrete-logic computer builds these days, and we love them all. But after a while, they kind of all blend in with each other. So what’s the discrete logic aficionado to do if they want to stand out from the pack? Perhaps this CPU-less computer with a single NOR-gate instead of an arithmetic-logic unit is enough of a hacker flex? We certainly think so.

We must admit that when we first saw [Dennis Kuschel]’s “MyNor” we thought all the logic would be emulated by discrete NOR gates, which of course can be wired up in various combinations to produce every other logic gate. And while that would be really cool, [Dennis] chose another path. Sitting in the middle of the very nicely designed PCB is a small outcropping, a pair of discrete transistors and a single resistor. These form the NOR gate that is used, along with MyNor’s microcode, to perform all the operations normally done by the ALU.

While making the MyNor very slow, this has the advantage of not needing 74-series chips that are no longer manufactured, like the 74LS181 ALU. It may be slow, but as seen in the video below, with the help of a couple of add-on cards of similar architecture, it still manages to play Minesweeper and Tetris and acts as a decent calculator.

We really like the look of this build, and we congratulate [Dennis] on pulling it off. He has open-sourced everything, so feel free to build your own. Or, check out some of the other CPU-less computers we’ve featured: there’s the Gigatron, the Dis-Integrated 6502, or the jumper-wire jungle of this 8-bit CPU-less machine.

Continue reading “A CPU-Less Computer With A Single NOR-Gate ALU”

Full 8-Bit Computer On Breadboards

Getting into a big electronics project often involves the use of specialized tools, namely the use of some sort of soldering iron or other way to apply solder to often intricate, tiny, and heat-sensitive parts. While it’s best to learn to pick up this skill at some point, it’s not always necessary, even for big, complicated projects like [DerULF1]’s full 8-bit computer that he built entirely on breadboards.

For a fully featured 8-bit computer, this build goes deep into the details of how the computer works. The clock allows programs to be stepped through one cycle at a time, and even the memory can be individually accessed with a set of switches. There are plenty of other interesting features as well, such as using registers to access extra memory. It features an SPI port and PS/2 keyboard controller and also loads programs from an SD card.

The build was inspired by some of [Ben Eater]’s projects which famously focus on using logic gates and TTL chips to perform complex tasks, such as another breadboard computer which plays snake on a small display. It’s certainly a great way to learn about the inner function of computers, and better still that no soldering is required. But you may need a few extra breadboards.

Continue reading “Full 8-Bit Computer On Breadboards”

New Raspberry Pi 400 Is A Computer In A Keyboard For $70

The newest Raspberry Pi 400 almost-all-in-one computer is very, very slick. Fitting in the size of a small portable keyboard, it’s got a Pi 4 processor of the 20% speedier 1.8 GHz variety, 4 GB of RAM, wireless, Ethernet, dual HDMI outputs, and even a 40-pin Raspberry Standard IDE-cable style header on the back. For $70 retail, it’s basically a steal, if it’s the kind of thing you’re looking for because it has $55 dollars worth of Raspberry Pi 4 inside.

In some sense, it’s getting dangerously close to fulfilling the Raspberry Pi Dream. (And it’s got one more trick up it’s sleeve in the form of a huge chunk of aluminum heat-sinked to the CPU that makes us think “overclocking”.)

We remember the founding dream of the Raspberry Pi as if it were just about a decade ago: to build a computer cheap enough that it would be within everyone’s reach, so that every school kid could have one, bringing us into a world of global computer literacy. That’s a damn big goal, and while they succeeded on the first count early on, putting together a $35 single-board computer, the gigantic second part of that master plan is still a work in progress. As ubiquitous as the Raspberry Pi is in our circles, it’s still got a ways to go with the general population.

By Gareth Halfacree  CC BY-SA 2.0

The Raspberry Pi Model B wasn’t, and isn’t, exactly something that you’d show to my father-in-law without him asking incredulously “That’s a computer?!”. It was a green PCB, and you had to rig up your own beefy 5 V power supply, figure out some kind of enclosure, scrounge up a keyboard and mouse, add in a monitor, and only then did you have a computer. We’ve asked the question a couple of times, can the newest Raspberry Pi 4B be used as a daily-driver desktop, and answered that in the affirmative, certainly in terms of it having adequate performance.

But powerful doesn’t necessarily mean accessible. If you want to build your own cyberdeck, put together an arcade box, screw a computer into the underside of your workbench, or stack together Pi Hats and mount the whole thing on your autonomous vehicle testbed, the Raspberry Pi is just the ticket. But that’s the computer for the Hackaday crowd, not the computer for everybody. It’s just a little bit too involved.

The Raspberry Pi 400, in contrast, is a sleek piece of design. Sure, you still need a power supply, monitor, and mouse, but it’s a lot more of a stand-alone computer than the Pi Model B. It’s made of high-quality plastic, with a decent keyboard. It’s small, it’s light, and frankly, it’s sexy. It’s the kind of thing that would pass the father-in-law test, and we’d suggest that might go a long way toward actually realizing the dream of cheaply available universal (open source) computing. In some sense, it’s the least Hackaday Raspberry Pi. But that’s not saying that you might not want one to slip into your toolbag.

Continue reading “New Raspberry Pi 400 Is A Computer In A Keyboard For $70”

Casio Computer Rebuild Puts New Wine In An Old Bottle

With a glut of vintage consumer electronics available from eBay it should be easy to relive your glory days, right? Unfortunately the march of time means that finding gear is easy but finding gear that works is not. So was the case when [Amen] acquired not one, but two used calculator/computer units hoping to end up with one working device. Instead, he went down the rabbit hole of redesigning his own electronics to drive the Casio QT-1 seen here.

Especially interesting is the prototyping process for the replacement board. [Amen] used a “BluePill” STM32 microcontroller board at its heart, and used point-to-point soldering for the rest of the circuitry on a rectangle of protoyping board. That circuit is non-trivial, needing a 23 V source to drive the original VFD from the computer, a battery-backed real-time-clock (MCP7940), and a GPIO expander to scan the keys on the keypad.

It worked great, but couldn’t be cut down to fit in the case. The solution was a PCB designed to fit the footprint of the original. The modern guts still need more firmware work and a couple of tweaks like nudging that 23 V rail a bit higher to 26 V for better brightness, but the work already warrants a maniacal cry of “It’s Alive!”.

This isn’t [Amen’s] first rodeo. Back in March we looked in on another vintage Casio refurb that sniffed out the display protocol.

The Descendants Of Ancient Computers

Building computers from discrete components is a fairly common hobby project, but it used to be the only way to build a computer until integrated circuits came on the scene. If you’re living in the modern times, however, you can get a computer like this running easily enough, but if you want to dive deep into high performance you’ll need to understand how those components work on a fundamental level.

[Tim] and [Yann] have been working on replicating circuitry found in the CDC6600, the first Cray supercomputer built in the 1960s. Part of what made this computer remarkable was its insane (for the time) clock speed of 10 MHz. This was achieved by using bipolar junction transistors (BJTs) that were capable of switching much more quickly than typical transistors, and by making sure that the support circuitry of resistors and capacitors were tuned to get everything working as efficiently as possible.

The duo found that not only are the BJTs used in the original Cray supercomputer long out of production, but the successors to those transistors are also out of production. Luckily they were able to find one that meets their needs, but it doesn’t seem like there is much demand for a BJT with these characteristics anymore.

[Tim] also posted an interesting discussion about some other methods of speeding up circuitry like this, namely by using reach-through capacitors and Baker clamps. It’s worth a read in its own right, but if you want to see some highlights be sure to check out this 16-bit computer built from individual transistors.