Talking To Laptop Batteries With The ESP8266

It’s not something you often give a lot of thought to, but the modern consumer laptop battery is a pretty advanced piece of technology. Not only does it pack several dozen watt-hours of energy into a relatively small and lightweight package, but it features integrated diagnostic capability to make sure all those temperamental lithium cells are kept in check. Widely available and extremely cheap thanks to the economies of scale (unless you try to get them from the OEM, anyway), they’re a very compelling option for powering your projects.

Of course, it also helps if, like [teliot] you have a bunch of the things lying around. For reasons we won’t get into, he’s got a whole mess of Acer AL12x32 battery packs which he wanted to use for something other than collecting dust. He had the idea of hooking one up to a solar panel and using it as a power supply for some ESP8266 projects but wanted to be able to talk to the battery for status and diagnostic information. After studying the Smart Battery System (SBS) protocol the batteries use, he was able to come up with some code that lets him pull 37 separate fields of information from the pack’s onboard electronics using his ESP8266.

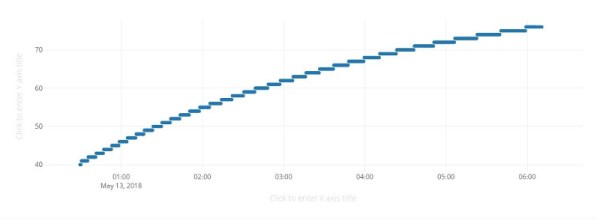
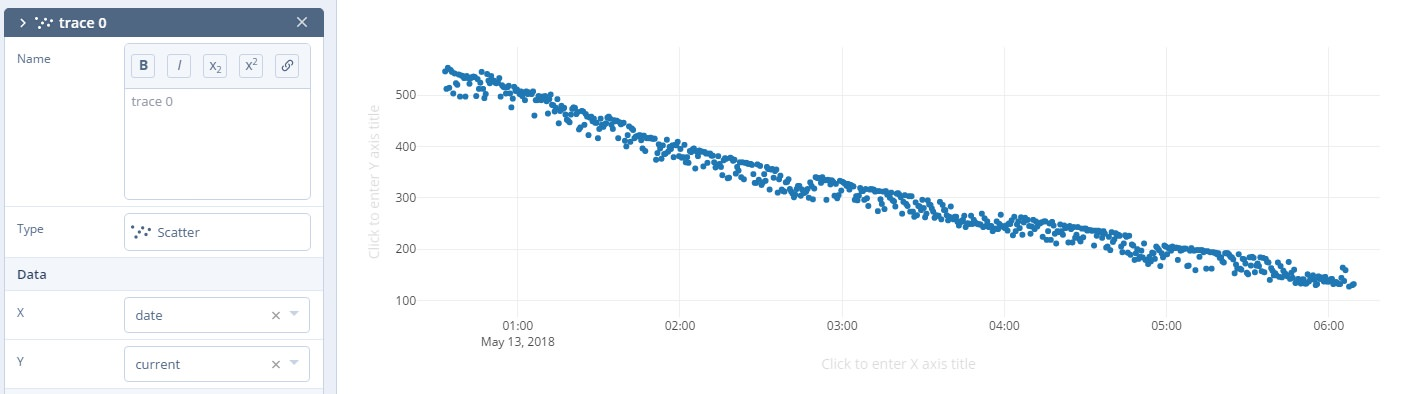
Battery consumption over time

It took some fiddling with a multimeter to figure out which pin did what on the eight pin interface of the battery. Two of the pins need to be shorted to enable the dual 12 VDC pins to kick in. Technically that’s all you really need to do if you want to utilize the battery in a low-tech sort of way. But to actually get some information from the battery, [teliot] had to identify the two pins which are for the System Management Bus (SMBus) interface where the SBS data lives.

Once he knew which pins to talk to the battery on, the rest was fairly easy. SBS is well documented, and the SMBus interface is very similar to I2C. Like all the cool kids are doing these days, his code publishes the battery info to MQTT where he can plot it and get finely grained info on the performance of his solar power system.

This isn’t the first time we’ve seen a hacker wrangle laptop batteries through SMBus, but it’s always nice to get multiple perspectives on a topic. If you plan on making this kind of thing part of your standard bag of tricks, you might even want to take the time to build a dedicated SMBus scanner.

[via /r/esp8266]

Atltvhead - wearable interactive TV

RCA TV Gets New Life As Interactive Atltvhead

TVs are usually something you sit and passively watch. Not so for [Nate Damen’s] interactive, wearable TV head project, aka Atltvhead. If you’re walking around Atlanta, Georgia and you see him walking around with a TV where his head should be, introduce yourself! Or sign into Twitch chat and take control of what’s being displayed on the LEDs which he’s attached to the screen. Besides being wearable technology, it’s also meant to be an interactive art piece.

For this, his third version, the TV is a 1960’s RCA Victor Portable Television. You can see some of the TVs he found for previous versions on his hackaday.io page. They’re all truly vintage. He gutted this latest one and attached WS2812 LED strips in a serpentine pattern inside the screen. The LEDs are controlled by his code and the FastLED library running on an ESP8266. Power comes from four NiMH AA-format batteries, giving him 5 V, which he regulates down to 3.3 V. His phone serves as a WiFi hotspot.

[Nate] limits the commands so that only positive things can be displayed, a heart for example. Or you can tweak what’s being displayed by changing the brightness or make the LEDs twinkle. Judging by the crowds we see him attracting in the first video below, we’d say his project was a huge success. In the second video, Nate does a code walkthrough and talks about some of his design decisions.

Continue reading “RCA TV Gets New Life As Interactive Atltvhead”

Linear Clock Is A Different Way To Look At Time

There are usually two broad user interfaces for clocks. On the one hand you’ve got the dial clock, the default display for centuries, with its numbered face and spinning hands. The other mode is some form of digital clock, where the current time is displayed directly as alphanumeric characters. They’re both useful representations of time, but they both have their limits.

Here’s a third model — the linear clock. [Jan Derogee] came up with it thanks to the inspiration of somewhat dubious run-ins with other kinds of clocks; we feel like this introductory video was made with tongue firmly planted in cheek. Whatever the inspiration, we find this idea clever and well executed. The running gear of the clock is just a long piece of M6 threaded rod and a stepper motor. A pointer connected to a nut rides on the rod, moving as the stepper rotates it. There are scales flanking the vertical rod, with the morning hours going up the left side and afternoon hours coming down the right. The threaded rod rotates one way for twelve hours before switching to the other direction; when the rotation changes, the pointer automatically swivels to the right scale. For alarms, [Jan] has brass rods running along each scale that make contact with the pointer; when they encounter a sliding plastic insulator to break the contact, it triggers an alarm. An ESP8266 controls everything and plays the audio files for the alarm.

Unusual clocks seem to be a thing with [Jan]. His other builds include this neat phosphorescent clock and YouTube subs counter, which is sure to turn heads along with this clock.

Continue reading “Linear Clock Is A Different Way To Look At Time”

Lucky Cat POV Display Ditches The Waving And Windmills Out Of Control

If you’ve been in a Japanese restaurant, you’ve probably seen a maneki-neko, the lucky cat charm, where a cat welcomes you with a beckoning arm. It’s considered to bring good luck, but we’re not sure if [Martin Fitzpatrick] is pushing his luck with this Lucky Cat POV display. He hacked one of the figurines so the arm forms a persistence of vision (POV) display, where blinking LEDs on the paw create a dot-matrix style display.

Inside the hapless neko is a Wemos D1, motor driver, and a few other components that turn the cat into a working display. The five LEDs he attached to the paw are wide enough to display 5×7 characters. The tricky part in the mechanical design is getting signals from a stationary base to a spinning arm(ature). In this case it was easily solved with a 6-wire slip ring from Adafruit. [Martin] revs the lucky cat up using a brushed DC motor and a couple of gears.

The ESP8266 is running MicroPython — the combination should make this a snap to hook into any web service API you want to display your own messages. Right now the arm doesn’t have positional awareness so the message isn’t locked in a single position like it would be if a hall effect sensor was used. But [Martin] says there’s plenty of room left inside the cat and a future upgrade could include stashing the batteries inside for a cordless, all-in-one build. If he takes that on it’s a perfect time to add some type of shaft encoding as well.

Check the Lucky Cat showing off in the clip after the break.

Continue reading “Lucky Cat POV Display Ditches The Waving And Windmills Out Of Control”

DIY Variacs Get ESP8266 Upgrades

If you’be been hacking and making long enough, you’ve probably run into a situation where you realize that a previous project could be improved with the addition of technology that simply wasn’t available when you built it. Sometimes it means starting over from scratch, but occasionally you luck out and can shoehorn in some new gear without having to go back to the drawing board.

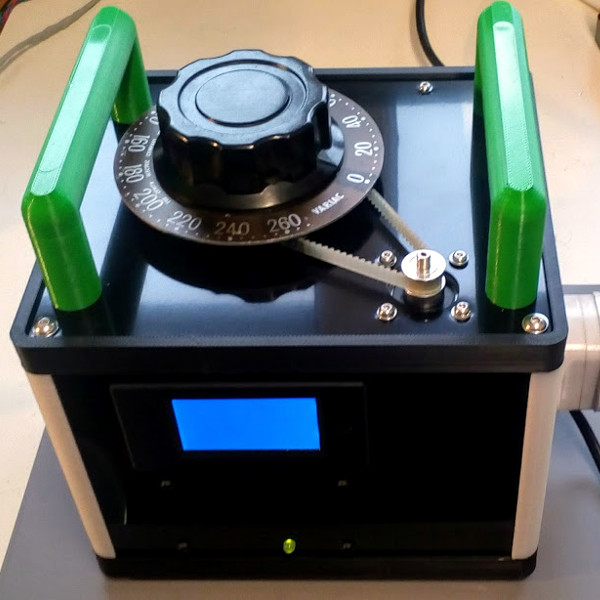
The two isolated variacs that [nop head] built were already impressive, but with the addition of the ESP8266 he was able to add some very slick additional features which really took them to the next level. He’s done an exceptional job detailing the new modifications, including providing all the source for anyone who might be walking down a similar path.

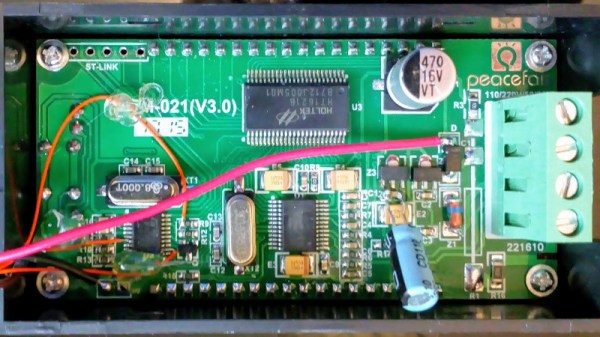
His variacs have digital energy meters right in the front panel which give voltage, amps, and a real-time calculation of watts. After reading an article by [Thomas Scherrer] about sniffing the SPI data out of one of these meters with an Arduino, [nop head] reasoned he could do the same thing with an ESP8266. The advantage being that he could then pull that data out over the network to graph or analyze however he wishes.

For his older variac, he decided to automate the device by adding a stepper and belt to turn the knob. The stepper is controlled by a Pololu stepper driver, which in turn get’s its marching orders from another ESP8266. He even came up with a simple web interface which allows you to monitor and control the variac from your smart device.

We don’t often see many variacs around these parts, and even fewer attempts at building custom ones. It’s one of those pieces of equipment you either can’t live without, or have never even heard of.

ESP Cookbook Goes Beyond Chips And DIPs

Are you putting ESP8266s in all your projects these days, whether they need one or not? We don’t blame you. These boards are cheap, tiny, oh and they have WiFi.

If you want to spend less time writing code and more time blinking RGB LEDs over Wi-Fi, then check out this ESP cookbook over on IO. [Turo Heikkinen] and team are writing a soup-to-nuts guide to these darlings of IoT. The cookbook leads off with pinouts and networking (of course) before moving into more intricate recipes involving popular sensors and displays.

This cookbook is funny, it’s helpful, and it’s really well-organized. We love that they used the details section to create a linked table of contents. The links all drive to a specific Instructions page where each group of code snippets and explanations can be found. It’s still a work in progress, so you might want to follow it for updates. We have a feeling they’re going to expand the dessert section next.

Love the ESP8266, but hate programming them in that wonky form factor? Here’s a handy programming jig you can build.

Simple Ethereum Vending Machines With NodeMCU

Recently, we covered how to use the Etherscan API to query data (a wallet balance) from the Ethereum blockchain with NodeMCU. It’s a very useful method for retrieving information from a blockchain on embedded systems where storage and memory are an issue.

It has some limitations though. Most notably, it’s polling the API at some interval to retrieve information whether it has changed or not. I would like to be able to receive data more efficiently than this, and quickly enough to make simple vending machines possible. While we’ve seen videos of Bitcoin-based Red Bull vending machines before, they required an NFC card to use.

If we could receive information about Ethereum transactions quickly and reliably enough, we could build a similar vending machine without requiring an NFC card as an intermediary. Simply send to an address via some method, and receive goods!

It turns out we can do exactly that with NodeMCU using WebSocket. Like HTTP, WebSocket is a communications protocol that uses TCP connections (typically over port 80), but it allows full-duplex communication. In other words, you can establish a connection to a server, and send/receive messages without needing to poll the server.

As in the previous example, we’ll use a NodeMCU running Lua. You may wish to refer to it for compile options and information about the screen, which will be the same in this case. Unlike the previous article, you will not need an API key from Etherscan to use this service (not yet, anyway). As usual, we’ll start off by connecting to WiFi:

wifi.setmode(wifi.STATION)
wifi.setphymode(wifi.PHYMODE_B)
station_cfg={}
station_cfg.ssid="Your SSID"
station_cfg.pwd="Your Password"
station_cfg.save=true
wifi.sta.config(station_cfg)

Connecting to a server with WebSockets is easy, but since we’re not using HTTP, we’ll have to remove the https:// and replace that with ws://. (Note: not wss:// because we’ve not enabled encryption yet.)

ws:connect(‘ws://socket.etherscan.io/wshandler’)

Next, we need to report back when the connection is established as the trigger to run additional code. It will return an error code if the connection fails to be established. Handling these error codes in a sensible way is an excellent feature, but we’ll handle that later:

ws:on("connection", function(ws)
    print('got ws connection')
    end)

Now, we need to extend the above to subscribe to an Eth address, and add some new code to do something when a transaction occurs. Note that the API requires that you subscribe to an address within 60 seconds of connecting. It also states that you have to send a ping event to the server every 20 seconds to keep the connection alive, so we’ll need to set a recurring timer for that.

If you’re using ESPlorer, you can send the ping request manually by entering =ws:send('{"event": "ping"}') and pressing Send. This is a useful way to test the connection status.

The address I used seems to have frequent transactions so is reasonable for testing. Be advised though that sitting and waiting for a transaction to happen to test the code creates a slow development cycle so some patience is necessary here.

ws = websocket.createClient()
ws:on("connection", function(ws)
    print('got ws connection')
    ws:send('{"event": "txlist", "address": "0x2a65aca4d5fc5b5c859090a6c34d164135398226"}')
    end)

ws:on("receive", function(_, msg, opcode)
    print('got message:', msg, opcode)
    end)

You should see something like what follows below. The first message is a simple confirmation of connection, the second confirms your subscription to an address, and the third is what you get sent when a transaction occurs. You can subscribe to up to 30 addresses with a single connected device! Note that the data is all in JSON format, which is something we’ll take advantage of later.

got message: {"event":"welcome"} 1
got message: {"event":"subscribe-txlist", "status":"1", "message":"OK, 0x2a65aca4d5fc5b5c859090a6c34d164135398226"} 1
got message: {"event":"txlist","address":"0x2a65aca4d5fc5b5c859090a6c34d164135398226","result":[{"blockNumber":"5532531","timeStamp":"1525098009","hash":"0xe5ec497cb5b38811e8bf5db67a056a2bdd4aa9b68df5c8e8225cb300cbcfa413","nonce":"3363391","blockHash":"0xf446f77d92ed29c221e8451b8048113969ed305a7dd49177e10b422e8e2c4bda","transactionIndex":"172","from":"0x2a65aca4d5fc5b5c859090a6c34d164135398226","to":"0xec5fdfba35c01c6ad7a00085e70e8f30cd121597","value":"24418350000000000","gas":"50000","gasPrice":"4000000000","input":"0x","contractAddress":"","cumulativeGasUsed":"7896403","gasUsed":"21000","confirmations":"1"}]} 1

That’s quite a mess of transaction data, and unfortunately the datum of interest is in the ‘result’ field – which is nested JSON. In the last article, we converted simple JSON to a Lua table using the excellent sjson module. We’ll do the same here after verifying the message type is a transaction (txlist).

ws:on("receive", function(_, msg, opcode)
    print('got message:', msg, opcode)
    ok, ethdata = pcall(sjson.decode, msg)
    if ok then
        msgtype = (ethdata["event"])
        if msgtype == "txlist" then
...

The NodeMCU documentation specifically notes that nested JSON can cause out-of-memory errors. For that reason we use pcall (protected call) to contain any such errors when decoding our JSON message. Next, we extract the contents of the ‘value’ field, nested within the ‘result’ field:

if msgtype == "txlist" then
    wei = ethdata.result[1].value
    print (wei)
    eth = wei/1000000000000000000
    print (eth)
    end

It took me a few hours to figure out how to deal with nested tables, but in the end it was actually quite clean and easy — I was just being dense. Now, we need to add a basic provision to handle errors when the websocket is closed:

ws:on("close", function(_, status)
    print('connection closed', status)
    print('Reconnecting...')
    ws = nil -- required to Lua gc the websocket client
    tmr.alarm(0,4000,tmr.ALARM_SINGLE,transact) -- This reconnects after 4 seconds
end)

To wrap it all up, we encase the code in a couple of functions — first, one to establish a connection, subscribe to the right address, and notify when there is a transaction. Next we need one to display the amount of Eth transferred. Finally, we need a ‘ping’ function to call every 20 seconds or less to keep the connection alive. Overall this turned out to be more robust than expected and has yet to encounter an error. Check out the full code listing here. Note that I’ve also added a little code above to interface with a 128×32 OLED screen, the same one we used previously.

Now that it works, let’s consider im/practical applications. It’s a neat way to display Ethereum transactions in real-time, say if you do livestreaming and accept Eth donations and want them to trigger something fancy. Or, you could make a somewhat insecure vending machine. Clearly, getting a secure WebSocket up and running is the next order of business.

You could also set a timer where the length depends on the amount of Eth received. This would allow for things like public advertisements that go away for a while if someone pays a fee. (Please don’t do this!) Maybe a conference room for rent with the power controlled this way? Hackerspace membership payment? An electric bicycle that charges you for power used?

In any case, it’s not legal to use cryptocurrency as a form of payment in my country so I can’t implement any of the above examples at this time. If you’ve got a better application, please share it in the comments!