Router Rebooter Eliminates Hassles

Some low-end or older routers might get you a decent WiFi network in your house or apartment, but often these cheaply made devices are plagued with subtle software problems that cause the router itself to become unresponsive after a few days of operating. One solution is to just power cycle the router by hand whenever the Internet disappears, but a better solution is to build something that does that for you.

[Charlie] had this problem as the de facto IT person in his family, and didn’t want to keep getting bothered for such a simple problem. His solution involves a relay, an ESP8266, and a Wemos D1 mini. The device connects to the Internet through the router and occasionally sends out pings to another address. If it can’t ping the address successfully after a certain time period, the device power cycles the router by activating the relay.

Since this isn’t the newest idea out there, there are many ways to solve this problem if you are constantly annoyed by router issues, whether from your own router or from friends and family who treat you as their personal IT department. One solution doesn’t involve any extra hardware at all as long as you have a computer near your router/modem already, and others solve this problem when it happens to the modem rather than the router.

Continue reading “Router Rebooter Eliminates Hassles”

Alexa Controls This Projector Thanks To ESP8266

[jfessard] doesn’t have extra-sensory perception, but does have an ESP8266. The little board seems to pop up in every hack these days. Inspired by not wanting to get up from the bean-bag chair or leave the electronics-housing cabinet wide open to use an HDMI switcher, [jfessard] hacked together an Alexa-compatible projector control via the ESP8266!

The core functionality here is the ability to turn the projector on and off, and to switch the HDMI source. [jfessard] connected the Panasonic PT-AE3000U projector to a Monoprice HDX-401TA 4×1 HDMI switcher. Tucked away in the cabinet below the projector, it is controlled using a IR LED transmitter breakout board sitting at the end of a fairly long set of jumper wire. The projector control itself is through a RS232 interface.

To make this easy to use with Amazon’s Alexa, [jfessard] turned to some libraries for the ESP8266 D1 Mini. The fauxmoesp library makes it look like a WeMo device, and the IRemoteESP8266 library made remote control code cloning a snap. One really frustrating part of this hack was the MAX232-style breakout board; getting a board to work when it’s labelled backwards takes a bit of head-scratching to figure out.

If the the projector ever gets too noisy, we suggest this hack that shushes the machine. For the moment, we’d rather take another look at this laser projector that mimics a cool ‘laser sky’ effect.

Build An Excellent Coffee Roaster With A Satisfyingly Low Price Tag

There’s a lot of mysticism around coffee roasting, but in the end it couldn’t be simpler. Take a bunch of beans, heat them up evenly, and stop before they get burned. The rest is details.

And the same goes for coffee roasters. The most primitive roasting technique involves stirring the beans in a pan or wok to keep them from scorching on the bottom. This works great, but it doesn’t scale. Industrial drum roasters heat a rotating drum with ridges on the inside like a cement mixer to keep the beans in constant motion while they pass over a gas fire. Fluidized-bed roasters use a strong stream of heated air to whirl the beans around while roasting them evenly. But the bottom line is that a coffee roaster needs to agitate the beans over a controllable heat source so that they roast as evenly as possible.

My DIY coffee roaster gave up the ghost a few days ago and I immediately ordered the essential replacement part, a hot air popcorn popper, to avert a true crisis: no coffee! While I was rebuilding, I thought I’d take some pictures and share what I know about the subject. So if you’re interested in roasting coffee, making a popcorn popper into a roaster, or even just taking an inside look at a thoroughly value-engineered kitchen machine, read on!

Continue reading “Build An Excellent Coffee Roaster With A Satisfyingly Low Price Tag”

How Low Can An ESP8266 Go?

We’ve been tuned into coin cell designs lately given the coin cell challenge, so we were interested in [CNLohr]’s latest video about pushing the ESP8266 into the lowest-possible battery drain with coin cells. The result is a series of hacks, based on a reverse-engineered library and depends on a modified router, but that gets the power consumption down by more than a factor of ten!

Although the ESP8266 has a deep sleep mode that draws only 20 microamps or so, that isn’t as rosy as it seems. If you could go to sleep for a while, wake up for just a moment, send your data, and then go back to sleep, that might be one thing. But when you use conventional techniques, the device wakes up and has to do about ten seconds of work (at high power) to connect to a nearby access point. Then it can do what you want and go back to sleep. That ten-second hit is a killer on small batteries.

Since that’s all you can do with the standard libraries, the next step was to find [pvvx] who has reverse engineered a great deal of the libraries and provides a library with no WiFi capability. That’s a two-edged sword. The pro is you get a 30 ms startup from a deep sleep. The downside is — well — you don’t have WiFi.

Continue reading “How Low Can An ESP8266 Go?”

ESP8266 Beacon Announces Your Arrival

It used to be people were happy enough to just have to push a button in their car and have the garage door open. But pushing a button means you have to use your hands, like it’s a baby toy or something. We’re living in the 21st century, surely there must be a better way! Well, if you’ve got a home automation system setup and a spare ESP8266 laying around, [aderusha] may have your solution with MQTTCarPresence.

The theory of operation here is very clever. The ESP8266 is powered via the in-dash USB port, which turns on and off with the engine. When the engine is started, the ESP8266 is powered up and immediately connects to the WiFi network and pushes an MQTT message to Home Assistant. When Home Assistant gets the notification that the ESP8266 has connected, it opens the garage door.

When [aderusha] drives out of the garage and away from the house, the ESP8266 loses connection to the network, and Home Assistant closes the door. The same principle works when he comes home: as the car approaches the house it connects to the network and the garage door opens, and when the engine is shut off in the garage, the door closes again.

The hardware side of the setup is really just a WeMos D1 mini Pro board, though he’s added an external antenna to make sure the signal gets picked up when the vehicle is rolling up. He’s also designed a very slick 3D printed case to keep it all together in a neat little package.

We’ve covered automated entry systems based on the ESP8266 before, though usually the ESP stays at home. Be sure to check out the awesome series [Elliot Williams] has on the wonders of MQTT if you’re looking to setup your own automation system.

Solenoids And Servos For Self Actuated Switches

The new hotness in home automation is WiFi controlled light switches. Sure, we’ve had computer-controlled home lighting for literally forty years with X10 modules, but now we have VC money pouring into hardware, and someone needs to make a buck. A few years ago, [Alex] installed WiFi switches in a few devices in his house and discovered the one downside to the Internet of Light Switches — his light switches didn’t have a satisfying manual override. Instead of cursing the darkness for want of an Internet-connected candle, [Alex] did the only sensible thing. He installed electromagnets, solenoids, and servos behind the light switches in his house.

The exact problem [Alex] is trying to solve here is stateful wall switches. With an Internet-connected lamp socket, the wall switch no longer functions. Being able to turn on a light when your phone is out of charge is something we all take for granted, and the solution is, of course, to have Internet-connected switches.

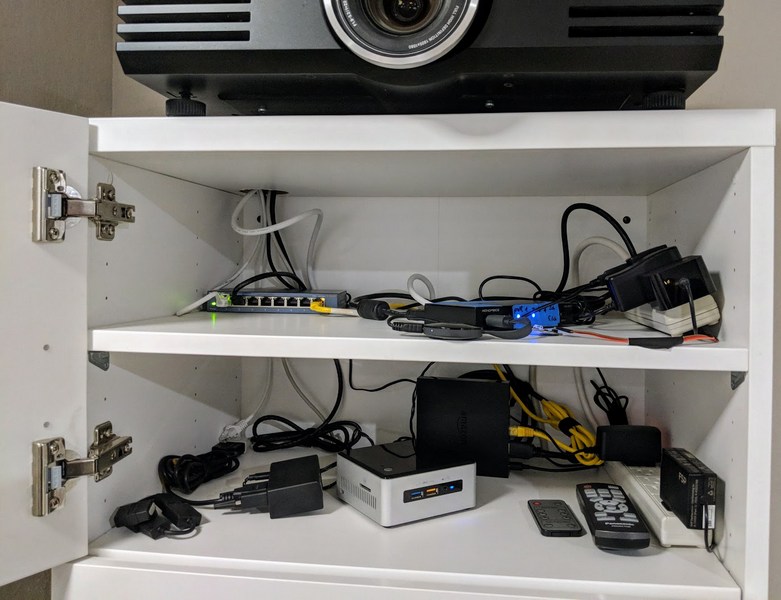
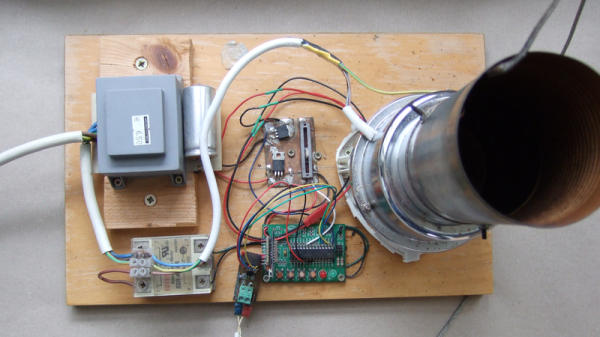
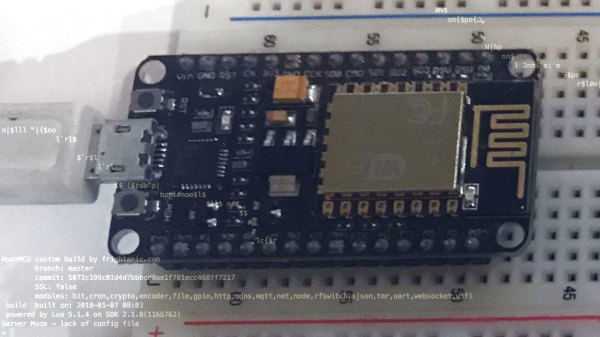
Being able to read the state of a switch and send some data off to a server is easy. For this, [Alex] used a WeMos D1 mini, a simple ESP8266-based board. The trick here, though, is stateful switches that can toggle themselves on and off. This is a mechanical build, and although self-actuated switches that can flip up and down by computer command exist, they’re horrifically expensive. Instead, [Alex] went the DIY route, first installing electromagnets behind the switches, then moving to solenoids, and finally designing a solution around four cheap hobby servos. The entire confabulation stuffed into a 2-wide electrical box consists of two switches, four hobby servos, the D1 mini, and an Adafruit servo driver board.

The software stack for this entire setup includes a NodeJS server connected to Orvibo Smart Sockets over UDP. Also on this server is a WebSocket server for browser-based clients that want to turn the lights on and off, a FauXMo server to turn the lights on and off via an Amazon Echo via WeMo emulation, and an HTTP server for other clients like [Alex]’ Pebble Watch.

This is, without question, the most baroque method of turning a lamp on and off that we’ve ever seen. Despite this astonishing complexity, [Alex] has something that is also intuitive to use and, to borrow an applhorism, ‘Just Works’. With a setup like this, anyone can flick a switch and turn a lamp on or off over the Internet, or vice-versa. This is the best Home Automation build we’ve ever seen.

You can check out [Alex]’ video demo of his build below, or his GitHub for the entire project here.

Continue reading “Solenoids And Servos For Self Actuated Switches”

Capture The Flag Challenge Is The Perfect Gift

Nothing says friendship like a reverse engineering challenge on unknown terrain as a birthday present. When [Rikaard] turned 25 earlier this year, his friend [Veydh] put together a Capture the Flag challenge on an ESP8266 for him. As a software guy with no electronics background, [Rikaard] had no idea what he was presented with, but was eager to find out and to document his journey.

Left without guidance or instructions, [Rikaard] went on to learn more about the ESP8266, with the goal to dump its flash content, hoping to find some clues in it. Discovering the board is running NodeMCU and contains some compiled Lua files, he stepped foot in yet another unknown territory that led him down the Lua bytecode rabbit hole. After a detour describing his adjustments for the ESP’s eLua implementation to the decompiler he uses, his quest to capture the flag began for real.

While this wasn’t [Rikaard]’s first reverse engineering challenge, it was his first in an completely unknown environment outside his comfort zone — the endurance he demonstrated is admirable. There is of course still a long way down the road before one opens up chips or counts transistors in a slightly more complex system.