Desktop 3D printing technology has improved by leaps and bounds over the last few years, but they can still be finicky beasts. Part of this is because the consumer-level machines generally don’t offer much in the way of instrumentation. If the filament runs out or the hotend clogs up and stops extruding, the vast majority of printers will keep humming along with nothing to show for it.
Looking to prevent the heartache of a half-finished print, [Elite Worm] has been working on a very clever filament detector that can be retrofitted to your 3D printer with a minimum of fuss. The design, at least in its current form, doesn’t actually interface with the printer beyond latching onto the part cooling fan as a convenient source of DC power. Filament simply passes through it on the way to the extruder, and should it stop moving while the fan is still running (indicating that the machine should be printing), it will sound the alarm.
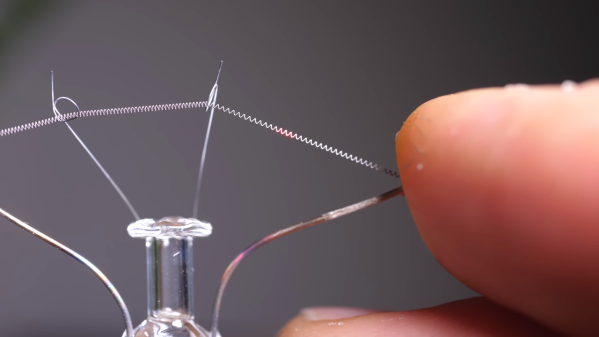
 Inside the handy device is a Digispark ATtiny85 microcontroller, a 128 x 32 I2C OLED display, a buzzer, an LED, and a photoresistor. An ingenious 3D printed mechanism grabs the filament on its way through to the extruder, and uses this movement to alternately block and unblock the path between the LED and photoresistor. If the microcontroller doesn’t see the telltale pulse after a few minutes, it knows that something has gone wrong.
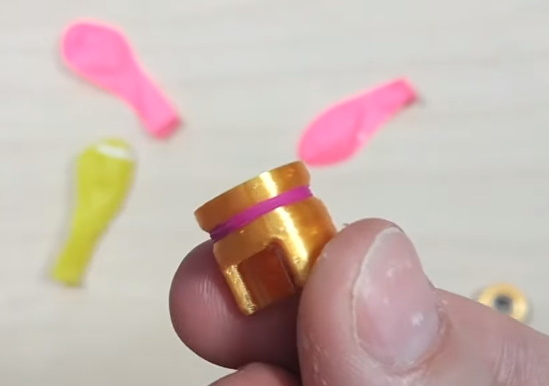
In the video after the break, [Elite Worm] fits the device to his Prusa i3 MK2, but it should work on essentially any 3D printer if you can find a convenient place to mount it. Keep a close eye out during the video for our favorite part of the whole build, using the neck of a latex party balloon to add a little traction to the wheels of the filament sensor. Brilliant.
Incidentally, Prusa tried to tackle jam detection optically on the i3 MK3 but ended up deleting the feature on the subsequent MK3S since the system proved unreliable with some filaments. The official line is that jams are so infrequent with high-quality filament that the printer doesn’t need it, but it does seem like an odd omission when even the cheapest paper printer on the market still beeps at you when things have run afoul.
Continue reading “Bolt-On Clog Detection For Your 3D Printer”