VGA From Scratch On A Homebrew 8-bit Computer

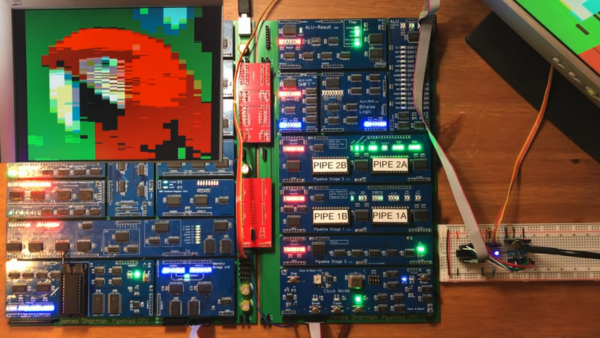
[James Sharman] has built an impressive 8-bit homebrew computer. Based on TTL logic chips, it has a pipelined design which makes it capable of Commodore-level computing, but [James] hasn’t quite finished everything yet. While it is currently built on its own custom PCB, it has a limiting LCD display which isn’t up to the standards of the rest of the build. To resolve this issue, he decided to implement VGA from scratch.

This isn’t a bit-bang VGA implementation, either. He plans for full resolution (640×480) which will push the limits of his hardware. He also sets goals of a 24-bit DAC which will allow for millions of colors, the ability to use sprites, and hardware scrolling. Since he’s doing all of this from scratch, the plan is to keep it as simple as possible and make gradual improvements to the build as he goes. To that end, the first iteration uses a single latching chip with some other passive components. After adding some code to the CPU to support the new video style, [James] is able to display an image on his monitor.

While the image of the parrot he’s displaying isn’t exactly perfect yet, it’s a great start for his build and he does plan to make improvements to it in future videos. We’d say he’s well on his way to reproducing a full 8-bit retrocomputer. Although VGA is long outdated for modern computers, the standard is straightforward to implement and limited versions can even be done with very small microcontrollers.

Thanks to [BaldPower] for the tip!

Continue reading “VGA From Scratch On A Homebrew 8-bit Computer”

Dreamcast Homebrew Gets Boost From SD Card Cache

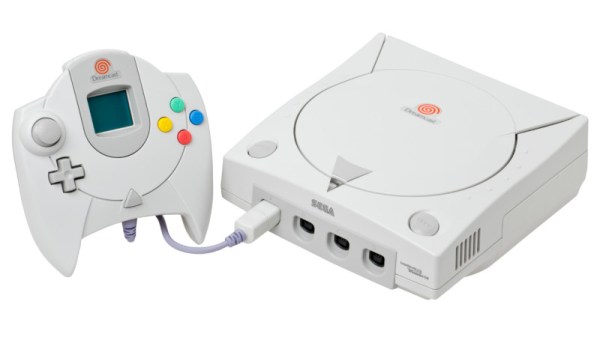
While it might have been a commercial failure compared to contemporary consoles, the Sega Dreamcast still enjoys an active homebrew scene more than twenty years after its release. Partly it’s due to the fact that you can burn playable Dreamcast discs on standard CD-Rs, but fans of the system will also point out that the machine was clearly ahead of its time in many respects, affording it a bit of extra goodwill in the community.

That same community happens to be buzzing right now with news that well-known Dreamcast hacker [Ian Micheal] has figured out how to cache data to an SD card via the console’s serial port. At roughly 600 KB/s the interface is too slow to use it as swap space for expanding the system’s paltry 16 MB of memory, but it’s more than fast enough to load game assets which otherwise would have had to be loaded into RAM.

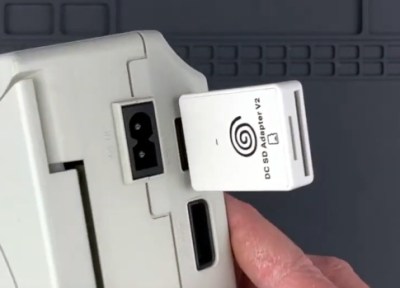
A third-party Dreamcast SD adapter.

In the video below, [Ian] shows off his new technique with a port of DOOM running at 640×480. He’s already seeing an improvement to framerates, and thinks further optimizations should allow for a solid 30 FPS, but that’s not really the most exciting part. With the ability to load an essentially unlimited amount of data from the SD card while the game is running, this opens the possibility of running mods which wouldn’t have been possible otherwise. It should also allow for niceties like saving screenshots or game progress to the SD card for easy retrieval.

[Ian] says he’ll be bringing the same technique to his Dreamcast ports of Quake and Hexen in the near future, and plans on posting some code to GitHub that demonstrates reading and writing to FAT32 cards so other developers can get in on the fun. The downside is that you obviously need to have an SD card adapter plugged into your console to make use of this technique, which not everyone will have. Luckily they’re fairly cheap right now, but we wouldn’t be surprised if the prices start climbing. If you don’t have one already, now’s probably the time to get one.

To be clear, this technique is completely separate from replacing the Dreamcast’s optical drive with an SD card, which itself is a very popular modification that’s helped keep Sega’s last home console kicking far longer than anyone could have imagined.

Continue reading “Dreamcast Homebrew Gets Boost From SD Card Cache”

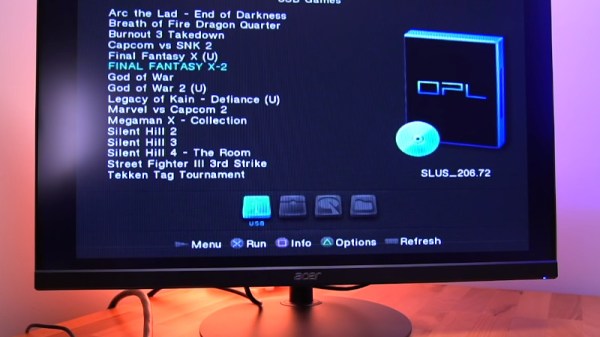
Exploring The World Of Nintendo 3DS Homebrew

When Nintendo officially ended production of the 3DS in September 2020, it wasn’t exactly a surprise. For one thing, some variation of the handheld system had been on the market since 2011. Which is not to say the product line had become stagnant: the system received a considerable mid-generation refresh, and there was even a more affordable variant introduced that dropped the eponymous stereoscopic 3D effect, but nearly a decade is still a fairly long life in the gaming industry. Of course Nintendo’s focus on the Switch, a hybrid device that blurs the line between console and handheld games, undoubtedly played a part in the decision to retire what could effectively be seen as a competing product.

While putting the 3DS out to pasture might have been the logical business move, a quick check on eBay seems to tell a different story. Whether it’s COVID keeping people indoors and increasing the demand for at-home entertainment, or the incredible library of classic and modern games the system has access to, the fact is that a used 3DS in good condition is worth more today than it was when it was brand new on the shelf this time last year.

I’ve certainly made more expensive mistakes.

In short, this was the worst possible time for me to decide that I finally wanted to buy a 3DS. Then one day I noticed the average price for a Japanese model was far lower than that of its American counterpart. I knew the hardware was identical, but could the firmware be changed?

An evening’s worth of research told me the swap was indeed possible, but inadvisable due to the difficulty and potential for unexpected behavior. Of course, that’s never stopped me before.

So after waiting the better part of a month for my mint condition 3DS to arrive from the land of the rising sun, I set out to explore the wide and wonderful world of Nintendo 3DS hacking.

Continue reading “Exploring The World Of Nintendo 3DS Homebrew”

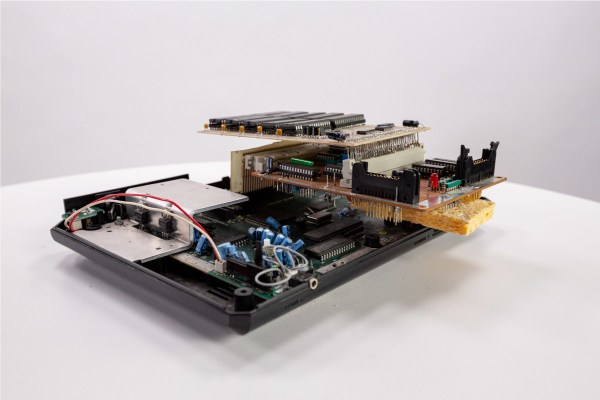
Gorgeous 6502 Celebrates Craftsmanship Of The Early Homebrewers

The days when a computer had a front panel bristling with switches and LEDs are long gone, and on balance that’s probably for the better in terms of ease of use, raw power, and convenience. That’s not to say there aren’t those who long for the days of flipping switches to enter programs, of course, but it’s a somewhat limited market. So unless you can find an old IMSAI or Altair, chances are you’ll have to roll your own — and you could do a lot worse than this aluminum beauty of a 6502 machine.

The machine is named PERSEUS-8 by its creator, [Mitsuru Yamada]. It follows earlier machines bearing the PERSEUS badge, all of them completely homebrewed and equally gorgeous. The PERSEUS-8 would have been an impressive machine had it come along 45 years ago — the 2 MHz version of the 6502, a full 16-bit memory address space, and 16 kB of battery-backed RAM. But the mechanical and electrical construction methods and the care and craftsmanship taken are where this build really shines. The case is fabricated out of aluminum sheets and angles and looks like it could have come from a server rack. The front panel is to die for — [Mitsuru] carefully brushed the aluminum before drilling the dozens of holes needed for the toggle switches and LEDs. And the insides are equally lovely — socketed chips neatly arranged on perfboard with everything wired up using period-correct wirewrap methods. Even the labels, both on the front panel and even on the motherboard, are a joy to behold.

Builds like this are the ones that really inspire us to take the extra steps needed to make our projects not only work, but also to be beautiful. We’ve seen this kind of craftsmanship from [Mitsuru] before — recall this serial terminal that never was, or the machine that came before the PERSEUS-8.

DIY I2C Tester

[Dilshan] built a dedicated I2C tester which allows for I2C bus control over USB using simple commands such as init, read, write, etc. The Linux kernel has had I2C driver support for a couple of decades, but you’ll be hard pressed to find a computer or laptop with a I2C connector (excluding Bunnie Huang’s Novena hacker’s laptop, of course). This tester does require a Linux host, and his programs use libusb on the computer side and V-USB on the embedded side.

[Dilshan] put a lot of time into building this project, and it shows in the build quality and thorough documentation. With its single-sided PCB and all thru-hole construction, it makes a great beginner project for someone just getting into the hobby. At the heart of the tester is an ATmega16A in a 40-pin PDIP package (despite the Microchip overview page calling it a 44-pin chip), supported by a handful of resistors and transistors. Schematics are prepared in KiCad, code is compiled using gcc and avr-gcc, and he provides a label for the enclosure top. The only thing missing is information on the enclosure itself, but we suspect you can track that down with a little sleuthing (or asking [Dilshan] himself).

If you use I2C quite a lot, give this project a look. Easy to build, useful in the lab, and it looks nice as well. We have featured [Dilshan]’s work over the years, including this logic pattern generator and his two-transistor-on-a-breadboard superheterodyne receiver.

A Few Of My Favorite Things: Amateur Radio

Hackaday has among its staff a significant number of writers who also hold amateur radio licenses. We’re hardware folks at heart, so we like our radios homebrew, and we’re never happier than when we’re working at high frequencies.

Amateur radio is a multi-faceted hobby, there’s just so much that’s incredibly interesting about it. It’s a shame then that as a community we sometimes get bogged down with negativity when debating the minutia. So today let’s talk about a few of my favourite things about the hobby of amateur radio. I hope that you’ll find them interesting and entertaining, and in turn share your own favorite things in the comments below.

Continue reading “A Few Of My Favorite Things: Amateur Radio”

Full 8-Bit Computer On Breadboards

Getting into a big electronics project often involves the use of specialized tools, namely the use of some sort of soldering iron or other way to apply solder to often intricate, tiny, and heat-sensitive parts. While it’s best to learn to pick up this skill at some point, it’s not always necessary, even for big, complicated projects like [DerULF1]’s full 8-bit computer that he built entirely on breadboards.

For a fully featured 8-bit computer, this build goes deep into the details of how the computer works. The clock allows programs to be stepped through one cycle at a time, and even the memory can be individually accessed with a set of switches. There are plenty of other interesting features as well, such as using registers to access extra memory. It features an SPI port and PS/2 keyboard controller and also loads programs from an SD card.

The build was inspired by some of [Ben Eater]’s projects which famously focus on using logic gates and TTL chips to perform complex tasks, such as another breadboard computer which plays snake on a small display. It’s certainly a great way to learn about the inner function of computers, and better still that no soldering is required. But you may need a few extra breadboards.

Continue reading “Full 8-Bit Computer On Breadboards”