A Simple Laser Harp MIDI Instrument

Craig Lindley is a technical author and a prolific maker of things. This simple project was his first attempt to create a laser harp MIDI device. While on vacation, Craig saw a laser harp with only three strings and decided to improve upon it by expanding it to twelve strings. The principle of operation is straightforward: twelve cheap diode laser modules aim a beam towards an LDR, which changes resistance if the light level changes when the beam is interrupted.

The controller is a simple piece of perf board, with a Wemos D1 mini ESP32 module flanked by some passives, a barrel socket for power, and the usual DIN connector for connecting the MIDI instrument. Using the ESP32 is a smart choice, removing all the need for configuration and user indication from the physical domain and pushing it onto a rarely-needed webpage. After a false start, attempting to use a triangular frame arrangement, [Craig] settled upon a simple linear arrangement of beams held within a laser-cut wooden box frame. Since these laser modules are quite small, some aluminium rod was machined to make some simple housings to push them into, making them easier to mount in the frame and keeping them nicely aligned with their corresponding LDR.
Sadly, the magnetic attachment method [Craig] used to keep the LDRs in place and aligned with the laser didn’t work as expected, so it was necessary to reach for the hot glue. We’ve all done that!

An interesting addition was using an M5 stack Unit-Synth module for those times when a proper MIDI synthesiser was unavailable. Making this luggable was smart, as people are always fascinated with laser harps. That simple internal synth makes travelling to shows and events a little easier.

Laser harps are nothing new here; we have covered plenty over the years. Like this nice build, which is more a piece of art than an instrument, one which looks just like a real harp and sounds like one, too, due to the use of the Karplus-Strong algorithm to mimic string vibrations.

Intentionally Overly-Complex Clock Is Off To A Good Start

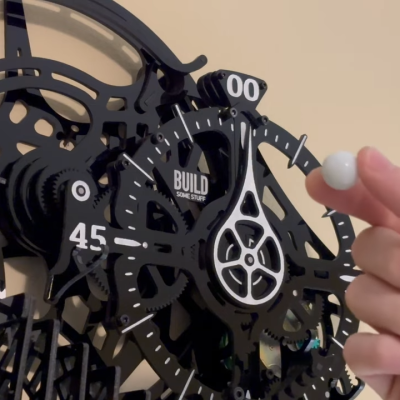
[Kelton] from Build Some Stuff decided to create a clock that not only had kinetic elements, but a healthy dose of Rube Goldberg inspiration. The result is a work in progress, but one that looks awfully promising.

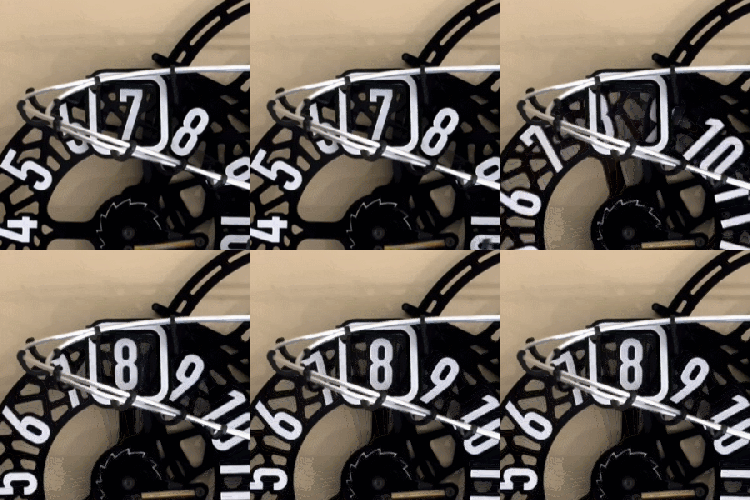
The main elements of the design are rotating pieces that indicate the hours and minutes, but each hour is advanced solely by the satisfying physical culmination of multiple interacting systems. Those systems also completely reset themselves every hour.

Each hour, a marble run kicks off a short chain reaction that culminates in advancing the hour.

At the top of the hour, a marble starts down a track and eventually tips over a series of hinged “dominoes”, which culminate in triggering a spring-loaded ratchet that advances the hour. The marble then gets carried back to the top of the device, ready for next time. Meanwhile, the domino slats and spring-loaded ratchets all get reset by a pulley system.

There’s still some work to do in mounting the motor, pulley system, and marble run. Also, a few bugs have surfaced, like a slight overshoot in the hour display. All par for the course for a device with such a large number of moving parts, we suppose.

[Kelton] has a pretty good sense how it will all work in the end, and it looks promising. We can’t wait to see it in its final form, but the tour of clock so far is pretty neat. Check it out in the video, embedded just under the page break.

As for the clock’s inspiration, Rube Goldberg’s cultural impact is hard to overstate and our own Kristina Panos has an excellent article about the man that might just teach you something you didn’t know.

Continue reading “Intentionally Overly-Complex Clock Is Off To A Good Start”

Clock Mixes Analog, Digital, Retrograde Displays

Unique clocks are a mainstay around here, and while plenty are “human readable” without any instruction, there are a few that take a bit of practice before someone can glean the current time from them. Word clocks are perhaps on the easier side of non-traditional displays but at the other end are binary clocks or even things like QR code clocks. To get the best of both worlds, though, multiple clock faces can be combined into one large display like this clock build from [imitche3].

The clock is actually three clocks in one. The first was inspired by a binary clock originally found in a kit, which has separate binary “digits” for hour, minute, and second and retains the MAX 7219 LED controller driving the display. A standard analog clock rests at the top, and a third clock called a retrograde clock sits at the bottom with three voltmeters that read out the time in steps. Everything is controlled by an Arduino Nano with the reliable DS3231 keeping track of time. The case can be laser-cut or 3D printed and [imitche3] has provided schematics for both options.

As far as clocks builds go, we always appreciate something which can be used to tell the time without needing any legends, codes, or specialized knowledge. Of course, if you want to take a more complex or difficult clock face some of the ones we’re partial to are this QR code clock which needs a piece of hardware to tell the time that probably already has its own clock on it.

Ancient Instrument Goes Digital: The Digi-Gurdy

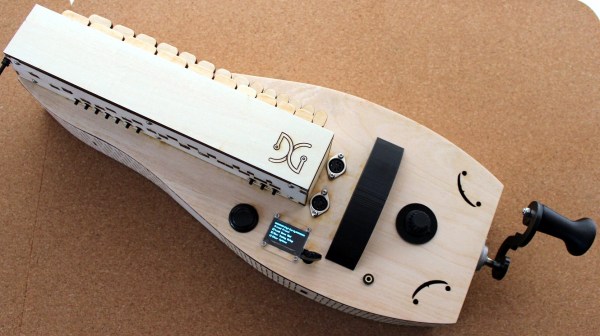
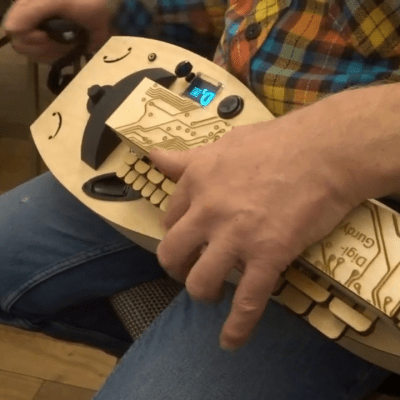
The hurdy-gurdy is a fascinating string instrument dating from sometime around the 10th century. There is an active community of modern enthusiasts, but one can’t simply walk into a music shop and buy one. That’s where [XenonJohn] and the Digi-Gurdy come in, bringing some nice features while maintaining all the important elements of the original.

The mechanical keys and crank of the Hurdy-Gurdy are preserved in this modern digital incarnation.

The hurdy-gurdy works by droning strings with a rotating wheel, and the player applies pressure to those strings via keys to play combinations of notes. Here’s a video demonstrating what it sounds like to play one, and one can see a conceptual resemblance to bagpipes, among other things.

The Digi-Gurdy is a modern electronic version that maintains the mechanical elements while sending MIDI signals over USB. It has options for line-out or headphone output. A thriving online community has shaped its development since its inception years ago.

We hope this leaves you wanting to know more because [XenonJohn] has loads of details to share. The main website at digigurdy.com is jam-packed with information about this instrument and its construction, and the project page on Hackaday.io has more nitty-gritty design details and source files for those who crave hardware specifics.

If [XenonJohn]’s name sounds familiar, it’s because we’ve admired his work on DIY self-balancing vehicles over the years. He also submitted an earlier version as an entry into the Hackaday Prize. His careful attention to detail shines through. Check out the two videos (embedded just below the page break): the first demonstrates the Digi-Gurdy, and the second shows off the construction and insides. You’d think a MIDI hurdy-gurdy would be unique, but, actually, we’ve seen more than one.

Continue reading “Ancient Instrument Goes Digital: The Digi-Gurdy”

Flat-Pack Multi-Tool Has Many Dimensions

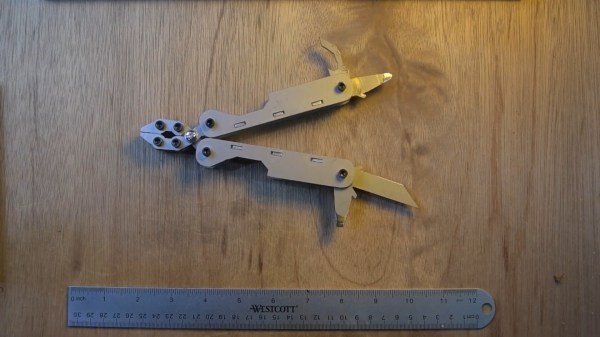
Sometimes, you just have to see whether something can be done. Such is the case with [ToolTechGeek]’s flat-pack metal multi-tool build. Can an entire multi-tool be made with only flat pieces of laser-cut metal and fasteners? It would seem so, yes. And quite nicely, too, as you’ll see in the video after the break.

[ToolTechGeek] started by designing all the parts in Inkscape, and then made a few 3D printed versions to check fitment before committing to laser-cut metal. Once they had the pieces cut, everything came together nicely except for a few tabs that connect some of the parts together. These just had to be filed down a bit.

So now, [ToolTechGeek] has a handy set of pliers, flat- and Phillips-head screwdrivers, a knife, and a bottle opener all in one place. Although the pliers don’t have teeth, they still do a fine job of removing nuts and the like. Be sure to check out the final product and see it get put to the test.

No use for such a thing? Maybe you’d prefer an NFC multi-tool.

Continue reading “Flat-Pack Multi-Tool Has Many Dimensions”

Watch Time Roll By On This Strange, Spiral Clock

[Build Some Stuff] created an unusual spiral clock that’s almost entirely made from laser-cut wood, even the curved and bendy parts.

The living hinge is one thing, but getting the spacing, gearing, and numbers right also takes work.

The clock works by using a stepper motor and gear to rotate the clock’s face, which consists of a large dial with a spiral structure. Upon this spiral ramp rolls a ball, whose position relative to the printed numbers indicates the time. Each number is an hour, so if the ball is halfway between six and seven, it’s 6:30. At the center of the spiral is a hole, which drops the ball back down to the twelve at the beginning of the spiral so the cycle can repeat.

The video (embedded below) demonstrates the design elements and construction of the clock in greater detail, and of particular interest is how the curved wall of the spiral structure consists of a big living hinge, a way to allow mostly rigid materials to flex far beyond what they are used to. Laser cutting is well-suited to creating living hinges, but it’s a technique applicable to 3D printing, as well.

Thanks to [Kelton] for the tip!

Continue reading “Watch Time Roll By On This Strange, Spiral Clock”

Laser Cut Clips Save A Lamp From The Trash

Ikea have been known for years as a purveyor of inexpensive  yet stylish homewares, but it’s fair to say that sometimes their affordability is reflected in their insubstantial construction. Such is the case with the Sjöpenna lamp, whose construction relies on rubber bands. On [Tony]’s lamp these bands degraded with age, causing it to fall apart. The solution? A set of cleverly-designed laser-cut clips to replace them.

The challenge to replacing a stretchy material with a rigid one is that it must have enough ability to bend without snapping as it is put in place. For this he selected PETG, with 0.04″ (about 1 mm thick) hitting the sweet spot. His photos demonstrate with some green tape added for visibility, how the clip bends backwards just far enough to fit over where the rubber band once located, and then flips back neatly to hold it all in place.

If you have a collapsing Ikea lamp then this will be just what you need, but this hack goes further than that. A frequent requirement for repairs is some kind of clip, because clips are always the first to break, This technique for laser cutting them is a handy one to remember, next time your design needs a springy bit of plastic.