Laser Cut Cardboard Robot Construction Kit Eases Learning And Play

It has never been easier to put a microcontroller and other electronics into a simple project, and that has tremendous learning potential. But when it comes to mechanical build elements like enclosures, frames, and connectors, things haven’t quite kept the same pace. It’s easier to source economical servos, motors, and microcontroller boards than it is to arrange for other robot parts that allow for cheap and accessible customization and experimentation.
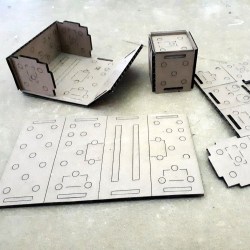
That’s where [Andy Forest] comes in with the Laser Cut Cardboard Robot Construction Kit, which started at STEAMLabs, a non-profit community makerspace in Toronto. The design makes modular frames, enclosures, and basic hardware out of laser-cut corrugated cardboard. It’s an economical and effective method of creating the mechanical elements needed for creating robots and animatronics while still allowing easy customizing. The sheets have punch-out sections for plastic straws, chopstick axles, SG90 servo motors, and of course, anything that’s missing can be easily added with hot glue or cut out with a knife. In addition to the designs being open sourced, there is also an activity guide for educators that gives visual examples of different ways to use everything.

Cardboard makes a great prototyping material, but what makes the whole project sing is the way the designs allow for easy modification and play while being easy to source and produce.


An Unmanned Ground Vehicle, Compatable With An Arduino

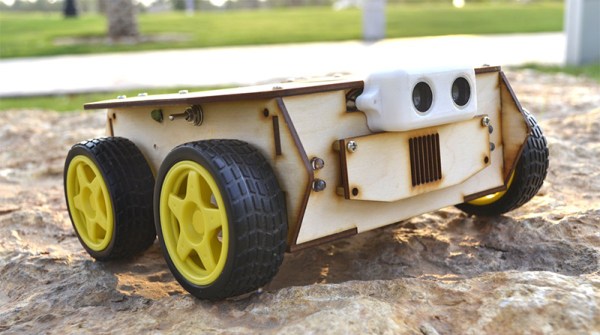
Building your own robot is something everyone should do, and [Ahmed] has already built a few robots designed to be driven around indoors. An indoor robot is easy, though: you have flat surfaces to roll around on, and the worst-case scenario you have a staircase to worry about. An outdoor robot is something else entirely, which makes this project so spectacular. It’s the M1 Rover, an unmanned ground vehicle, built around the Arduino platform.

The design goal of the M1 Rover isn’t just to be a remote-controlled car that can be driven around indoors. This robot is meant for rough terrain, and is a robot that can be programmed, can also be driven around by a computer, a video game controller, or custom joysticks.

To this end, the M1 rover is designed around high-quality laser cut plywood, powered by a few DC motors controlled through a dual H-bridge, and loaded up with sensors, including a front-mounted ultrasonic sensor. All the electronics are tucked away in the chassis, and the software is just fantastic. In fact, with the addition of a smartphone skillfully mounted to the top of the chassis, this little robot can became an autonomous rover, complete with a webcam. It’s one of the better robotic rover projects we’ve seen, and amazing addition to this year’s Hackaday Prize.

Faux Aircon Units, Made Entirely From 2D Cuts

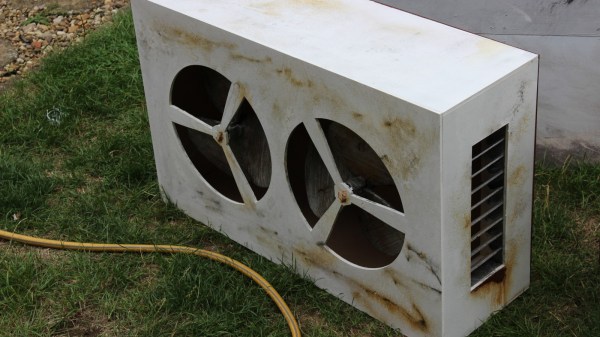
2D design and part fabrication doesn’t limit one to a 2D finished product, and that’s well-demonstrated in these Faux Aircon Units [Martin Raynsford] created to help flesh out the cyberpunk-themed Null Sector at the recent 2018 Electromagnetic Field hacker camp in the UK. Null Sector is composed primarily of shipping containers and creative lighting and props, and these fake air conditioner units helped add to the utilitarian ambiance while also having the pleasant side effect of covering up the occasional shipping container logo. Adding to the effect was that the fan blades can spin freely in stray air currents; that plus a convincing rust effect made them a success.

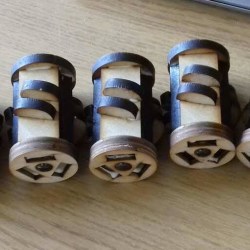
Fan hubs, showing spots for fan blades to be glued. With the exception of embedded bearings, the entire hub (like the rest of the unit) is made from laser-cut MDF.

The units are made almost entirely from laser-cut MDF. The fan blades are cut from the waste pieces left over from the tri-pronged holes, and really showing off the “making 3D assemblies out of 2D materials” aspect are the fan hubs which are (with the exception of bearings) made from laser-cut pieces; a close-up of the hubs is shown here.

Capping off the project is some paint and the rusted appearance. How did [Martin] get such a convincing rust effect? By using real rust, as it turns out. Some cyanoacrylate glue force-cured with misted water for texture, followed by iron powder, then vinegar and hydrogen peroxide with a dash of salt provided the convincing effect. He was kind enough to document the fake rust process on his blog, complete with photos of each stage.

Null Sector showcased a range of creativity; it’s where this unusual headdress was spotted, a device that also showed off the benefits of careful assembly and design.

Watch The Honeycomb Clock Gently Track Time

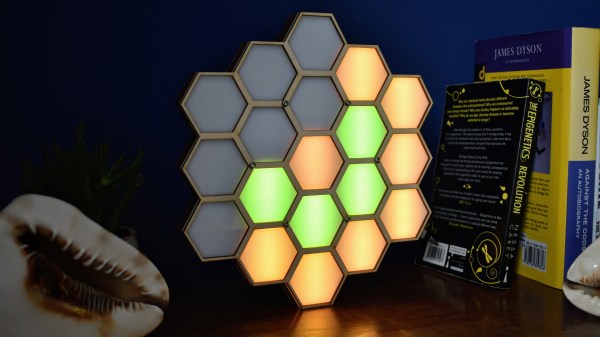
We love clocks here at Hackaday, and so does [John Whittington]. Last year he created this hexagonal honey clock (or “Honock”) by combining some RGB LEDs with a laser-cut frame to create a smooth time display that uses color and placement to display time with a simple and attractive system.

The outer ring of twelve hexagons is essentially the hour hand, similar to analog clock faces: twelve is up, three is directly to the right, six is straight down, and nine is to the left. The inner ring represents ten minutes per hex. Each time the inner ring fills, the next hex (hour) on the outer ring lights up. The whole display is flooded with a minute-long rainbow at noon and midnight. Watch it in action in the video, embedded below.

Continue reading “Watch The Honeycomb Clock Gently Track Time”

Laser-Cut Mecanum Wheel For The Budget Roboticist

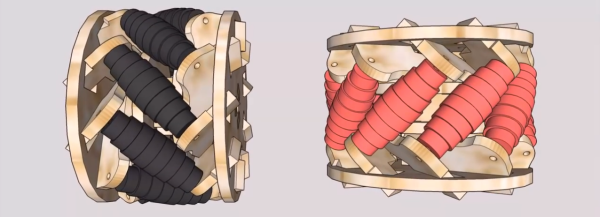
For the budding roboticist, omniwheels might be the next step in design patterns from your everyday “getting-started” robot kits. These wheels consist of tiny rollers that sit on the perimeter of the wheel and enable the wheel to freely slide laterally. With independent motor control of each wheel, a platform can freely locomote sideways by sliding on the rollers. You might think: “a wheel made of wheels? That sounds pricey…”–and you’d be right! Fear not, though; the folks at [Incubhacker] in Belgium have you covered with a laser-cut design that’s one-click away from landing on your workbench.

For anyone who’s tried to reliably mate flat laser-cut parts at an angle, we can tell you it’s no easy feat. The design here triumphs as both simple and reliable. Not only do they solve this problem elegantly, they also manage to create a design that will bear the load of a robot chassis that will travel with it. Laser-cut designs also usually suffer from a poor range of material options. Here the actual rollers need a bit more grip than what the plywood can provide. They also solve this problem effectively as well too, relying on heat-shrink tubing to provide the traction expected from a conventional wheel.

In the video below, [Incubhacker] takes you through the step-by process of making your own come to life. We’ve certainly seen some impressive laser-cut omniwheels in the past, but we like the simplicity of design combined with the composition of parts that probably already live on our workbenches.

Continue reading “Laser-Cut Mecanum Wheel For The Budget Roboticist”

Emboss Your Own Seals With A Laser Cutter

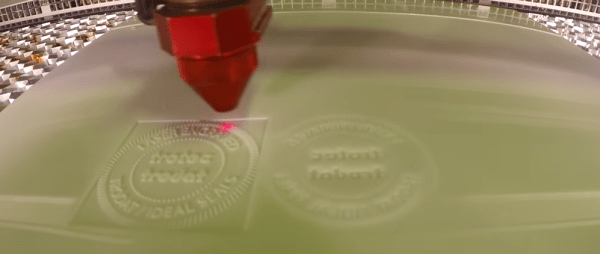
Parchment might be a thing of the past, but for those of us who still use paper an embossed seal can give everything from your official documents to your love letters a bold new feeling of authenticity. As far as getting your own seals made, plenty of folks will settle for having a 3rd party make them a seal, but not us. [Jason] shows us just how simple it is to raster our own seals with a laser cutter.

As far as the process goes, there are no tricks outside the typical workflow for raster engraving. Here, [Jason] simply creates a positive and (mirrored) negative seal pattern for each side of the seal embosser. The pattern is set for raster engraving, and the notched outline will be vector cut. From here, he simply exports the design, and the laser handles the rest.

This hack turned out so cleanly it almost seems like it could got into professional use–and it already is! Some extra Google-fu told us that it’s actually a fairly standard technique across the embossing industry for making embossing seals. Nevertheless, we couldn’t share our excitement for just how accessible this technique can be to anyone within reach of some time on a laser cutter.

[Jason] is using Delrin as his material to capture the design, which cuts cleanly and nicely handles the stress of being squished against your legal documents a couple hundred times. We’ve had our fair share of love on these pages for this engineering plastic. If you’re looking to get a closer look at this material, have a go at our materials-to-know debrief and then get yourself equipped with some design principles so that you’re ready to throw dozens of designs at it.

It’s not the first time the crafting and hacking communities intermingle and start sharing tools. In fact, if you’ve got yourself a vinyl cutter kicking around, why not have a go at churning out a few pcb stencils?

Thanks for the tip, [Doug]!

Continue reading “Emboss Your Own Seals With A Laser Cutter”

Stecchino Game Is All About Balancing A Big Toothpick

Stecchino demo by the creator

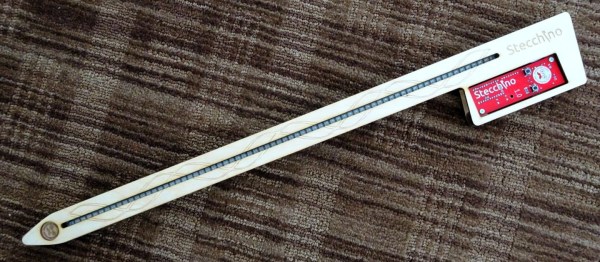
Self-described “Inventor Dad” [pepelepoisson]’s project is called Stecchino (English translation link here) and it’s an Arduino-based physical balancing game that aims to be intuitive to use and play for all ages. Using the Stecchino (‘toothpick’ in Italian) consists of balancing the device on your hand and trying to keep it upright for as long as possible. The LED strip fills up as time passes, and it keeps records of high scores. It was specifically designed to be instantly understood and simple to use by people of all ages, and we think it has succeeded in this brilliantly.

To sense orientation and movement, Stecchino uses an MPU-6050 gyro and accelerometer board. An RGB LED strip gives feedback, and it includes a small li-po cell and charger board for easy recharging via USB. The enclosure is made from a few layers of laser-cut and laser-engraved material that also holds the components in place. The WS2828B WS2812B LED strip used is technically a 5 V unit, but [pepelepoisson] found that feeding them direct from the 3.7 V cell works just fine; it’s not until the cell drops to about three volts that things start to glitch out. All source code and design files are on GitHub.

Games are great, and the wonderful options available to people today allow for all kinds of interesting experimentation like a blind version of tag, or putting new twists on old classics like testing speed instead of strength.