Ah, the humble Commodore 1530 Datasette drive. It never enjoyed much popularity in the USA, but it was the standard for quite some time in Europe. [DerSchatten13] still uses and loves his 1530. When a co-worker showed him some 7-segment bubble LEDs, he knew what he had to do. Thus the 1530 digital counter (translated) was born.
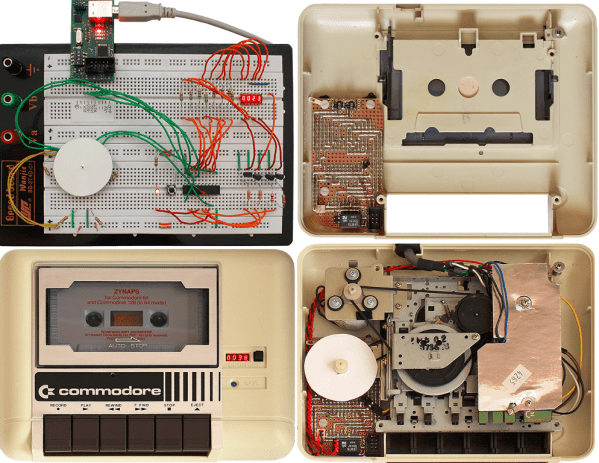
[DerSchatten13] started out by building his design on a breadboard. He used every I/O pin on an ATtiny2313 to implement his circuit. Tape motion is detected by a home-made rotary encoder connected to the original mechanical counter’s belt drive. To keep the pin count down, [DerSchatten13] multiplexed the LEDs on the display.
Now came the hard part, tearing into the 1530 and removing the mechanical counter. [DerSchatten13] glued in some standoffs to hold the new PCB. After rebuilding the circuit on a piece of perfboard, he installed the new parts. The final result looks great on the inside. From the outside, one would be hard pressed to tell the digital counter wasn’t original equipment.
Operation of the digital counter is identical to the analog unit – with one exception. The clear button now serves double duty. Pressing and holding it saves the current count. Save mode is indicated by turning on the decimal point. If the user rewinds the tape, the counter will stop the motor when the saved count is reached. Cueing up that saved program just got a heck of a lot easier!
Continue reading “Commodore 1530 Datasette Gets A Digital Counter”
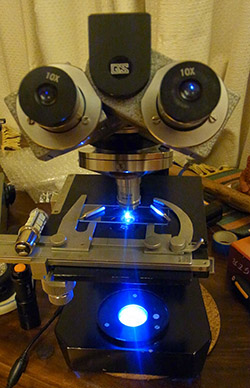 We’re not quite sure where [Andy] hangs out, but he recently found a pile of broken microscopes in a dumpster. They’re old and obsolete microscopes made for biological specimens and not inspecting surface mount devices and electronic components, but the quality of the optics is outstanding and hey, free microscope.