Liquid (Reversibly) Solidifies At Room Temperature, Gets Used For 3D Prints

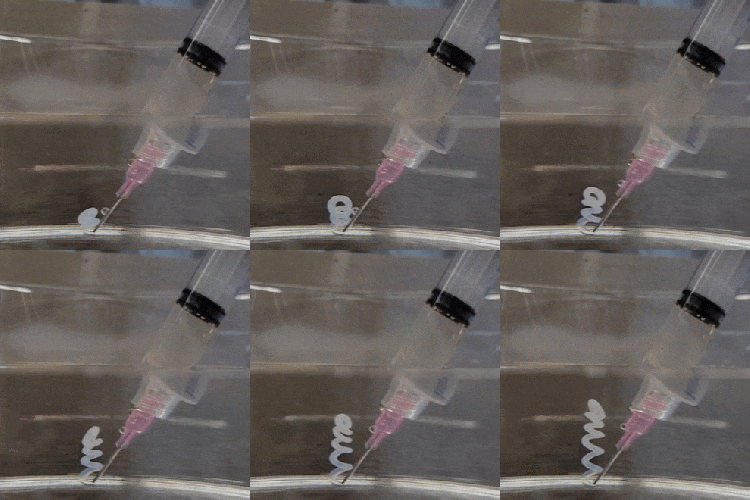
Researchers demonstrate sustainable 3D printing by using poly(N-isopropylacrylamide) solutions (PNIPAM), which speedily and reliably turn solid by undergoing a rapid phase change when in a salt solution.

This property has been used to 3D print objects by using a syringe tip as if it were a nozzle in a filament-based printer. As long as the liquid is being printed into contact with a salt solution, the result is a polymer that solidifies upon leaving the syringe.

What’s also interesting is that the process by which the PNIPAM-based solutions solidify is entirely reversible. Researchers demonstrate printing, breaking down, then re-printing, which is an awfully neat trick. Finally, by mixing different additives in with PNIPAM, one can obtain different properties in the final product. For example, researchers demonstrate making conductive prints by adding carbon nanotubes.

While we’ve seen the concept of printing with liquids by extruding them into a gel bath or similar approach, we haven’t seen a process that prides itself on being so reversible before. The research paper with all the details is available here, so check it out for all the details.

Helium Recovery System Saves Costs

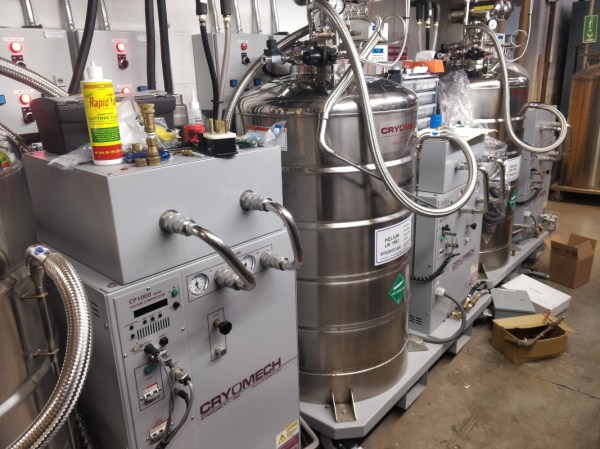
Helium is the most common element in the universe besides hydrogen, but despite this universal abundance it is surprisingly difficult to come across on Earth. Part of the problem is that it is non-renewable, so unless it is specifically captured during mining its low density means that it simply escapes the atmosphere. For that reason [Meow] maintains a helium recovery system for a lab which is detailed in this build.

The purpose of the system is to supply a refrigerant to other projects in the lab. Liquid helium is around 4 Kelvin and is useful across a wide variety of lab tests, but it is extremely expensive to come across. [Meow]’s recovery system is given gaseous helium recovered from these tests, and the equipment turns it back into extremely cold liquid helium in a closed-cycle process. The post outlines the system as a whole plus goes over some troubleshooting that they recently had to do, and shows off a lot of the specialized tools needed as well.

Low-weight gasses like these can be particularly difficult to deal with as well because their small atomic size means they can escape fittings, plumbing, and equipment quite easily compared to other gasses. As a result, this equipment is very specialized and worth a look. For a less lab-based helium project, though, head on over to this helium-filled guitar instead.

Tube Tumbler Provides The Perfect Culture

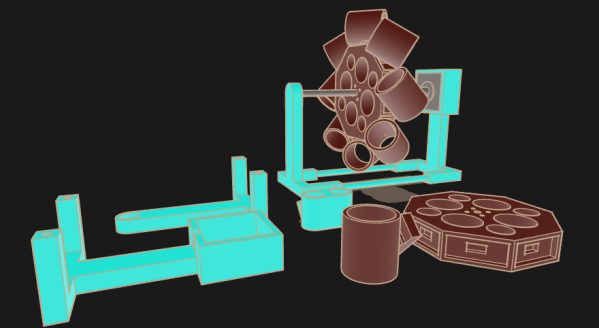
We’ve all had to shake jars of nail polish, model paint, or cell cultures. Mixing paint is easy – but bacteria and cells need to be agitated for hours.  Happily, laboratory tube tumblers automate this for us. The swishing action is handled with rotation. The vials are mounted at angles around a wheel. The angular offset means the tubes are inclined as they rise, and declined as they fall. This causes the liquid in the tube to slosh from one side to the other as the wheel rotates.  [Sebastian S. Cocioba] aka [ATinyGreenCell] released his plans through Tinkercad and GitHub, and with a name like Sir Tumbalot, we know he must be cultured indeed.

Grab your monocles. Version 2 features a driven wheel lined with magnets to attach tube adapters, and he’s modeled 50mL and twin 15mL tube holders. The attachment points look like a simple beveled rectangle with a magnet pocket, so if you’re feeling vigorous for vials, you can whip up custom sockets and tumble any darn thing. A Trinamic StealthChop chip on a custom PCB controls the pancake stepper, and the whole shebang should cost less than $50USD. We’re wondering what other purposes this modular design could have, like the smallest rock tumbler or resin print rinser.

Making lab equipment is phenomenal for saving money for things that just spin up to a biotech lab.

Continue reading “Tube Tumbler Provides The Perfect Culture”

Liquid Lite Brite Robot

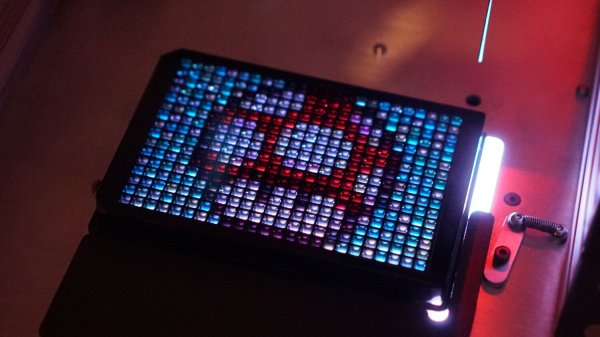
Liquid handling workstations are commonly used in drug development, and look like small CNC machines with droppers on the ends which can dispense liquid into any container in a grid array. They are also extraordinarily expensive, as is most specialty medical research equipment. This liquid handling workstation doesn’t create novel drugs, though, it creates art, and performs similar functions to its professional counterparts at a much lower cost in exchange for a lot of calibration and math.

The art is created by pumping a small amount of CMYK-colored liquids into a 24×16 grid, with each space in the grid able to hold a small amount of the colored liquid. The result looks similar to a Lite-Brite using liquids instead of small pieces of plastic. The creator [Zach Frew] created the robot essentially from scratch using an array of 3D printers, waterjets, and CNC machines. He was able to use less expensive parts, compared to medical-grade equipment, by using servo-controlled valves and peristaltic pumps, but makes up for their inaccuracies with some detailed math and calibration.

The results of the project are striking, especially when considering that a lot of hurdles needed to be cleared to get this kind of quality, including some physical limitations on the way that the liquids behave in the first place. It’s worth checking out not just for the art but for the amount of detail involved as well. And, for those still looking to scratch the 90s nostalgia itch, there are plenty of other projects using the Lite Brite as inspiration.

Thanks to [Thane Hunt] for the tip!

Extreme Pi Overclocking With Mineral Oil

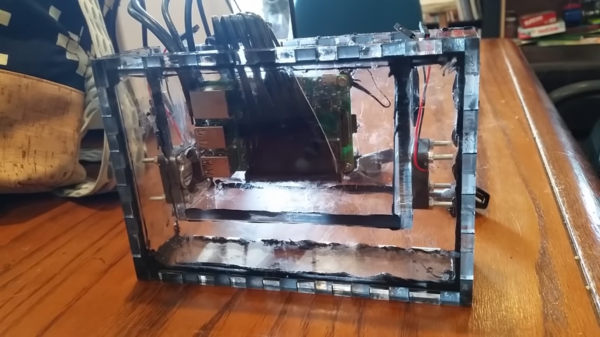
Liquid cooling is a popular way to get a bit of extra performance out of your computer. Usually this is done in desktops, where a special heat sink with copper tubing is glued to the CPU, and the copper tubes are plumbed to a radiator. If you want dive deeper into the world of liquid cooling, you can alternatively submerge your entire computer in a bath of mineral oil like [Timm] has done.

The computer in question here is a Raspberry Pi, and it’s being housed in a purpose-built laser cut acrylic case full of mineral oil. As a SoC, it’s easier to submerge the entire computer than it is to get a tiny liquid-cooled heat sink for the processor. While we’ve seen other builds like this before, [Timm] has taken a different approach to accessing the GPIO, USB, and other connectors through the oil bath. The ports are desoldered from the board and a purpose-built header is soldered on. From there, the wires can be routed out of the liquid and sealed off.

One other detail used here that  we haven’t seen in builds like this before was the practice of “rounding” the flat ribbon cable typically used for GPIO. Back in the days of IDE cables, it was common to cut the individual wires apart and re-bundle them into a cylindrical shape. Now that SATA is more popular this practice has been largely forgotten, but in this build [Timm] uses it to improve the mineral oil circulation and make the build easier to manage.

Continue reading “Extreme Pi Overclocking With Mineral Oil”

Wield The Power Of Molten Metal

[TheBackyardScientist] at it again with another super villain-esque demonstration of gadgetry: a liquid metal squirt gun.

The squirt gun has a compressed air tank like most others — more on that later — but to fire its primary ammunition, a nozzle that connects directly to an air compressor is needed. Again, like most guns of this nature, air is forced into the gun’s reservoir, displacing the pewter and expelling it out the gun’s barrel. Yes, pewter.

Working around the heat tolerances of thread seal tape, pewter has a low enough melting point that an airtight system is preserved — plus it’s really cool to fire a stream of liquid metal. The ammunition is made from pewter ware melted down and cast into pucks. These pucks are stacked into the gun’s magazine, melted with a propane torch and carefully loaded into the gun.

The built-in compressed air tank lacks the oomph to push out the pewter — hence the air compressor, but any lighter liquids or condiments are fair game for rapid-fire exercises. Yes, condiments.

Continue reading “Wield The Power Of Molten Metal”

This Way To The Ingress: Keeping Stuff Dry And Clean With IP And NEMA

When designing a piece of hardware that has even the faintest chance of being exposed to the elements, it’s best to repeat this mantra: water finds a way. No matter how much you try to shield a project from rain, splashing, or even just humid air, if you haven’t taken precautions to seal your enclosure, I’ll bet you find evidence of water when you open it up. Water always wins, and while that might not be a death knell for your project, it’s probably not going to help. And water isn’t the only problem that outdoor or rough-service installations face. Particle intrusion can be a real killer too, especially in an environment where dust can be conductive.

There’s plenty you can do to prevent uninvited liquid or particulate guests to your outdoor party, but it tends to be easier to prevent the problem at design time than to fix it after the hardware is fielded. So to help you with your design, here’s a quick rundown of some standards for protection of enclosures from unwanted ingress.

Continue reading “This Way To The Ingress: Keeping Stuff Dry And Clean With IP And NEMA”