Apple is fairly notorious for building devices that are difficult to repair, but with the right tools it’s often not completely impossible to circumvent some of their barriers. As they say, every lock has a key. [dosdude1] has wanted a specific M1 development board for a while now and has been slowly piecing together everything he needs to cobble one together, and finally got this unit running despite many roadblocks put in his way by Apple.
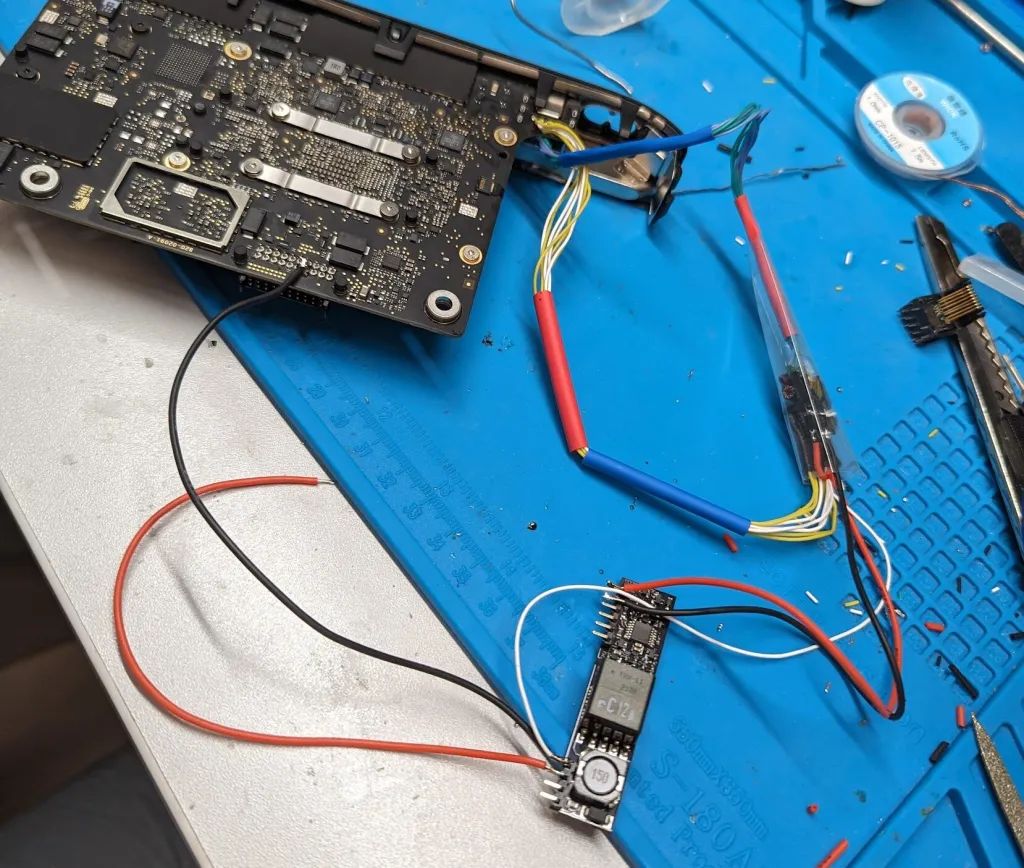
The development kit is a Developer Transition Kit or “DTK” meant for developers during Apple’s transition from Intel chips to their own in-house ARM-based M1 platform. This particular version is in a Mac Mini form factor but it has a few hurdles to clear before it powers on. First, the board was cut in a critical location that shorted out many of the PCB layers, so this had to be carefully filed down to remove the shorts. It was also missing a few tiny surface mount components and a NAND chip, but these were scavenged from other scrapped parts and assembled into a fully working machine.
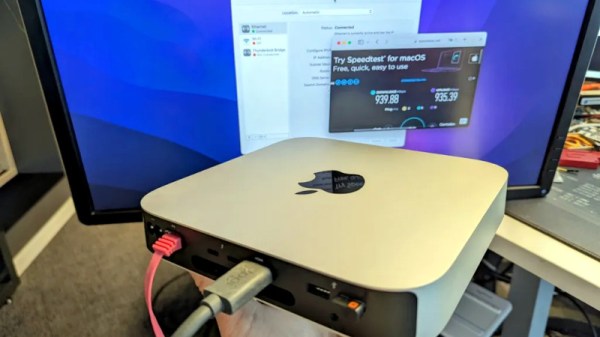
There are a number of other non-physical problems to solve here as well, too. Apple coded their NAND chips to work with specific WiFi modules so if these aren’t programmed to work together the computer will get stuck in a boot loop. But with that and a few other details out of the way [dosdude1] finally has his DTK up and running in a 2018 Mac Mini chassis, right down to the working power LEDs. We’ve seen all kinds of PCB damage before (although not often quite this intricate) and even PCBs repaired that were snapped in half.
Thanks to [CodeAsm] for the tip!