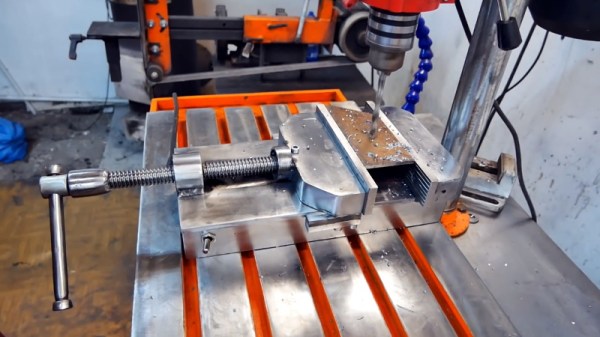
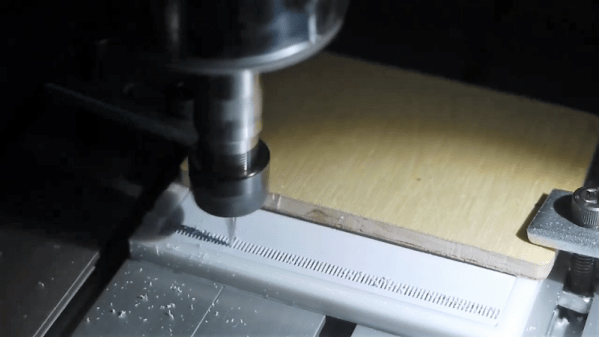
For those who might not have run into one before, a magnetic vise is used when you want to quickly anchor something to a metal surface at an arbitrary position. They’re often used to hold the workpiece down when machining, and can be a real time saver if a lot of repositioning is involved.
[Workshop From Scratch] recently wanted to put together one of these handy pieces of gear, and as we’ve come to expect from his channel, the finished product is an absolute beast. Starting with little more than scraps of metal, the video after the break takes the viewer on a fascinating journey that ends with some demonstrations of the vise in action.
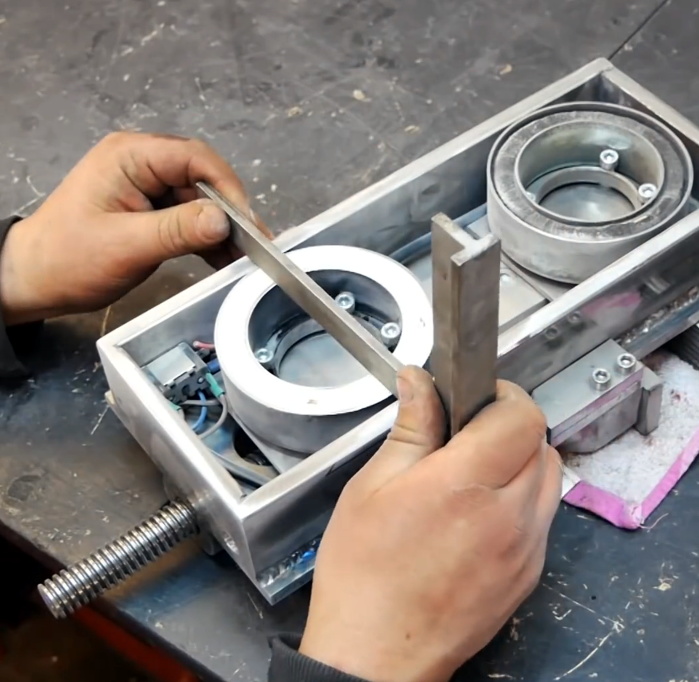 Conceptually, this build is relatively simple. Start with a vise, put a hollow base on it, and fit it with powerful electromagnets that will anchor it down once you flip the switch. Technically you could just build a magnetic base and bolt a commercially available vise onto it, but that’s not how [Workshop From Scratch] does things.
Every element of the build is done by hand, from the pattern cut into the jaws to the t-handle nut driver that gets adapted into a very slick crank. Of particular interest is how much effort is put into grinding down the surface of the electromagnets so they are perfectly flush with the base of the vise. Incidentally, these beefy electromagnets were salvaged from automotive air conditioning compressors, so you might want to add that to your junkyard shopping list.
Eagle-eyed readers might recognize the surface [Workshop From Scratch] uses the vise on as the custom drill press table he built a few months ago. These videos are not only reminders of what you can accomplish when you’ve mastered the use of a few common tools, but just how much design and thought goes into the hardware many of us take for granted.
Continue reading “Scratch Built Magnetic Vise Stays Where You Need It”

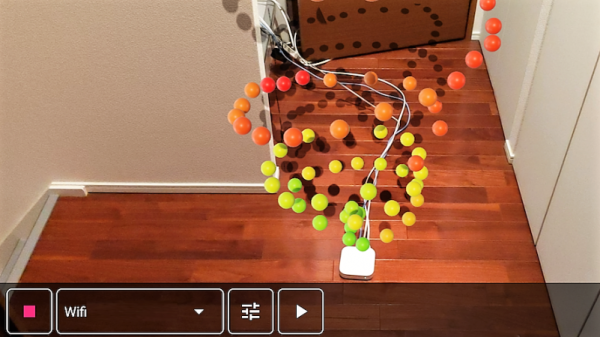
 Unwilling to go full [Geordi La Forge] to be able to visualize RF, [Ken Kawamoto] built the next best thing –


