As long-time Hackaday readers will know, there is much rubbish spouted in the world of audio about perceived tone and performance of different hi-fi components. Usually this comes from audiophiles with, we’d dare to suggest, more money than sense. But oddly there’s an arena in which the elusive tone has less of the rubbish about it and it in fact, quite important. [Jim Lill] is a musician, and like all musicians he knows that different combinations of microphones impart a different sound to the recording. But as it’s such a difficult property to quantify, he’s set out to learn all he can about where the tone comes from in a microphone.
He’s coming to this from the viewpoint of a musician rather than an engineer, but his methodology is not diminished by this. He’s putting each mic on test in front of the same speaker at the same position, and playing a standard piece of music and a tone sweep through each. He doesn’t have an audio analyser, reference speaker and microphone, or anechoic chamber, so he’s come up with a real-world standard instead. He’s comparing every mic he can find with a Shure SM57, the go-to general purpose standard in the world of microphones for as long as anyone can remember, being a 1960s development of their earlier Unidyne series. His reasoning is that while its response is not flat the sound of the SM57 is what most people are used to hearing from a microphone, so it makes sense to measure the others against its performance.
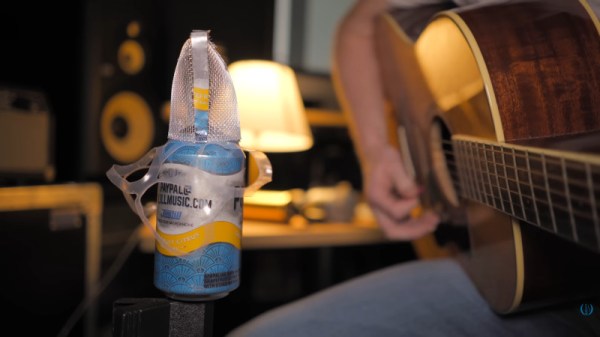
Along the way he tests a huge number of microphones including famous and expensive ones from exclusive studios and finally one he made himself by mounting a cartridge atop a soda can. You’ll have to watch the video below the break for his conclusions, we can promise it’s worth it.

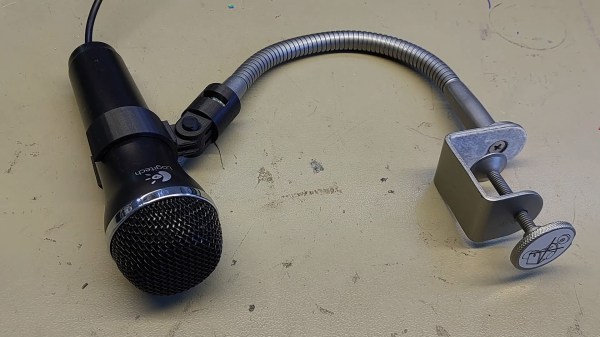
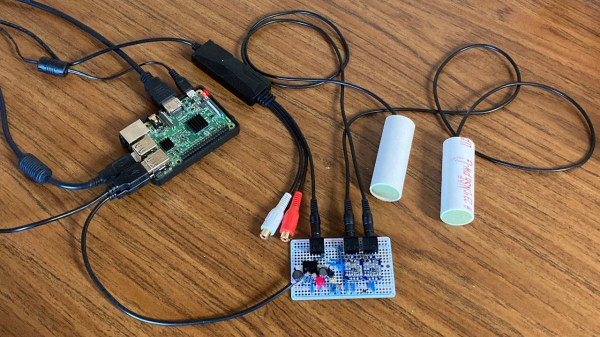
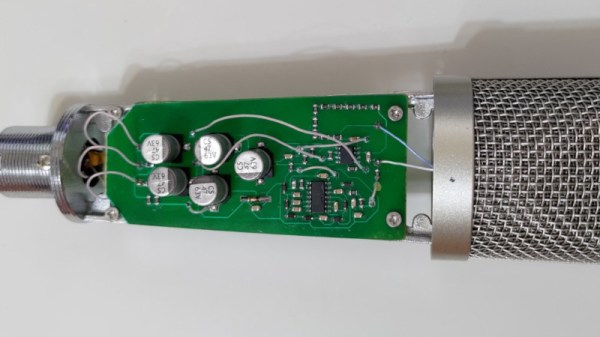
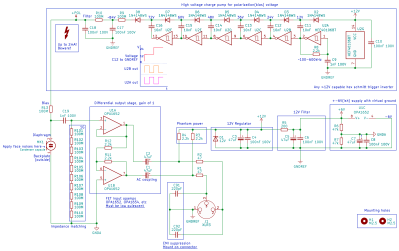 The capsule and body are off-the-shelf items — what he’s produced is the bias voltage supply and preamplifier. In both cases these are the interesting parts of a condenser microphone, so their circuit bears a second look.