Yes, You Can Put IoT On The Blockchain Using Python And The ESP8266

Last year, we saw quite a bit of media attention paid to blockchain startups. They raised money from the public, then most of them vanished without a trace (or product). Ethics and legality of their fundraising model aside, a few of the ideas they presented might be worth revisiting one day.

One idea in particular that I’ve struggled with is the synthesis of IoT and blockchain technology. Usually when presented with a product or technology, I can comprehend how and/or why someone would use it – in this case I understand neither, and it’s been nagging at me from some quiet but irrepressible corner of my mind.

The typical IoT networks I’ve seen collect data using cheap and low-power devices, and transmit it to a central service without more effort spent on security than needed (and sometimes much less). On the other hand, blockchains tend to be an expensive way to store data, require a fair amount of local storage and processing power to fully interact with them, and generally involve the careful use of public-private key encryption.

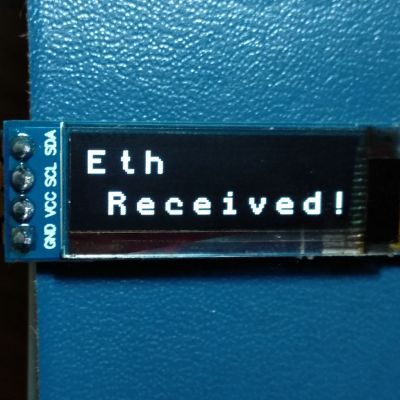
I can see some edge cases where it would be useful, for example securely setting the state of some large network of state machines – sort of like a more complex version of this system that controls a single LED via Ethereum smart contract.

What I believe isn’t important though, perhaps I just lack imagination – so lets build it anyway.

Continue reading “Yes, You Can Put IoT On The Blockchain Using Python And The ESP8266”

Building A Simple Python API For Internet Of Things Gadgets

It’s no secret that I rather enjoy connecting things to the Internet for fun and profit. One of the tricks I’ve learned along the way is to spin up simple APIs that can be used when prototyping a project. It’s easy to do, and simple to understand so I’m happy to share what has worked for me, using Web2Py as the example (with guest appearances from ESP8266 and NodeMCU).

Barring the times I’m just being silly, there are two reasons I might do this. Most commonly I’ll need to collect data from a device, typically to be stored for later analysis but occasionally to trigger some action on a server in the cloud. Less commonly, I’ll need a device to change its behavior based on instructions received via the Internet.

Etherscan is an example of an API that saves me a lot of work, letting me pull data from Ethereum using a variety of devices.

In the former case, my first option has always been to use IoT frameworks like Thingsboard or Ubidots to receive and display data. They have the advantage of being easy to use, and have rich features. They can even react to data and send instruction back to devices. In the latter case, I usually find myself using an application programming interface (API) – some service open on the Internet that my device can easily request data from, for example the weather, blockchain transactions, or new email notifications.

Occasionally, I end up with a type of data that requires processing or is not well structured for storage on these services, or else I need a device to request data that is private or that no one is presently offering. Most commonly, I need to change some parameter in a few connected devices without the trouble of finding them, opening all the cases, and reprogramming them all.

At these times it’s useful to be able to build simple, short-lived services that fill in these gaps during prototyping. Far from being a secure or consumer-ready product, we just need something we can try out to see if an idea is worth developing further. There are many valid ways to do this, but my first choice is Web2Py, a relatively easy to use open-source framework for developing web applications in Python. It supports both Python 2.7 and 3.0, although we’ll be using Python 3 today.

Continue reading “Building A Simple Python API For Internet Of Things Gadgets”

The Empire Strikes Back With The ESP8266

Like many of us, [Matthew Wentworth] is always looking for a reason to build something. So when he found a 3D model of the “DF.9” laser turret from The Empire Strikes Back intended for Star Wars board games on Thingiverse, he decided it was a perfect excuse opportunity to not only try his hand at remixing an existing 3D design, but adding electronics to it to create something interactive.

As the model was originally intended for a board game, it was obviously quite small. So the first order of business was scaling everything up to twice the original dimensions. As [Matthew] notes, the fact that it still looks so good when expanded by such a large degree is a credit to how detailed the original model is. Once blown up to more useful proportions, he modified the head of the turret as well as the barrel to accept the electronics he planned on grafting into the model.

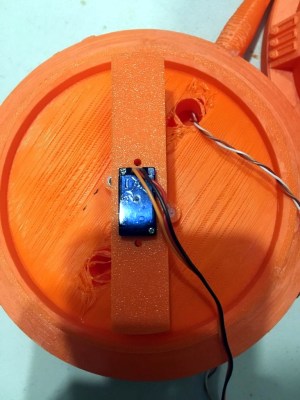
He created a mount for a standard nine gram servo inside the head of the turret which allows it to rotate, and the barrel got an LED stuck in the end. Both of which are controlled with a NodeMCU ESP8266 development board, allowing [Matthew] to control the direction and intensity of the pew-pew over WiFi. He mentions that in the future he would like to add sound effects that are synchronized to the turret rotation and LED blinking.

For the software side of the project, he used Blynk to quickly build a smartphone interface for the turret. This is the first time he had used Blynk, and reports that outside of a little trial and error, it was some of the easiest code he’s ever written for the Arduino. This is a sentiment we’ve been seeing a lot of recently towards Blynk, and it’s interesting to see how often it shows up in ESP8266 projects now.

Looking ahead [Matthew] says he wants to paint and detail the turret, as the bright orange color scheme probably wouldn’t do terribly well on Hoth. If he can manage the time, he’d also like to add it to the long list of OpenCV-powered turrets that hackers love harassing their friends and family with.

Continue reading “The Empire Strikes Back With The ESP8266”

ESP8266 AC Controller Shows Whats Possible

People often get the impression that home built hardware is destined to have a certain amateurish look or feel to it. It’s as though just because you didn’t buy it in a store, it will look cheap or thrown together. While it’s true a hacked together device could look like it was built from the parts bin (and to be fair, sometimes it is), there are plenty of examples of DIY hardware that could give commercial offerings a run for their money.

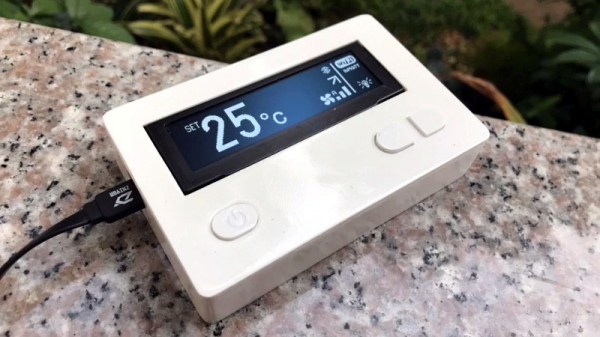
A case in point is this fantastic ESP8266 air conditioner controller created by [Sitinut Waisara] (Google Translate). Between the simple yet elegant 3D printed enclosure to the very slick user interface on its OLED screen, this project could easily pass as a commercial device. In fact, we’ve seen commercial offerings that didn’t look half this good, let alone offer the same features for what this cost in components and printer filament. It’s a perfect example of what the modern hacker or maker is capable of with the wide array of tools and components currently available to us.

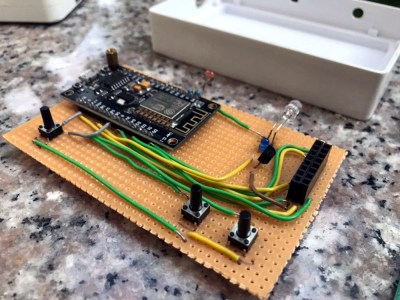
What’s perhaps the most impressive about this project, especially given how good it looks on the outside, is how little there really is on the inside. Beyond the NodeMCU board and SSD1332 OLED display, the only components inside the device are the three tactile buttons, a photoresistor so it can dim the display’s brightness based on ambient light level, an IR LED so it can send commands to the AC unit, and a handful of passives. The hardware side of this design is so simple that [Sitinut] was able to put the whole thing together on a scrap of perfboard. Not that you’d be able to tell when it gets installed into the 3D printed wall-mount enclosure, complete with printed button caps.

While the hardware side of the project might be rather light, the software is anything but. [Sitinut] really went all-in writing his code for the ESP, adding in the little features like the automatic screen dimming and pulling the current time from NTP that often get overlooked in our rush to get a project out the door. He even included a whole collection of icons to display on the OLED screen, which goes a long way towards selling that professional look. But his effort wasn’t limited to cosmetics or clever features, there was also plenty of work put into decoding the IR signals used to control the AC unit and getting all the features and functions plugged into MQTT.

We’ve seen a number of projects that aimed at dragging an existing HVAC system kicking and screaming onto the “Internet of Things”, some considerably less complex than others. But few have had the level of polish that [Sitinut] has put into his controller, so we take our hats off to him.

Continue reading “ESP8266 AC Controller Shows Whats Possible”

Compiling NodeMCU For The ESP32 With Support For Public-Private Key Encryption

When I began programming microcontrollers in 2003, I had picked up the Atmel STK-500 and learned assembler for their ATtiny and ATmega lines. At the time I thought it was great – the emulator and development boards were good, and I could add a microcontroller permanently to a project for a dollar. Then the ESP8266 came out.

I was pretty blown away by its features, switched platforms, except for timing-sensitive applications, and it’s been my chip of choice for a few years. A short while ago, a friend gave me an ESP32, the much faster, dual core version of the ESP8266. As I rarely used much of the computing power on the ESP8266, none of the features looked like game changers, and it remained a ‘desk ornament’ for a while.

About seven weeks ago, support for the libSodium Elliptic Curve Cryptography library was added. Cryptography is not the strongest feature of IoT devices, and some of the methods I’ve used on the ESP8266 were less than ideal. Being able to more easily perform public-private key encryption would be enough for me to consider switching hardware for some projects.

However, my preferred automated build tool for NodeMCU wasn’t available on the ESP32 yet. Compiling the firmware was required – this turned out to be a surprisingly user-friendly experience, so I thought I’d share it with you. If I had known it would be so quick, this chip wouldn’t have sat on my desk unused quite so long!  Continue reading “Compiling NodeMCU For The ESP32 With Support For Public-Private Key Encryption”

Reflex Trainer Puts Athletes To The Test

Being a top athlete in this modern age is a full-time job. No longer do athletes simply practice at their nominated sport of choice. They undergo strength training, full nutritional programs, cardio, and even reflex training.

Reflex training involves a series of nodes that an athlete must identify when lit up, and touch them to switch them off. By triggering them in a fast sequence, the athlete must work hard to both identify the lit node and then move to switch it off. TrainerLights is just such a system, built around the NodeMCU platform.

The system consists of a minimum of four lights – one acting as a server, the others as nodes. The lights each contain a nodeMCU board which communicates over WiFi, while the server has an additional board – acting as a WiFi hotspot that controls the system.

With the lights switched on, the coach connects to the server with a smartphone, and configures the lighting sequence and timings depending on the desired excercise regime. The server then communicates with the lighting nodes, which light their LEDs  at specified intervals. The athlete must clear the lights by swiping at the nodes, which detect the athlete’s hand via an ultrasonic proximity sensor. The sensitivity is configurable, to allow the system to trigger from a distant wave or a direct touch from the athlete. This allows a variety of training uses, from tennis to taekwondo.

With a 3D printed case and parts readily available from any good maker supplier, it’s a project you could tackle in a weekend to add to your own training regime.

We see plenty of athletic hacks in these parts – like this line-following robot for training sprinters. Video after the break.

[Thanks to Baldpower for the tip!]

Continue reading “Reflex Trainer Puts Athletes To The Test”

Weather Station Is A Tutorial In Low Power Design

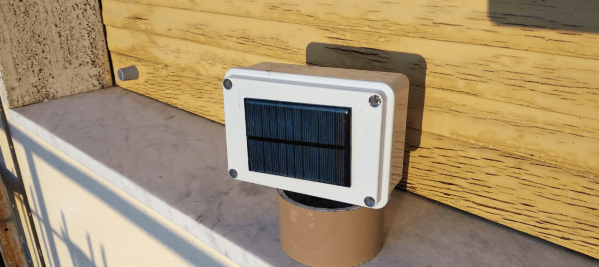
Building your own weather station is a fun project in itself, but building it to be self-sufficient and off-grid adds another set of challenges to the mix. You’ll need a battery and a solar panel to power the station, which means adding at least a regulator and charge controller to your build. If the panel and battery are small, you’ll also need to make some power-saving tweaks to the code as well. (Google Translate from Italian) The tricks that [Danilo Larizza] uses in his build are useful for more than just weather stations though, they’ll be perfect for anyone trying to optimize their off-grid projects for battery and solar panel size.

When it comes to power conservation, the low-hanging fruit is plucked first. [Danilo] set the measurement intervals to as long as possible and put the microcontroller (a NodeMCU) to sleep in between. Removing the power from the sensors when the microcontroller was asleep was another easy step, but the device was still crashing overnight. Then he turned to a hardware solution and added a more efficient battery charger to the setup, which saved even more power. This is all the more impressive because the station communicates via WiFi which is notoriously difficult to run in low-power applications.

Besides the low power optimizations, the weather station itself is interesting for its relative simplicity. It could be built with things most of us have knocking around. Best of all, [Danilo] published the source code on his site, so most of the hard work has been done already. If you’re thinking he seems a little familiar, it’s because we’ve featured some of his projects before, like his cheap WiFi extender antenna and his homemade hybrid tube amplifier.