Kicad Autorouting Made Easy

One of the most laborious tasks in PCB layout is the routing. Autorouting isn’t always perfect, but it is nice to have the option, even if you only use it to get started and then hand-tune the resulting board. Unfortunately, recent versions of Kicad have dropped support for autorouting. You can, however, still use Freerouting and the video from [Mr. T] below shows you how to get started.

There are three ways to get the autorouting support. You can install Java and a plugin, you can isntall using a ZIP file, or you can simply export a Specctra DSN file and use Freerouting as a standalone program. Then you import the output DSN file, and you are done.

Continue reading “Kicad Autorouting Made Easy”

Photoplotting PCBs With A 3D Printer

Do you ever wonder why your PCB maker uses Gerber files? It doesn’t have to do with baby food. Gerber was the company that introduced photoplotting. Early machines used a xenon bulb to project shapes from an aperture to plot on a piece of film. You can then use that film for photolithography which has a lot of uses, including making printed circuit boards. [Wil Straver] decided to make his own photoplotter using a 3D printer in two dimensions and a UV LED. You can see the results in the video below.

A small 3D printed assembly holds a circuit board, the LED, and a magnet to hold it all to the 3D printer. Of course, an LED is a big large for a PCB trace, so he creates a 0.3 mm aperture by printing a mold and using it to cast epoxy to make the part that contacts the PCB film.

Continue reading “Photoplotting PCBs With A 3D Printer”

Printing Antennas On Circuit Boards

Yagi-Uda antennas, or simply “Yagis”, are directional antennas that focus radio waves to increase gain, meaning that the radio waves can travel further in that direction for a given transmitter power. Anyone might recognize an old TV antenna on a roof that uses this type of antenna, but they can be used to increase the gain of an antenna at any frequency. This one is designed to operate within the frequencies allotted to WiFi and as a result is so small that the entire antenna can be printed directly on a PCB.

The antenna consists of what is effectively a dipole antenna, sandwiched in between a reflector and three directors. The reflector and directors are passive elements in that they interact with the radio wave to focus it in a specific direction, but the only thing actually powered is the dipole in the middle. It looks almost like a short circuit at first but thanks to the high frequencies involved in this band, will still function like any other dipole antenna would. [IMSAI Guy], who created the video linked above which goes over these details also analyzed the performance of this antenna and found it to be fairly impressive as a WiFi antenna, but he did make a few changes to the board for some other minor improvements in performance.

The creator of these antennas, [WA5VJB] aka [Kent Britain] is an antenna builder based in Texas who has developed a few unique styles of antennas produced in non-traditional ways. Besides this small Yagi, there are other microwave antennas available for direction-finding, some wide-band antennas, and log-periodic antennas that look similar to Yagi antennas but are fundamentally different designs. But if you’re looking to simply extend your home’s WiFi range you might not need any of these, as Yagi antennas for home routers can be a lot simpler than you ever imagined.

Continue reading “Printing Antennas On Circuit Boards”

Foldable PCB Becomes Tiny Rover

Typically, when you’re putting electronics in a robot, you install the various controller PCBs into the robot’s chassis. But what if the PCB itself was the chassis? [Carl Bugeja’s] latest design explores just that idea.

Yes, [Carl] decided to build a tiny robotic rover out of a foldable PCB. This choice was made as using a flexible foldable PCB would allow for the creation of a 3D chassis without the need for bulky connectors joining several boards together. A key part of the design was allowing the structure to unfold easily for serviceability’s sake. To that end, the structure is held together by the bolts that also act as the axles for the rover’s wheels. Even more brilliantly, the wheels are turned by motors built into the very PCB itself. Control is via a PlayStation controller, connected wirelessly to command the robot.

The little bot is surprisingly capable, especially when juiced up with a twin-cell lithium battery. It’s tiny, with minimal ground clearance, so it’s not the best at driving on rough surfaces. Having all-wheel-drive helps, though.

[Carl] specifically credits Altium Designer for making the design possible, thanks to its advanced 3D visualization tools that support foldable PCBs. Video after the break.

Continue reading “Foldable PCB Becomes Tiny Rover”

Single Flex PCB Folds Into A Four-Wheel Rover, Complete With Motors

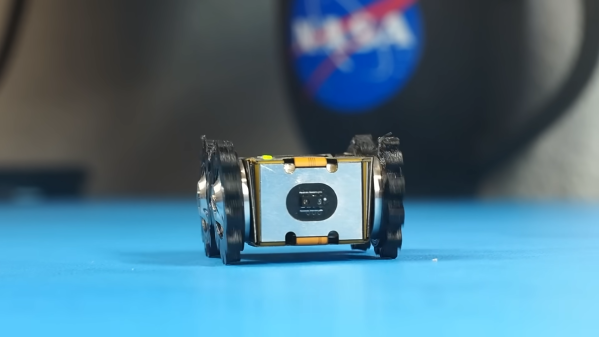
You’ve got to hand it to [Carl Bugeja] — he comes up with some of the most interesting electromechanical designs we’ve seen. His latest project is right up there, too: a single PCB that folds up into a four-wheel motorized rover.

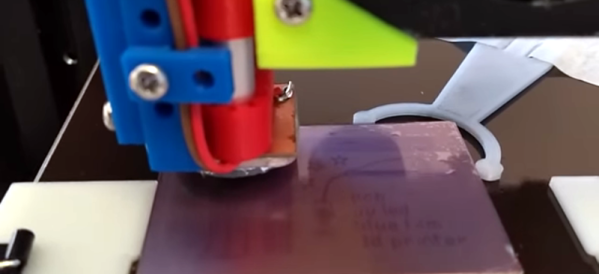
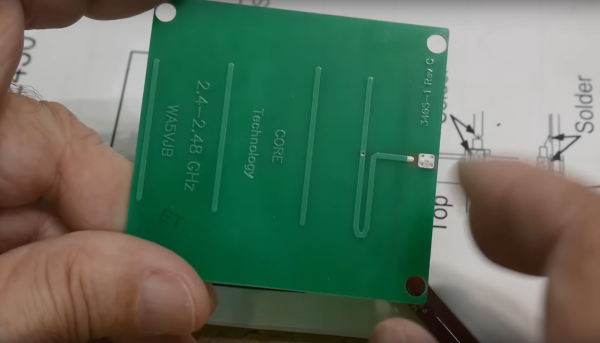
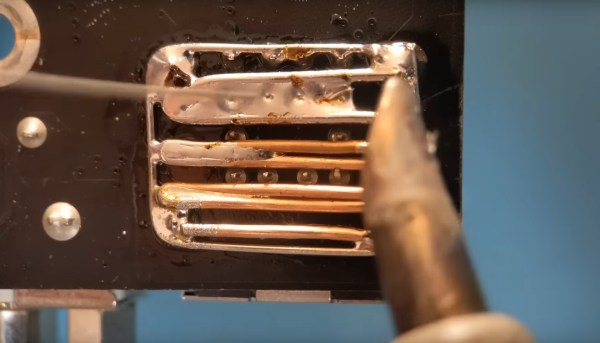
The key to [Carl]’s design lies with his PCB brushless motors, which he has been refining since we first spotted them back in 2018. The idea is to use traces on the PCB for the stator coils to drive a 3D printed rotor containing tiny magnets. They work surprisingly well, even if they don’t generate a huge amount of torque. [Carl]’s flexible PCB design, which incorporates metal stiffeners, is a bit like an unfolded cardboard box, with two pairs of motor coils on each of the side panels. This leaves the other surfaces available for all the electronics, with includes a PIC, a driver chip, and a Hall sensor for each motor, an IMU and proximity sensor for navigation, and an ESP32 to run the show.

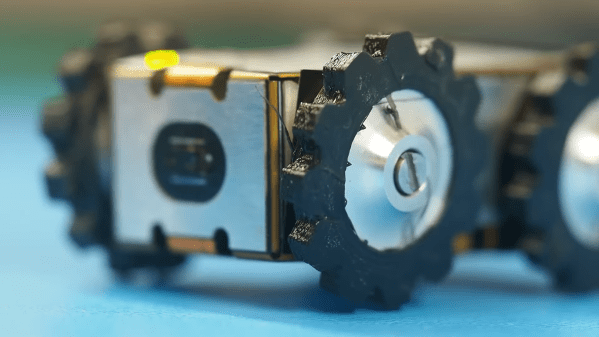
With machined aluminum rotors and TPU tires mounted to the folded-up chassis, it was off to the races, albeit slowly. The lack of torque from the motors and the light weight of the rover, along with some unwanted friction due to ill-fitting joints, added up to slow progress, especially on anything other than a dead flat surface. But with some tweaking, [Carl] was able to get the buggy working well enough to call this one a win. Check out the build and testing in the video below.

Knowing [Carl], this isn’t the last we’ll see of the foldable rover. After all, he stuck with his two-wheel PCB motor design and eventually got that running pretty well. We’ll be keeping an eye out for progress on this one.

Continue reading “Single Flex PCB Folds Into A Four-Wheel Rover, Complete With Motors”

Finessing A Soldering Iron To Remove Large Connectors

One of the first tools that is added to a toolbox when working on electronics, perhaps besides a multimeter, is a soldering iron. From there, soldering tools can be added as needed such as a hot air gun, reflow oven, soldering gun, or desoldering pump. But often a soldering iron is all that’s needed even for some specialized tasks as [Mr SolderFix] demonstrates.

This specific technique involves removing a large connector from a PCB. Typically either a heat gun would be used, which might damage the PCB, or a tedious process involving a desoldering tool or braided wick might be tried. But with just a soldering iron, a few pieces of wire can be soldered around each of the pins to create a massive solder blob which connects all the pins of the connector to this wire. With everything connected to solder and wire, the soldering iron is simply pressed into this amalgamation and the connector will fall right out of the board, and the wire can simply be dropped away from the PCB along with most of the solder.

There is some cleanup work to do afterwards, especially removing excess solder in the holes in the PCB, but it’s nothing a little wick and effort can’t take care of. Compared to other methods which might require specialized tools or a lot more time, this is quite the technique to add to one’s soldering repertoire. For some more advanced desoldering techniques, take a look at this method for saving PCBs from some thermal stresses.

Continue reading “Finessing A Soldering Iron To Remove Large Connectors”

Classic Gaming With FPGA And ATX

Playing classic games, whether they are games from the golden age of arcades or simply games from consoles that are long out of production, tends to exist on a spectrum. At one end is grabbing a game’s ROM file, finding an emulator, and kludging together some controls on a keyboard and mouse with your average PC. At the other is meticulously restoring classic hardware for the “true” feel of what the game would have felt like when it was new. Towards the latter end is emulating the hardware with an FPGA which the open-source MiSTer project attempts to do. This build, though, adds ATX capabilities for the retrocomputing platform. Continue reading “Classic Gaming With FPGA And ATX”