Turning The Pi Zero Into A USB Gadget

The Raspberry Pi Zero is limited, or so everyone says, and everyone is trying to cram a USB hub and WiFi adapter on this tiny, tiny board. One thing a lot of people haven’t realized is that the Raspberry Pi Zero comes with a USB OTG port, meaning it can function as a USB device rather than a USB host. This means the Raspi can become a serial device with just a USB cable, an Ethernet device, MIDI device, camera, or just about anything else you can plug into a USB port. Adafruit has your back with a tutorial for using the USB OTG port as a serial and Ethernet interface, and the possible applications are extremely interesting.

The only requirement for using the USB OTG port for device applications is an update to the kernel. This is easily installed by dumping a few files on an SD card and a employing bit of command line wizardry. The simplest example is setting up the Pi Zero as a USB serial device, allowing anyone to log into a serial console on the Pi with just a USB cable.

A slightly more interesting application is setting up the Pi as an Ethernet gadget. This effectively tunnels all the networking on the Pi Zero through a USB cable and a separate computer. The instructions are extremely OS-specific, but the end result is the same: you can apt-get on a Pi Zero to your heart’s desire with a new kernel loaded onto the SD card and a USB cable.

This experimentation is just scratching the surface of what is possible with the OTG port on the Pi Zero. MIDI devices are easy, and with a ton of GPIOs, the Pi Zero itself could become a very interesting musical instrument. Want the Pi Zero to be a storage device? That’s easy too. The USB Gadget will end up being one of the most exciting uses for the Pi Zero, and we can’t wait to see what everyone will come up with next.

Let Alexa Control Your Life; Guide To Voice-Enable Everything

Let’s face it, automation doesn’t feel quite as futuristic unless you can just say what you want out loud and have the machines flawlessly obey. That is totally possible now — and on the cheap. Well, cheap as far as money goes. It can be an expensive learning curve to get it all working. This will help. [Lindo St. Angel] has put together a guide to navigate voice control of hardware using Amazon’s Alexa SDK.

We previously reported that Amazon’s AI had escaped its hardware prison in the form of the Alexa Skills Kit. Yes, calling it the Alexa SDK above is wrong it’s actually the ASK but nobody knows what that acronym is while most recognize the gist of an SDK. It gives you the hooks and the documentation necessary to leverage the functionality in your own applications. The core functionality of Alexa is voice recognition. Even so, it’s still a tall hill to climb.

[Lindo] has broken down the problem into a very manageable example. The Amazon Voice Service (part of ASK) is used for voice recognition and control. Amazon’s Lambda service connects the ASK to your piece of hardware; in this case he’s using a Raspberry Pi as the server. The final step is to connect your hardware to the Pi. [Lindo] is interfacing a keypad-based home automation system with the Pi but the sky’s the limit at this point.

With all the authentication and connectivity laid bare, this is a lot more approachable. The question is no longer can you connect everything to voice control. The question becomes should you give control of everything over to one single online service?

Here Comes Santa Claws

Liberty Games in the UK was looking for a fun way to support charity for the holidays, and we think they succeeded. They decided to set up an arcade crane machine to run over the internet, with each type of toy snagged earning  a donation. Snag a bear, and they will donate £5 to St Mungos, a UK charity that works with homeless or at risk people. Snag one of the rarer Santa toys, and they will donate £20. It’s a great cause, and a nice hack. Behind the scenes, the Internet side of things runs on a Raspberry Pi connected to a PiRack and a couple of PiFace digital interface cards that are wired into the electronics of the crane machine so they could control the buttons on the machine from a Web interface. Unfortunately, it didn’t seem to be running when we tried it, but hopefully someone will give the machine a swift kick shortly to get it going until the Hackaday traffic invariably brings it down again.

One of the interesting thing that they discovered while working on these hacks: they have a pay-out ratio that is determined by the strength of the grabbing arm. The owner can tweak this so that the arm does not grab very firmly, which means a dropped bear. Want to torture your friends with hopes of snagging the best stuffed animals?. Follow the example of this claw machine build all from parts on hand.

POV Globe Display Spins Up Full Color Tupac

Persistence of vision projects were once all the rage, judging by a quick review of the literature here on Hackaday. They’ve tapered off a bit lately, but this impressive full-color globe display might just kick-start some new POV projects.

Built as a final project for an EE course, [Evan] and [Kyle]’s project is more about the control electronics and programming than the mechanical end of the build. Still, spinning a 12″ ring of 1/4″ thick acrylic with a strip of APA102 LEDs glued to the edge takes some thoughtful engineering. While the build appears sturdy, [Evan] does admit to a bit of wobble under full steam, which was addressed by adding some weight to the rig. We wonder if mounting half the LEDs on each side of the ring to balance the forces wouldn’t have worked better. True, it would have complicated the coding for the display, but maybe that would have been good for extra points. In any case, the display turned out well and the quality of the images is great. And as an aside: how awesome is it that we live at a time when you can order a six-circuit slip-ring for a project like this for less than $20?

It’s the end of the semester and we love seeing the final projects that have just made it across the finish line. This globe is one, yesterday we saw a voice-controlled digital eye exam, and if you have or know of a final project, don’t forget send us the link!

If POV globes are your thing, be sure to set the Hackaday WABAC machine a few years and check out this Death Star design from 2012 or this globe from 2010.

Raspberry Pi Laser Beam Profiler

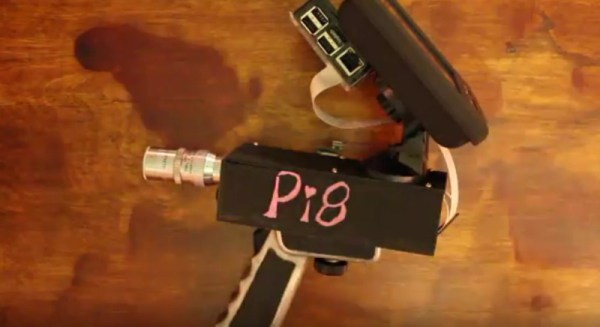
[Anthony] at UCLA needed to verify the shape of a laser beam. Commercial units for this, as you would expect, are expensive. But a Raspberry Pi with a Pi Noir camera easily handles the task. Not only is the use of the Pi cool but so is the task – they are using lasers to cool molecules to study quantum effects. The Pi camera without the IR filter captures a wide bandwidth making it suitable for use with non-visible lasers. [Anthony] captures the beam along two axes and plots both curves on the LCD touchscreen. That data, based on the pictures, is also available on a host PC. All this in a super compact package with a 7″ touch screen display.

One reason I find this fascinating is I did something similar 1977 at the University of Rochester Laboratory for Laser Energetics. My project was measuring the energy cross-section of a laser beam. The research goal of the Laboratory was the study of inertial confinement laser fusion. While [Anthony] uses an entire camera my project was limited to a 1 dimensional array of charge coupled devices (CCD). The output went to a Tektronix storage terminal and was printed on thermal paper for reference. He uses Python running on the target system. My work used a Z80 development system the size of a tower PC to write my program in assembly language which was then executed on a single board computer. We’ve come a long way. My code is long gone but you can get [Anthony’s] on GitHub.

Open Sesame Raspberry Pi Style

[Don] installed an Android tablet into his wife’s vehicle and realized he wanted to allow it to operate and monitor the garage door. His biggest challenge? Meeting the (what he refers to) as the WAF or Wife Acceptance Factor. He decided to use a Web app on a Raspberry Pi, along with a handful of switches and a relay. His list of goals were straightforward:

  • Provide the status of the door (open/closed/unknown)
  • Open and close the door
  • Work across multiple platforms
  • Secure enough to connect to the Internet
  • Reliable and simple

Continue reading “Open Sesame Raspberry Pi Style”

Better Networking With A Macintosh Classic

While it may not be the case anymore, if you compare a Mac and a PC from 1990, the Mac comes out far ahead. PCs suffered with DOS, while the Mac enjoyed real, non-bitmapped fonts. Where a Windows PC required LANMAN to connect to a network, the Mac had networking built right into every single machine. In fact, any Mac from The Old Days can use this built-in networking to connect to the Internet, but most old Mac networking hacks have relied on PPP or other network to serial conversion. [Pierre] thought there was an incomplete understanding in getting old Macs up on the Internet and decided to connect a Mac Classic to the Internet with Apple’s built-in networking.

Since the very first Macintosh, Apple included a simple networking protocol that allowed users to share hard drives, folders, and printers over a local network. This networking setup was called LocalTalk. It wasn’t meant for internets or very large networks; the connection between computers was basically daisy chained serial cables and later RJ-11 (telephone) cables.

LocalTalk stuck around for a long time, and even now if you need to do anything with a Mac made in the last century, it’s your best bet for file transfer. Because of LocalTalk’s longevity, routers and LocalTalk to Ethernet adapters can be found fairly easily. The only problem is finding a modern device that speaks both TCP/IP and LocalTalk. You can’t use a new Mac for this; LocalTalk has been gone from OS X since Snow Leopard. You can do it with a Raspberry Pi, though.

With a little bit of futzing about with MacTCP and a few other pieces of software from 1993 or thereabouts, [Pierre] can even get his old Mac Classic online. Of course the browsers are all horribly outdated (making the Hackaday retro edition very useful), but [Pierre] was able to load up rotten.com. It takes a while with an 8MHz CPU and 4MB of RAM, but it does get the job done.

You can check out [Pierre]’s demo video below.

Continue reading “Better Networking With A Macintosh Classic”