Cloning Knobs For Vintage Testing Equipment

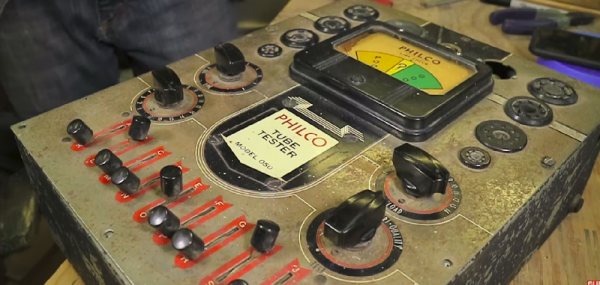
Knobs! Shiny candy-colored knobs! The last stand of skeuomorphism is smart light switches! Everyone loves knobs, but when you’re dealing with vintage equipment with a missing knob, the odds of replacing it are slim to none. That’s what happened to [Wesley Treat] when he picked up a vintage Philco tube tester. The tester looked great, but a single knob for a rotary switch was missing. What to do? Clone some knobs! You only need some resin and a little bit of silicone.

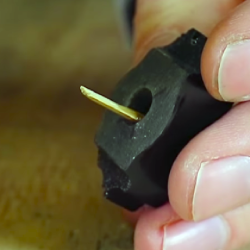
The process of copying little bits of plastic or bakelite is fairly standard and well-tread territory. Go to Michaels or Hobby Lobby, grab some silicone and resin, make a box, put your parts down, cover them in silicone, remove the parts, then put resin in. For simple parts, and parts with flat bottoms like knobs, this works great. However, there’s something weird about the knob on this old Philco tube tester. Firstly, it doesn’t fit a standard 1/4″ shaft — it’s a bit bigger. There’s also no set screw. Instead, this knob has a stamped spring aligning it with the flat part of the D-shaft in this rotary switch. This means a copy of this knob wouldn’t be useful to anyone else, and that no other knob would work with this tube tester.

However, a bit of clever engineering would make a copy of this knob fit the existing switch. Once the resin was cured, [Wesley] drilled out the hole, then sanded a dowel down to fit into the flat of the D-shaft. It took a little kergiggering, but the knob eventually fit onto one of the rotary switches. Not bad for a few bucks in silicone and resin.

You can check out the entire build process below.

Continue reading “Cloning Knobs For Vintage Testing Equipment”

3D Printed U-M

3D Printing At The Speed Of Light

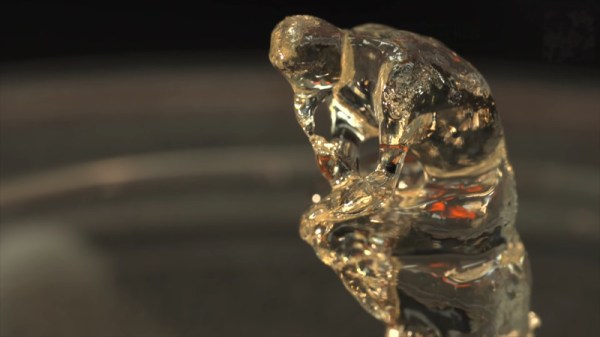
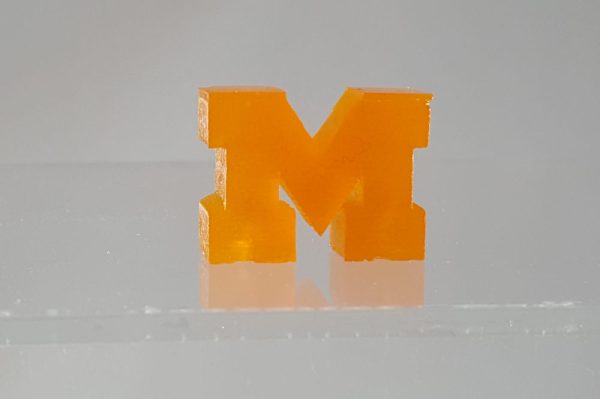
3D printers now come in all shapes and sizes, and use a range of technologies to take a raw material and turn it into a solid object. We’re most familiar with Additive Manufacturing – where the object is created layer by layer. This approach is quite useful, but has a down side of being time consuming. Two professors at the University of Michigan have figured out a way to speed this process up, big time.

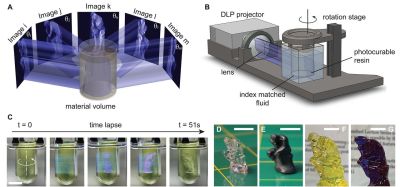
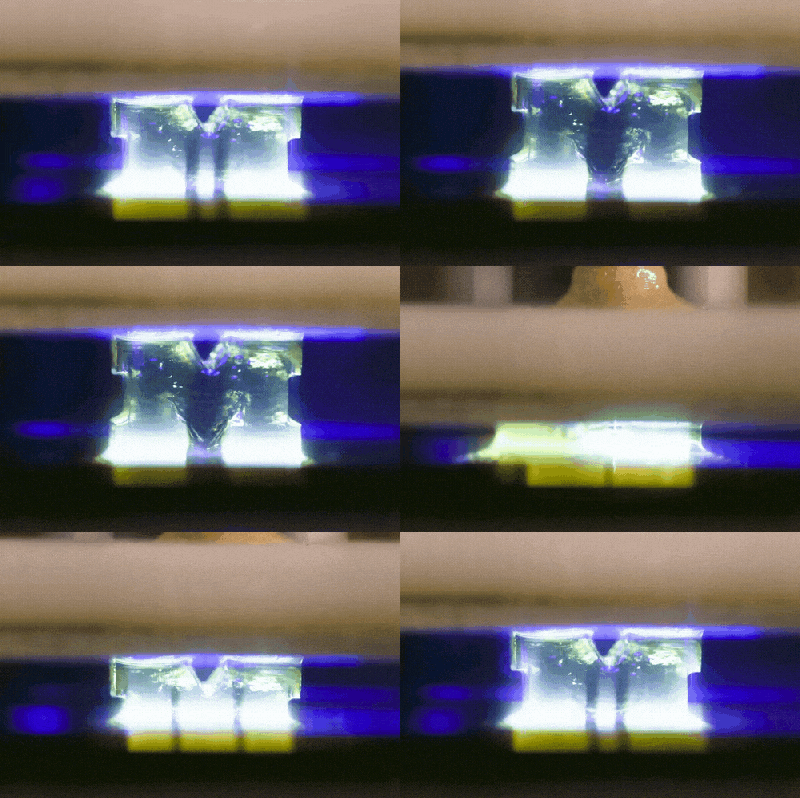
They start off with a VAT additive printing approach. These work by using an ultraviolet laser to harden or cure specific areas in a vat of resin, layer by layer, until the object is complete. The resin is then drained revealing your 3D printed object. Traditionally, VAT printing has been limited to small objects because the resin needs to have a relatively low viscosity.

The clever professors at U-M were able to get around this problem by adding a second laser that keeps the resin in a liquid state. By combining a curing laser with an ‘uncuring’ laser, they’re able to use resins that are more viscous, allowing them to print more durable parts. And do so about 100 times faster than traditional printers!

Thanks to [Baldpower] for the tip!

Have Yourself A Recursive Little Christmas: Ornament That Prints Ornaments

Sure there are the occasional functional Christmas tree ornaments; we had one that plugged into the lights and was supposed to sound like a bird gently trilling its song, but was in fact so eardrum-piercing that we were forbidden from using it. But in general, ornaments are just supposed to be for looks, right? Not so fast — this 3D-printed ornament has a 3D-printer inside that prints other ornaments. One day it might just be the must-have in functional Christmas decor.

Given that [Sean Hodgins] had only a few days to work on this tree-dwelling 3D-printer, the questionable print quality and tiny print volume can be overlooked. But the fact that he got this working at all is quite a feat. We were initially surprised that he chose to build a stereolithography (SLA) printer rather than the more common fused deposition modeling (FDM) printer, but it makes sense. SLA only requires movement in the Z-axis, provided in this case by the guts of an old DVD drive. The build platform moves in and out of a tiny resin tank, the base of which has a small LCD screen whose backlight has been replaced by a bunch of UV LEDs. A Feather M0 controls the build stage height and displays pre-sliced bitmaps on the LCD, curing the resin in the tank a slice at a time.

Results were mixed, with the tiny snowflake being the best of the bunch. For a rush job, though, and one that competed with collaborating on a package-theft deterring glitter-bomb, it’s pretty impressive. Here’s hoping that this turns into a full-sized SLA build like [Sean] promises.

Continue reading “Have Yourself A Recursive Little Christmas: Ornament That Prints Ornaments”

These 3D Printed Supports Can Take Hard Use, Thanks To Resin Filling

Liquid two-part resins that cure into a solid are normally used for casting, and [Cuddleburrito] also found them useful to add strength and rigidity to 3D printed pillar supports. In this case, the supports are a frame for some arcade-style buttons, which must stand up to a lot of forceful mashing. Casting the part entirely out of a tough resin would require a mold, and it turns out that filling a 3D print with resin gets comparable benefits while making it easy to embed fastener hardware, if done right.

Cap design shows how the nut will be encased and the cap anchored even if the pillar is slightly underfilled with resin. The screw can be backed out after the resin cures.

Filling the inside of an object with some kind of epoxy or resin to reinforce it isn’t a new idea, but [Cuddleburrito] learned how a few small design considerations can lead to less messy and more successful results. The first is that resin can be poured with screws in place without any worry of trapping the screws in the resin, if done correctly. As long as only the threads of the screw are in the resin, they can be backed out after the resin has cured. Embedding nuts into the resin to act as fasteners becomes a much easier task when one can simply pour resin with both nut and screw in place, and remove the screw afterwards. A thin layer of a lubricant on the threads to act as a release may help, but [Cuddleburrito] didn’t seem to need any.

The second thing learned was that, for a pillar that needs a cap and embedded nut on both ends, it can be tricky to fill the object’s void with the perfect amount of required resin before capping it off. On [Cuddleburrito]’s first attempt, he underfilled and there wasn’t enough resin to capture the nut on the top lid of the pillar he was making. The way around this was to offset the nut on a riser, and design in either a witness hole or an overflow relief. A small drain hole or a safe area for runoff allows for filling things right up without an uncontrolled mess in the case of overfilling.

Something worth keeping in mind when experimenting in this area is that in general the faster a resin cures, the more it heats up in the process. It may be tempting to use something like 5 minute epoxy in a pinch, but the heat released from any nontrivial amount of it risks deforming a thin-walled 3D print in the process. For cases where resin would be overkill and the fasteners are small, don’t forget we covered the best ways to add fasteners directly to 3D printed parts.

Epoxy Fix For A Combusted PCB

When the Magic Smoke is released, chances are pretty good that you’ve got some component-level diagnosis to do. It’s usually not that hard to find the faulty part, charred and crusty as it likely appears. In that case, some snips, a new non-crusty part, and a little solder are usually enough to get you back in business.

But what if the smoke came not from a component but from the PCB itself? [Happymacer] chanced upon this sorry situation in a power supply for an electric gate opener. Basking in the Australian sunshine for a few years, the opener started acting fussy at first, then not acting at all. Inspection of its innards revealed that some unlucky ants had shorted across line and neutral on the power supply board, which burned not only the traces but the FR4 of the board as well. Rather than replace the entire board, [Happymacer] carefully removed the carbonized (and therefore conductive) fiberglass and resin, leaving a gaping hole in the board. He fastened a patch for the hole from some epoxy glue; Araldite is the brand he used, but any two-part epoxy, like JB Weld, should work. One side of the hole was covered with tape and the epoxy was smeared into the hole, and after a week of curing and a little cleanup, it was ready for duty. The components were placed into freshly drilled holes, missing traces were replaced with wire, and it seems to be working fine.

This seems like a great tip to keep in mind for when catastrophe strikes your boards. There are more extreme ways to do it, of course, but perhaps none so flexible. After all, epoxy is versatile stuff.

Prusa Introduces A Resin Printer At Maker Faire NY

For one reason or another, the World Maker Faire in New York has become the preeminent place to launch 3D printers. MakerBot did it with the Thing-O-Matic way back when, and over the years we’ve seen some interesting new advances come out of Queens during one special weekend in September.

Today Prusa Research announced their latest creation. It’s the resin printer you’ve all been waiting for. The Prusa SL1 is aiming to become the Prusa Mk 3 of the resin printer world: it’s a solid printer, it’s relatively cheap (kit price starts at $1299/€1299), and it produces prints that are at least as good as resin printers that cost three times as much.

The tech inside the SL1 is about what you’d expect if you’ve been following resin printers for a while. The resin is activated by a bank of LEDs shining through a photomask, in this case a 5.5 inch, 1440p display. Everything is printed on a removable bed that can be transferred over to a separate ‘curing chamber’ after the print is done. It’s more or less what you would expect, but there are some fascinating refinements to the design that make this a resin printer worthy of carrying the Prusa name.

Common problems with a masked SLA printer that uses LEDs and an LCD are the interface between the LCD and the resin, and the temperature of the display itself. Resin is not kind to LCD displays, and to remedy this problem, Prusa has included an FEP film on the bottom of the removable tank. This is a user-replaceable part (technically a consumable, at least to the same extent as a PEI build plate on a filament printer), and Prusa will be selling those as spare parts on their store. The LCD is also cooled; one of the major drawbacks of shining several watts of UV through an LCD is the lifetime of the display. Cooling the display helps, and should greatly increase the lifetime of the printer. All of this is wrapped up in an exceptionally heavy metal case with the lovely hinged UV-opaque orange plastic lid.

Of course, saying you’ve built a resin printer is one thing, but how do the prints look? Exceptional. The Prusa booth at Maker Faire was loaded up with sample prints from the machine, and they’re of the same high quality you would expect from the Form 3D printers that have been the go-to in the resin printer world. The Prusa SLA also works with big-O Open resins, meaning you’re not tied to a single resin vendor.

This is just the announcement of the Prusa resin printer, but they are taking preorders. The price for the kit — no word on how complex of a kit it is — is $1300, while the assembled printer is $1600, with the first units shipping in January.

Incredible Atari 800XL Case Restoration

If you’ve been hanging around Hackaday for a while, you know that a large portion of the stuff we publish goes above and beyond what most people would consider a reasonable level of time and effort. One could argue that’s sort of the point: the easy way out is rarely the most exciting and interesting route you can take. We, and by extension our readers, are drawn to the projects that someone has really put their heart and soul into. If the person who created the thing wasn’t passionate about it, why should we be?

That being said, on occasion, even we are left in awe about the lengths some people will go to. A perfect example of this is the absolutely insane amount of time and effort [Drygol] has put into restoring an Atari 800XL that looked like it was run over by a truck. Through trial, error, and a bunch of polyester resin, he’s recreated whole sections of the Atari’s case that were missing.

To start the process, [Drygol] used metal rods to bridge the areas where the plastic was completely gone. By heating the rods with a torch and pushing them into the Atari’s case, he was able to create a firm base to work from. Additional rods were then soldered to these and bent, recreating the shape of the original case. With the “skeleton” of the repair in palce, the next step was filling it in.

[Drygol] borrowed an intact Atari 800XL case from a friend, and used that to create a mold of the missing sections from his own case. Most of his rear panel was missing, so it took some experimentation to create such a large mold. In the end he used silicone and a custom built tray that the case could sit in vertically, but he does mention that he never quite solved the problem of degassing the silicone. The mold still worked, but bubbles caused imperfections which needed to be filled in manually during the finishing process.

Using his silicone mold and the same tray, he was then able to pour polyester resin over the wire frame. This got him most of the way to rebuilding the case, but there was still plenty of filler and sanding required before the surface finish started to look half-way decent. When he got towards the very end of the finishing process, he used a mold he created of the case surface texture to roughen up the smooth areas left over from the filling process. Add a bit of custom spray paint, and the end result looks absolutely phenomenal considering the condition it was in originally.

We were already impressed by the work he put in during the first stages of the restoration, but this case repair is really on a whole new level. Between this and the incredible instructional videos [Eric Strebel] has been putting out, we’re really gaining a whole new respect for the power of polyester.

Continue reading “Incredible Atari 800XL Case Restoration”