Reverse Engineering The SEGA Mega Drive

With the widespread adoption of emulators, almost anyone can start playing video games from bygone eras. Some systems are even capable of supporting homebrew games, with several having active communities that are still creating new games even decades later. This ease of programming for non-PC platforms wasn’t always so easy, though. If you wanted to develop games on a now-antique console when it was still relatively new, you had to jump through a lot of hoops. [Tore] shows us how it would have been done with his Sega Mega Drive development kit that he built from scratch.

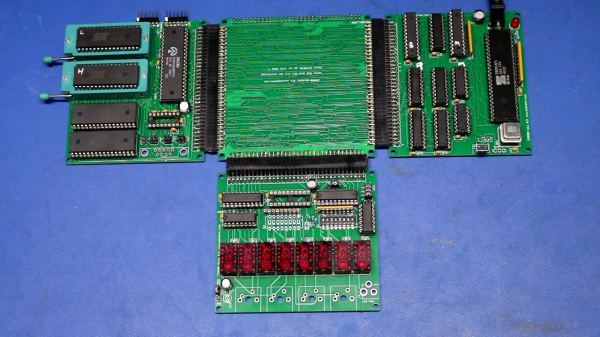
While [Tore] had an Atari ST, he wanted to do something a little more cutting edge and at the time there was nothing better than the Mega Drive (or the Genesis as it was known in North America). It had a number of features that lent the platform to development, namely the Motorola 68000 chip that was very common for the time and as a result had plenty of documentation available. He still needed to do quite a bit of reverse engineering of the system to get a proper dev board running, though, starting with figuring out how the cartridge system worked. He was able to build a memory bank that functioned as a re-writable game cartridge.

With the hard parts out of the way [Tore] set about building the glue logic, the startup firmware which interfaced with his Atari ST, and then of course wiring it all together. He was eventually able to get far enough along to send programs to the Mega Drive that would allow him to control sprites on a screen with the controller, but unfortunately he was interrupted before he could develop any complete games. The amount of research and work to get this far is incredible, though, and there may be some helpful nuggets for anyone in the homebrew Mega Drive community today. If you don’t want to get this deep into the Mega Drive hardware, though, you can build a cartridge that allows for development on native Sega hardware instead.

Nixie clock from a frequency counter

A Nixie Clock, The Hard Way

Notice: no vintage Hewlett Packard test equipment was harmed in the making of this overly complicated Nixie clock. In fact, if anything, the HP 5245L electronic counter came out better off than it went into the project.

HP 5245 hand-wired backplane
Beautiful hand-wired backplane in the HP 5245 counter.

We mention the fate of this instrument mainly because we’ve seen our fair share of cool-looking-old-thing-gutted-and-filled-with-Arduinos projects before, and while they can be interesting, there’s something deeply disturbing about losing another bit of our shared electronic heritage. To gut this device, which hails from the early 1960s and features some of the most beautiful point-to-point backplane wiring we’ve ever seen, would have been a tragedy, one that [Shahriar] wisely avoided.

After a bit of recapping and some power supply troubleshooting, the video below treats us to a tour of the Nixie-based beauty. It’s a wonderful piece, and still quite accurate after all these decades, although it did need a bit of calibration. Turning it into a clock non-destructively required adding a little bit of gear, though. Internally, [Shahriar] added a divide-by-ten card to allow the counter to use an external 10-MHz reference. Externally, an ERASynth++ programmable signal generator was used to send a signal to the counter from 0 Hz to 23,595.9 kHz, ramping up by 100 Hz every second.

The end result is the world’s most complicated 24-hour clock, which honestly wasn’t even the point of the build at all. It was to show off the glorious insides of the counter, introduce us to some cool new RF tools, and as always with [Shahriar]’s videos, to educate and inform. We’ve always enjoyed his wizardry, from his look into automotive radars to a million-dollar scope teardown, and this was another great project.

Continue reading “A Nixie Clock, The Hard Way”

Hacking An Obsolete Yet Modern Calculator

The gold standard for graphing calculators, at least in the US, are the Texas Instruments TI-84 series. Some black sheep may have other types, but largely due to standardized testing these calculators dominate the market. Also because of standardized testing, these calculators have remained essentially unchanged for decades. While this isn’t great for getting value for money, it does mean that generations of students have been able to hack on these calculators to do all kinds of interesting things as [George Hilliard] outlines.

Even before the creation of these graphing calculators, the z80 processor behind them was first produced over four decades ago and was ubiquitous in the computer scene at the time, which also lends to its hackability. There’s plenty to catch up on here, too, from custom TI games that trick the two-tone display into grayscale to Game Boy emulators that can play Zelda since the TI and Game Boy share the same processors. There are also several methods of running native code or otherwise “jailbreaking” these devices to run arbitrary code.

It looks like the world of TI hacking is alive and well now, and with several decades of projects to browse there’s always something new to find. As it stands, there may be more decades of these types of projects to come, since neither TI nor the various testing standardization companies and government agencies show any signs of changing any time soon.

Thanks to [Adrian] for the tip!

POLF: Retro 3D Game Uses Only A Character Display

Got a retrocomputing itch? So does [David Given], and luckily for us all he indulged it by writing POLF: a first-person 3D game for the Commodore PET that uses only the system’s 40×25 text mode character display for visuals. It’s a fantastic achievement, considering that the 80s-era computer boasts 32 kB of memory and doesn’t even have a graphical display.

Each level has an 8×8 layout.

Each level in POLF is a small, maze-like room in which one’s goal is to play a sort of cross between billiards and golf, aiming to move the round “ball” object into the square “hole” object. The 3D view is rendered using raycasting, which is a way of efficiently drawing a workable 3D perspective using limited resources. Raycasting can only do so much, but as a method it works fantastically within its limitations, and there are useful tutorials out there that lay the process bare.

The GitHub repository for the project is here, and it should run on any 40-column screen PET with at least 16 kB of RAM. Watch it in action in the video, embedded below. (Hint: the little bar graphs under the compass headings at the bottom of the screen represent the player’s proximity to the ball and hole objects. )

Continue reading “POLF: Retro 3D Game Uses Only A Character Display”

Vintage Displays Hack Chat With Fran Blanche

Join us on Wednesday, August 11 at noon Pacific for the Vintage Displays Hack Chat with Fran Blanche!

In terms of ease of integration and density of the information that can be shown, it’s hard to argue with the fact that modern displays like LCD panels are anything but superior to the character-based displays of yore. Throw one into a project, add a little code from a few off-the-shelf libraries to drive it, and you’re on to the next job.

Efficient, yes, but what does this approach do for the engineer’s soul? What design itch does it scratch; what aesthetic does it celebrate? Nostalgic questions, true, and not every project lends itself to exploring old display technologies. But some still do, thankfully, and when the occasion calls for it, we’re glad that there are those out there who are still actively involved in the retro display community, making sure that what was once state-of-the-art technology is still able to be added to modern projects.

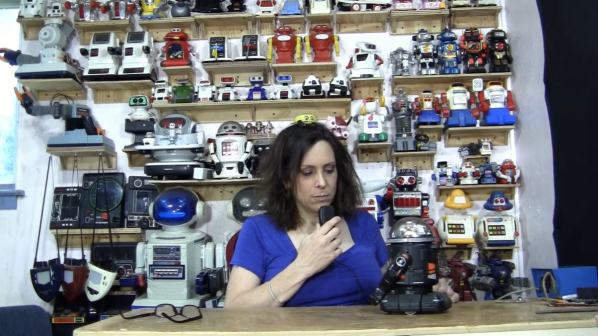
There’s no doubt that Fran Blanche is one of those passing the torch of vintage displays down to the next generation. You’ll certainly know Fran from her popular Fran Lab channel on YouTube, where in addition to about a million other interests, she has explored some really cool vintage displays: the Nimo cathode-ray tube, super-bright incandescent seven-segment displays, the delightfully strange “Bina-View”, and many, many more. Fran will stop by the Hack Chat to talk about all these retro displays, what she’s learned from collecting them, and how they shaped the displays we take so much for granted these days. Oh, and perhaps we’ll also talk about her upcoming ride on “G-Force 1” as well.

join-hack-chatOur Hack Chats are live community events in the Hackaday.io Hack Chat group messaging. This week we’ll be sitting down on Wednesday, August 11 at 12:00 PM Pacific time. If time zones have you tied up, we have a handy time zone converter.

This Old Mouse: Building A USB Adapter For A Vintage Depraz Mouse

When [John Floren] obtained a vintage Depraz mouse, he started out being content to just have such a great piece of history in his possession. But if you’re like him, you know it’s not enough to just have something. What would it be like to use it?

To find out, [John] embarked on a mission to build a USB adapter for his not so new peripheral.
Originally used in very early terminals with a Unix GUI, the Depraz mouse utilizes an unusual male DE9 connector rather than the more familiar female DB9 used in RS232 serial mice. Further deviating from the norm, he found that the quadrature encoders were connected directly to the DE9 connector.

Armed with an Arduino Pro Mini Micro and some buggy sample code, he got to work. The aforementioned buggy code was scrapped and a fresh sketch for the Arduino Pro Mini Micro gave the Depraz mouse the USB interface it lacked. [John] also found that he wasn’t the first hardware hacker to have modified the mouse for their use. Be sure to read to the end the article to find out about the vintage surprise lurking in the mouse shell itself! A demonstration of the mouse in action can be seen in the video below the break.

Looking for a fun mouse hack? Perhaps you’d like to use your more modern USB mouse on a retro computer, or try your hand at recreating an early Apple mouse for use in modern computers.

Continue reading “This Old Mouse: Building A USB Adapter For A Vintage Depraz Mouse”

Apollo DSKY Display Glows Again

We love seeing old technology brought back to life, especially when it’s done in the context of how the device was originally intended to be used. And double points when it’s space gear, like what [Curious Marc] and his usual merry band of cohorts did when they managed to light up a couple of real Apollo DSKY displays.

The “Display and Keyboard” formed the human interface to the Apollo Guidance Computer, the purpose-built machine that allowed Apollo missions to fly to the Moon, land safely, and return to Earth. Complete DSKYs are hard to come by, but a lucky collector named [Marcel] was able to score a pair of the electroluminescent panels, one a prototype and one a flight-qualified spare. He turned them over to AGC guru [Carl Claunch], who worked out all the details of getting the display working again —  a non-trivial task with a device that needs 250 volts at 800 Hertz.

The first third of the video below mostly concerns the backstory of the DSKY displays and the historical aspects of the artifacts; skip to around the 12:30 mark to get into the technical details, including the surprising use of relays to drive the segments of the display. It makes sense once you realize that mid-60s transistors weren’t up to the task, and it must have made the Apollo spacecraft a wonderfully clicky place. We were also intrigued by the clever way the total relay count was kept to a minimum, by realizing that not every combination of segments was valid for each seven-segment display.

The video has a couple of cameos, like [Ben Krasnow], no slouch himself when it comes to electroluminescent displays and DSKY replicas. We also get a glimpse of well-known component slicer and MOnSter 6502-tamer [TubeTime] too. Continue reading “Apollo DSKY Display Glows Again”