Shooting For The First Time With Help From A Raspberry Pi

Like many people, [Mike] has a list of things he wants to do in life. One of them is “fire a gun with a switch,” and with a little help from some hacker friends, he knocked this item off last weekend.

For those wondering why the specificity of the item, the backstory will help explain. [Mike] has spinal muscular atrophy, a disease that was supposed to end his life shortly after it began. Thirty-seven years later, [Mike] is still ticking items off his list, but since he only has voluntary control of his right eyebrow, he faces challenges getting some of them done. Enter [Bill] and the crew at ATMakers. The “AT” stands for “assistive technologies,” and [Bill] took on the task of building a rig to safely fire a Glock 17 upon [Mike]’s command.

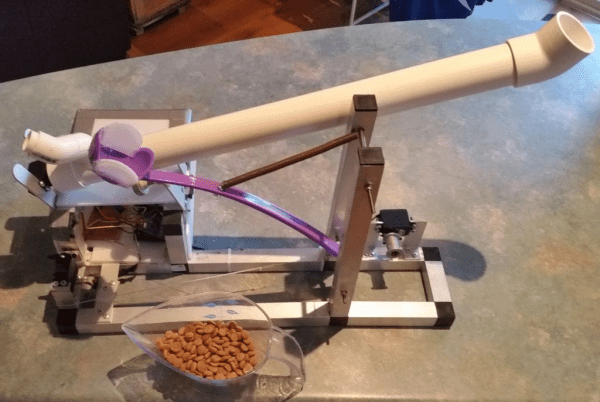
Before even beginning the project, [Bill] did his due diligence, going so far as to consult the Bureau of Alcohol, Tobacco, and Firearms (ATF) and arranging for private time at a local indoor gun range. The business end of the rig is a commercially available bench rest designed to control recoil from the pistol, which is fired by a servo connected to the trigger. The interface with [Mike]’s system is via a Raspberry Pi and a Crikit linked together by a custom PCB. A PiCam allowed [Mike] to look down the sights and fire the gun with his eyebrow. The videos below show the development process and the day at the range; to say that [Mike] was pleased is an understatement.

We’re not sure what else is on [Mike]’s list, but we see a lot of assistive tech projects around here — we even had a whole category of the 2017 Hackaday Prize devoted to them. Maybe there’s something else the Hackaday community can help him check off.

Continue reading “Shooting For The First Time With Help From A Raspberry Pi”

3D Print A Remote Control Flame Thrower

We all have a weakness for a good flamethrower project, but sometimes they can look a little hairy, even if losing hairs to them seems to be the order of the day. [Hyper_Ion] has a ‘thrower that might satisfy the need for fire among the cautious though, because he’s created a remote control flamethrower.

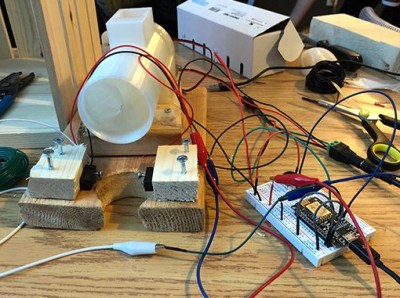
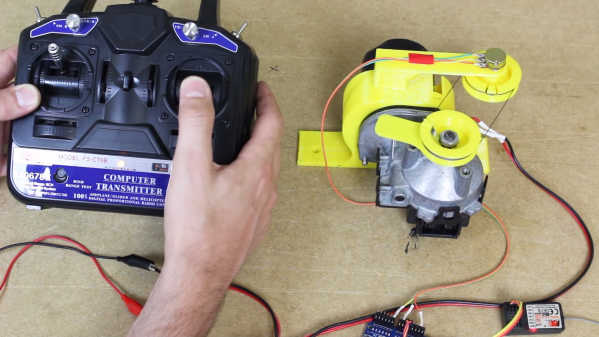
Fuel for the flames is provided from a butane canister held within a 3D-printed frame, and is delivered via a piece of copper tube to a welding nozzle. A plunger beneath the can is connected to a rack-and-pinion driven by a servo, connected to a straightforward radio control receiver. The position of the can is adjusted until there is just enough gas to sustain a pilot flame at the nozzle, and a command to the servo releases a burst of gas that results in a satisfying puff of fire.

This is more of a static stage effect than the wearable flamethrowers or flamethrower guitar projects we’ve seen in the past, but it is no less a neat project. And unlike many other flamethrowers, it’s simple to build. We have to deliver the usual exhortation though: take care with your fire, we’d prefer not to be writing either obituaries of Fail Of The Week posts about smoking ruins.

Servo Becomes Mini Linear Actuator

RC servos are a common component in many robotics projects, but [Giovanni Leal] needed linear motion instead of the rotary actuation that servos normally offer. The 3D Printed Mini Linear Actuator was developed as a way to turn a mini servo into a linear actuator, giving it more power in the process.

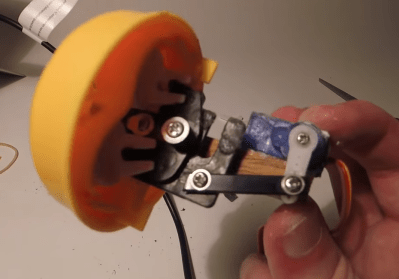
A servo uses a potentiometer attached to the output shaft in order to sense position, and the internal electronics take care of driving the motor to move the shaft to the desired angle. [Giovanni] took apart an economical mini servo and after replacing the motor with a 100:1 gear motor and using it to power a compact 3D printed linear actuator, he used the servo’s potentiometer to read the linear actuator’s position. As a result, the linear actuator can exert considerably more force than the original servo while retaining exactly the same servo interface. You can see one being assembled and tested in the video embedded below, which is part of [Giovanni]’s entry for The 2018 Hackaday Prize.

Continue reading “Servo Becomes Mini Linear Actuator”

Supercapacitors In A Servo: The “Forever” Flashlight

The principle is well understood: use a motor in reverse and you get a generator. Using this bit of knowledge back in 2001 is what kick-started [Ted Yapo]’s Hackaday Prize entry. At the time, [Ted] was searching for a small flashlight for astronomy, but didn’t like dealing with dead batteries. He quickly cobbled together a makeshift solution out of some supercapacitors and a servo-as-a-generator, hacked for continuous rotation.

A testament to the supercapacitors, 17 years later it’s still going strong – leading [Ted] to document the project and also improve it. The original circuit was as simple as a servo, protection diode, some supercapacitors, and a LED with accompanying resistor; but now greater things are afoot.

A DC-DC boost converter enables constant power through the LED, regardless of the capacitor voltage. This is achieved by connecting the feedback pin of an MCP1624 switcher to an INA199 current-shunt monitor. The MCP1624 kicks in at 0.65V and stays active down to 0.35V. This is all possible due to the supercapacitors, which happily keep increasing current as voltage drops – all the way to 0.35V. Batteries are less ideal in this situation, as their internal resistance increases as voltage drops, as well as increasing with age.

When testing the new design, [Ted] found that the gears on his servos kept stripping when he was using them to charge capacitors. Though at first he attributed it to the fact that the gears were plastic, he realized that his original prototype from 2001 had been plastic as well. Eventually, he discovered the cause: modern supercapacitors are too good! The ones he’d been using in 2001 were significantly less advanced and had a much higher ESR, limiting the charging current. The only solution is to use metal gear servos

Want to read more about boost converter design? We have the pros and cons of microcontrollers for boost converters, or this neat Nixie driver for USB power.

Super Simple, Super Cheap FPV Drone Tracking

What’s more disruptive to the drone first-person view (FPV) experience than dropouts in your video feed when you’re in the middle of a race? Probably nothing, and there’s probably also not much you can do about it. Or is there? Might a simple tracker based on RSSI help keep your video signal locked in?

Honestly, we’re not sure it would, but we think it’s pretty nifty to see [FlyerFpv]’s tracker following his drone around. The idea is simple and uses the full-diversity FPV receiver he already has. Diversity receivers constantly monitor signal strength from multiple antennas to determine which one to listen to, which improves reception quality. [FlyerFpv] sends the RSSI outputs to analog inputs on an Arduino which drives a servo to keep the signals as close to each other as possible. The Arduino and the DC-DC converter needed to power it fit nicely inside the receiver case with no modifications, which is a nice touch. With a 3D-printed servo mount and some fancy directional antennas, the setup keeps pretty good track of his drone now. See it in action below.

Sure, the response could be snappier, and we’d love to see another receiver and servo added to track pitch as well as yaw. For a first pass, we think it’s great, but [FlyerFpv] should enjoy it while he can in case AI takes over our flying fun soon.

Continue reading “Super Simple, Super Cheap FPV Drone Tracking”

Servos Do The Plucking In This MIDI Music Box

It started with a cheap, punch-card programmable manual music box. Thirty-one hobby servos later, it ended as an automated MIDI music box, with a short pit stop as a keyboard-driven MIDI device.

If you think you’ve seen the music box in [Mitxela]’s video below before, you’re right. [Martin], musician, inventor, and father of the marvelous marble music machine, took an interest in these music boxes and their programming a while back. Like [Martin], [Mitxela] started his music box project with punch card programming, but he quickly grew tired of the bothersome process, even after automating production with a laser cutter. He decided to do away with the punch cards completely and devised a method to pluck all 30 notes using a few large handfuls of hobby servos. One servo, converted to continuous rotation, spins the drum, with the rest linked to small laser-cut acrylic plectrums via stiff brass wire. The fingers imitate the punched holes passing over the drum and pluck the notes according to MIDI messages. The whole thing can draw quite a bit of current, so in addition to a beefy power supply, [Mitxela] optimized the code to minimize power requirements. This had the happy consequence of reducing the latency enough to allow the music box to be played from a MIDI keyboard in real time.

A lot of work went into this one, but [Mitxela] isn’t resting on his laurels; he has a full slate of improvements that he wants to tackle, not least of which is SD card support for MIDI files to turn this into a jukebox. We’re looking forward to the updates.

Continue reading “Servos Do The Plucking In This MIDI Music Box”

The Sensor Array That Grew Into A Robot Cat

Human brains evolved to pay extra attention to anything that resembles a face. (Scientific term: “facial pareidolia”) [Rongzhong Li] built a robot sensor array with multiple emitters and receivers augmenting a Raspberry Pi camera in the center. When he looked at his sensor array, he saw the face of a cat looking back at him. This started his years-long Petoi OpenCat project to build a feline-inspired body to go with the face.

While the name of the project signals [Rhongzhong]’s eventual intention, he has yet to release project details to the open-source community. But by reading his project page and scrutinizing his YouTube videos (a recent one is embedded below) we can decipher some details. Motion comes via hobby remote-control servos orchestrated by an Arduino. Higher-level functions such as awareness of environment and Alexa integration are handled by a Raspberry Pi 3.

The secret (for now) sauce are the mechanical parts that tie them all together. From impact-absorption spring integrated into the upper leg to how its wrists/ankles articulate. [Rongzhong] believes the current iteration is far too difficult to build and he wants to simplify construction before release. And while we don’t have much information on the software, the sensor array that started it all implies some level of sensor fusion capabilities.

Continue reading “The Sensor Array That Grew Into A Robot Cat”