Roboshield Helps Your Robot Walk And Talk

The joy of building robots comes from being able to imbue them with as much or as little personality and functionality as you wish during the design and build process. While creative flair and originality is always a good thing, there’s a lot of basic needs many robots have in common with each other, so where possible it’s good to avoid reinventing the wheel so more time can be spent on more advanced features. Roboshield aims to help make the basics easy so you can let your robot freak flag fly!

At its core, it’s an Arduino shield that packs in a host of hardware to get your robot up and running. As far as motion is concerned, a PCA9685 module is used to allow the control of 8 servos, plus there’s a TB6621FNG dual motor speed controller that offers both speed control and forward/reverse. That’s enough to get your electronic buddy scooting about the floor and waving its arms in the air.

The party piece, however, is the Vstamp text-to-speech module. This device produces a beautiful cliche electronic voice, which your robot is legally required to use to recite Asimov’s Laws of Robotics. Overall, it’s a tidy project that can take the hassle out of getting your robot design up and running, leaving you to focus on the fun bits like death rays and tractor beams. We can’t wait to see it powering the next wave of sassy DIY robots.

Stomping On Microcontrollers: Arduino Mega Guitar Effects Pedal

Effects pedals: for some an object of overwhelming addiction, but for many, an opportunity to hack. Anyone who plays guitar (or buys presents for someone who does) knows of the infinite choice of pedals available. There are so many pedals because nailing the tone you hear in your head is an addictive quest, an itch that must be scratched. Rising to meet this challenge are a generation of programmable pedals that can tweak effects in clever ways.

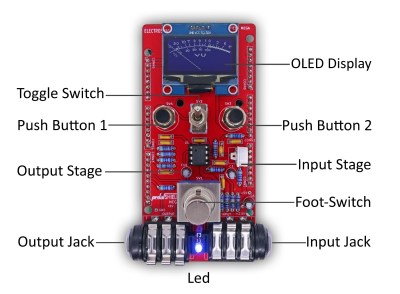
With this in mind, [ElectroSmash] are back at it with another open source offering: the pedalSHIELD MEGA. Aimed at musicians and hackers who want to learn more about audio, DSP and programming, this is an open-hardware/open-software shield for the Arduino MEGA which transforms it into an effects pedal.

The hardware consists of an analog input stage which amplifies and filters the incoming signal before passing it to the Arduino, as well as an output stage which does the DAC-ing from the Arduino’s PWM outputs, and some more filtering/amplifying. Two 8-bit PWM outputs are used simultaneously to make pseudo 16-bit resolution — a technique you can read more about in their handy forum guide.

The list of effects currently implemented covers all the basics you’d expect, and provides a good starting point for writing custom effects. Perhaps a library for some of the commonly used config/operations would be useful? Naturally, there are some computational constraints when using an Arduino for DSP, though it’s up to you whether this is a frustrating fact, or an opportunity to write some nicely optimised code.

[ElectroSmash] don’t just do pedals either: here’s their open source guitar amp.

Continue reading “Stomping On Microcontrollers: Arduino Mega Guitar Effects Pedal”

The Adafruit Feather Is A Thing

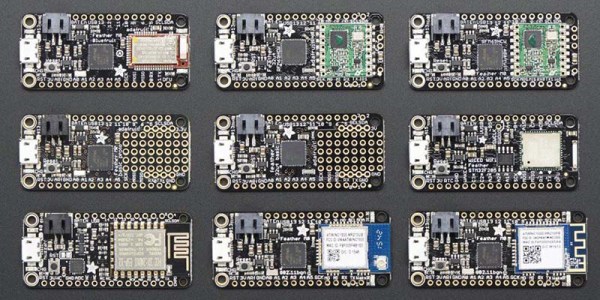
A few years ago, Adafruit launched the Feather 32u4 Basic Proto. This tiny development board featured — as you would expect — an ATMega32u4 microcontroller, a USB port, and a battery charging circuit for tiny LiPo batteries. It was, effectively, a small Arduino clone with a little bit of extra circuitry that made it great for portable and wearable projects. In the years since, and as Adafruit has recently pointed out, the Adafruit Feather has recently become a thing. This is a new standard. Maxim is producing compatible ‘wings’ or shields. If you’re in San Francisco, the streets are littered with Feather-compatible boards. What’s the deal with these boards, and why are there so many of them?

The reason for Adafruit’s introduction of the Feather format was the vast array of shields, hats, capes, clicks, props, booster packs, and various other standards. The idea was to bring various chipsets under one roof, give them a battery charging circuit, and not have a form factor that is as huge as the standard Arduino. The Feather spec was finalized and now we have three-phase energy monitors, a tiny little game console, LoRaWAN Feathers, and CAN controllers.

Of course, the Feather format isn’t just limited to Adafruit products and indie developers. The recently introduced Particle hardware is built on the Feather format, giving cellular connectivity to this better-than-Arduino format. Maxim is producing some development boards with the same format.

So, do we finally have a form factor for one-off embedded development that isn’t as huge or as wonky as the gigantic Arduino with weirdly offset headers? It seems so.

Tracktorino Shields You From Poor Interfaces

On-screen controls in a digital audio workstation expand the power of a DJ or musician, but they are not intuitive for everyone. The tactility of buttons, knobs, sliders and real-world controls feels nothing like using a mouse, trackpad, or even a touchscreen. Unfortunately, devices meant to put control into a DJs hands can be unavailable due to location or cost. [Gustavo Silveira] took charge of the situation so he could help other DJs and musicians take control of their workstations with a customized MIDI interface for Traktor DJ software.

MIDI is a widely used serial protocol which has evolved from a DIN connector to USB, and now it is also wireless. This means that the Traktorino is not locked to Traktor despite the namesake. On the Hackaday.io page, there’s even a list of other workstations it will work with, but since many workstations, all the good ones anyway, accept MIDI hardware like this, the real list is a lot longer.

The custom circuit board is actually a shield. Using an Arduino UNO, the current poster child of the Arduino world, opens up the accessibility for many people who don’t know specialized software. A vector drawing for a lasercut enclosure is also included. This means that even the labeling on the buttons are not locked into English language.

Here’s another project which combined laser cutting and MIDI to make some very clever buttons or turn your DIN MIDI connector into USB.

Continue reading “Tracktorino Shields You From Poor Interfaces”

This Is How The Fonz Would Play MP3s

Here at Hackaday, we love to see old hardware treated with respect. A lovingly restored radio or TV that’s part of our electronic heritage is a joy to behold, and while we understand the desire to stream media from a funky retro case, it really grates when someone throws away the original guts to make room for new electronics.

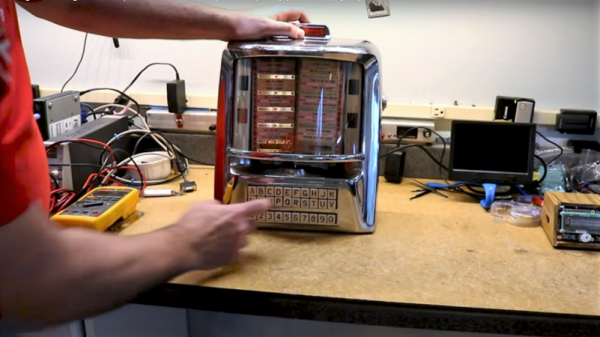
Luckily, this Seeburg jukebox wall remote repurposing is not one of those projects. [Scott M. Baker] seems to have an appreciation for the finer things, and when he scored this classic piece of Mid-Century Americana, he knew just what to do. These remotes were situated around diners and other hangouts in the 50s and 60s and allowed patrons to cue up some music without ever leaving their seats. They were real money makers back in the day, and companies put a lot of effort into making them robust and reliable.

[Scott]’s first video below shows the teardown of this unit; you can practically smell the old transformer and motor windings. His goal in the second video was to use the remote to control his Raspberry Pi jukebox; he wisely decided to leave everything intact and use the original electromechanically generated pulses to make selections. His analysis led to a nicely executed shield for his Pi which conditions the pulses and imitates coin drops; happily, the coin mechanism still works too, so you can still drop a quarter for a tune.

The remote is working well now, but [Scott] still needs to finish up a few odds and ends to bring this one home. But we love the look and the respect for tradition here, as we did when this juke got a Raspberry Pi upgrade to imitate a missing wall remote.

Continue reading “This Is How The Fonz Would Play MP3s”

Fight Mold And Mildew With An IoT Bathroom Fan

Delicious sheets of wallboard coated with yummy latex paints, all kept warm and moist by a daily deluge of showers and habitually forgetting to turn on the bathroom exhaust fan. You want mildew? Because that’s how you get mildew.

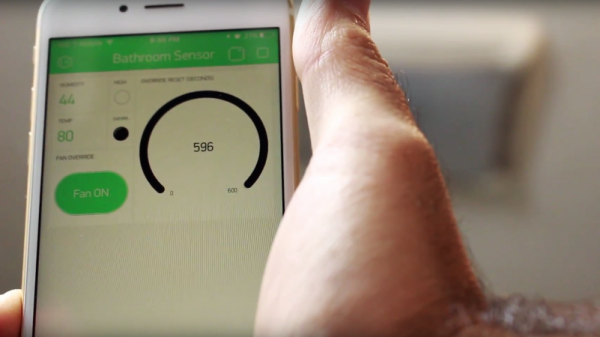
Fed up with the fuzzy little black spots on the ceiling, [Innovative Tom] decided to make bathroom ventilation a bit easier with this humidity-sensing IoT control for his bathroom exhaust fan. Truthfully, his build accomplishes little more than a $15 timer switch for the fan would, with one critical difference — it turns the fan on automatically when the DHT11 sensor tells the WeMos board that the relative humidity has gone over 60%. A relay shield kicks the fan on until the humidity falls below a set point. A Blynk app lets him monitor conditions in the bathroom and override the automatic fan, which is handy for when you need it for white noise generation more than exhaust. The best part of the project is the ample documentation and complete BOM in the description of the video below, making this an excellent beginner’s project.

No bathroom fan? Not a problem — this standalone humidity-sensing fan can help. Or perhaps you have other bathroom ventilation needs that this methane-sensing fan could help with?

Continue reading “Fight Mold And Mildew With An IoT Bathroom Fan”

Graduation Cap Shows Us What It’s Got!

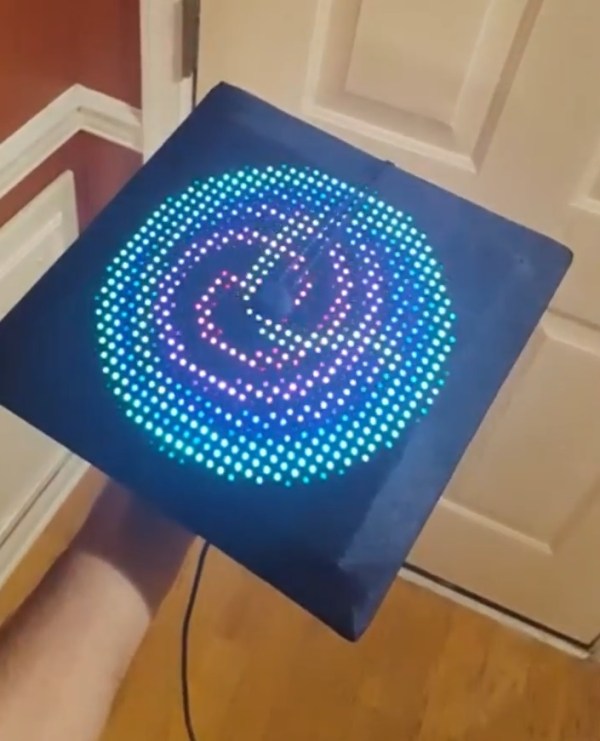
A high school graduation ceremony is well due the pomp and circumstance for making it through one of life’s many milestones. To commemorate the event with their own flair, redditor [PM_(cough)_FOR_KITTENS] hid a 32 x 32 GIF-playing LED matrix in their graduation cap!

The board is controlled by a Teensy hosting a SmartMatrix shield. With the shield’s assistance, the matrix enables scrolling text and GIFs to play across the LEDs, as well as an SD card slot to load up your favourites. Currently, it’s set to a 50-50 chance of playing a gif — one of sixty — or one of the twenty scrolling text lines loaded onto the SD card. [PM_(ahem)_FOR_KITTENS] co-opted his friend’s expertise to write the code — available here — while he designed the circuit and handled the assembly.

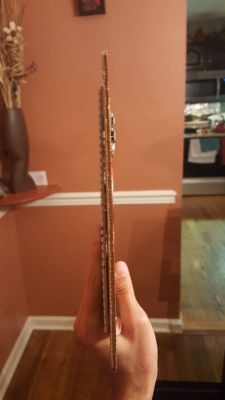
Carefully unwrapping his cap, [PM_(yep)_FOR_KITTENS] reinforced it with thinner and stronger cardboard, cutting slots into it, allowing the boards and wires to — barely — fit inside. A hole in the side of the cap is enough for a barely noticeable USB cable to run down his neck to a 2000 mAh battery which can power the cap for over five hours at 5V and 2A. Check out a demo video after the break!

Continue reading “Graduation Cap Shows Us What It’s Got!”