3D Printering: Which Raspberry Pi Is Best At Slicing In Octoprint?

OctoPrint is arguably the ultimate tool for remote 3D printer control and monitoring. Whether you simply want a way to send G-Code to your printer without it being physically connected to your computer or you want to be able to monitor a print from your phone while at work, OctoPrint is what you’re looking for. The core software itself is fantastic, and the community that has sprung up around the development of OctoPrint plugins has done an incredible job expanding the basic functionality into some very impressive new territory.

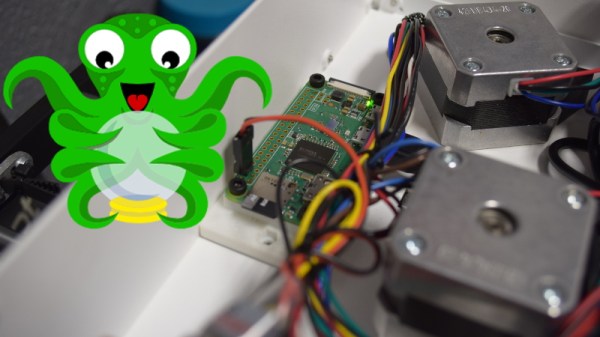
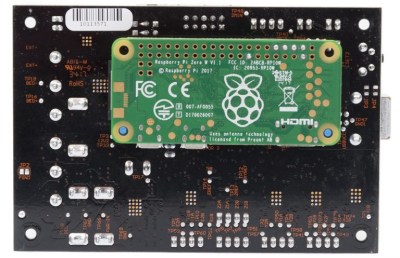
RAMBo 3D controller with Pi Zero Integration

But all that is on the software side; you still need to run OctoPrint on something. Technically speaking, OctoPrint could run on more or less anything you have lying around the workshop. It’s cross platform and doesn’t need anything more exotic than a free USB port to connect to the printer, and people have run it on everything from disused Windows desktops to cheap Android smartphones. But for many, the true “home” of OctoPrint is the Raspberry Pi.

As I’ve covered previously, the Raspberry Pi does make an exceptional platform for OctoPrint. Given the small size and low energy requirements of the Pi, it’s easy to integrate into your printer. The new Prusa i3 MK3 even includes a header right on the control board where you can plug in a Raspberry Pi Zero.

But while the Raspberry Pi is more than capable of controlling a 3D printer in real-time, there has always been some debate about its suitability for slicing STL files. Even on a desktop computer, it can sometimes be a time consuming chore to take an STL file and process it down to the raw G-Code file that will command the printer’s movements.

In an effort to quantify the slicing performance on the Raspberry Pi, I thought it would be interesting to do a head-to-head slicing comparison between the Pi Zero, the ever popular Pi 3, and the newest Pi 3 B+.

Continue reading “3D Printering: Which Raspberry Pi Is Best At Slicing In Octoprint?”

Bringing Fiction To Life With 3D Printing

I print something nearly every day, and over the last few years, I’ve created hundreds of practical items. Parts to repair my car, specialized tools, scientific instruments, the list goes on and on. It’s very difficult for me to imagine going back to a time where I didn’t have the ability to rapidly create and replicate physical objects at home. I can say with complete honesty that it has been an absolutely life-changing technology for me, personally.

But to everyone else in my life, my friends and family, 3D printers are magical boxes which can produce gadgets, weapons, and characters from their favorite games and movies. Nobody wants to see the parts I made to get my girlfriend’s 1980’s Honda back on the road before she had to go to work in the morning, they want to see the Minecraft block I made for my daughter. I can’t get anyone interested in a device I made to detect the algal density of a sample of water, but they all want me to run off a set of the stones from The Fifth Element for them.

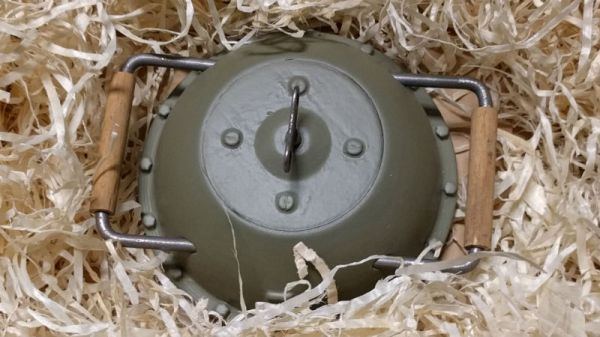
As I recently finished just such a project, a 3D printed limpet mine from Battlefield 1, I thought I would share some thoughts on the best practices for turning fiction into non-fiction.

Continue reading “Bringing Fiction To Life With 3D Printing”

Customizing STLs For Off-Brand Devices

[Rob Clarke] needed a mount for his off-brand action camera, but it’s not exactly the kind of thing with a bustling accessory market. To make matters worse, it turns out the camera is so low-key that he couldn’t find a 3D printable mount for it either. Luckily, a check with his calipers confirmed his camera is just about the same size as an old GoPro Hero 3, so all he had to do was modify an existing design to fit his needs.

As anyone who’s worked with STL files will tell you, they are a pain to modify. An STL is essentially a completed solid model, and not really meant to be fiddled around with. It’s a bit like trying to take an edited image and get back to the layers that were used to create it in Photoshop or GIMP. The final output has been “flattened”, so that granular control is lost.

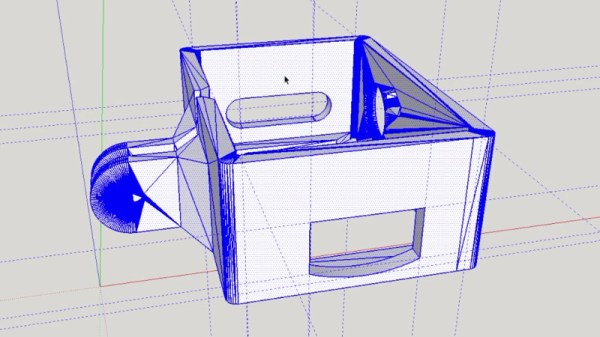
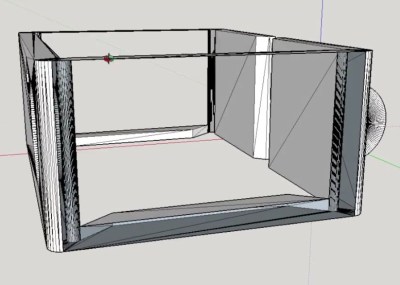
That being said, [Rob] got rather lucky in this case. He found a GoPro mount that was about 90% there, he just needed to adjust the depth and change the positioning of the holes on the side. He loaded the STL into SketchUp, deleted the two sides, and replaced them with new surfaces. This gave him a clean slate to add the appropriate openings for his camera’s USB port and microSD card. To adjust the depth of the mount, he simply stretched the model out on the Z axis.

[Rob] event went ahead and released his modified STLs as a remix of the original case he found on Thingiverse for anyone else that has the same camera. That’s what we love to see.

If you’re interested in learning more about using SketchUp for designing 3D printed parts, check out this excellent guide by our very own [Brian Benchoff].

Continue reading “Customizing STLs For Off-Brand Devices”

If 3D Printer, Then Custom Aluminum Extrusion Brackets

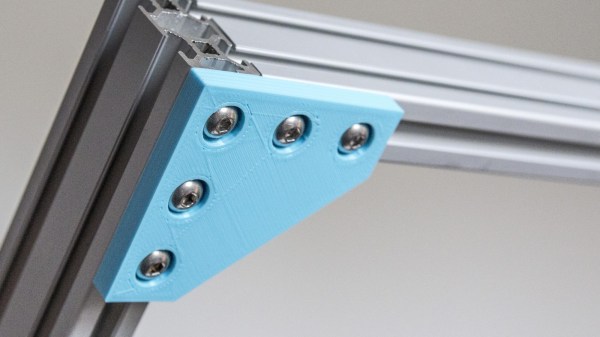
Aluminum extrusions are a boon for mechanical assemblies, but they require a stock of brackets and other hardware to be kept on hand. [mightynozzle] has decided to make things a little easier for prototyping and low-stress assemblies by creating a collection of 3D printable brackets for aluminum extrusions. 3D printing your own bracket hardware means faster prototyping, and if the assemblies don’t need the extra strength and rigidity of metal brackets you can just stick with the 3D printed versions.

The files are on Thingiverse, and include STL files of common brackets as well as an OpenSCAD script for customizing. Not familiar with OpenSCAD? No problem, we have a quick primer with examples.

This project showcases two things well. The first is that while brackets are not particularly expensive or hard to obtain, it can still be worth 3D printing them to reduce the overall amount of hardware one needs to keep on hand to make prototyping faster. The other is that 3D printing can shine when it comes to the creation of things like brackets: a few dimes’ worth of plastic can be turned into precise yet geometrically simple objects that would be a pain to make by other means. It certainly beats sitting on one’s hands waiting for parts to be delivered.

That Time I Spent $20 For 25 .STL Files

Last weekend I ran out of filament for my 3D printer midway through a print. Yes, it’s evidence of poor planning, but I’ve done this a few times and I can always run over to Lowe’s or Home Depot or Staples and grab an overpriced spool of crappy filament to tide me over until the good, cheap filament arrives via UPS.

The Staples in my neck of the woods was one of the few stores in the country to host a, ‘premium, in-store experience’ featuring MakerBot printers. Until a few months ago, this was a great place to pick up a spool of filament that could get you through the next few hours of printing. The filament cost about three times what I would usually pay, but it was still good quality filament and they usually had the color I needed.

This partnership between MakerBot and Staples fell through a few months ago, the inventory was apparently shipped back to Brooklyn, and now Robo3D has taken MakerBot’s space at the endcap in Staples. Last weekend, I picked up a 1kg spool of red PLA for $40. What I found next to this filament left me shocked, confused, and insatiably curious. I walked out of that store with a spool of filament and a USB thumb drive loaded up with twenty-five STL files. This, apparently, is the future of 3D printing.

Continue reading “That Time I Spent $20 For 25 .STL Files”

DIY 3D Slicer Is A Dynamo

We all know that hacker that won’t use a regular compiler. If he’s not using assembly language, he uses a compiler he wrote. If you don’t know him, maybe it is you! If you really don’t know one, then meet these two. [Nathan Fuller] and [Andy Baldwin] want to encourage you to write your own 3D slicer.

Their post is very detailed and uses Autodesk Dynamo as a graphical programming language. However, the details aren’t really specific to Dynamo. It is like a compiler. You sort of know what it must be doing, but until you’ve seen one taken apart, there are a lot of subtleties you probably wouldn’t think of right away if you were building one from scratch.

Continue reading “DIY 3D Slicer Is A Dynamo”

Hackaday Links Column Banner

Hackaday Links: November 20, 2016

The Raspberry Pi 2 is getting an upgrade. No, this news isn’t as big as you would imagine. The Raspberry Pi 2 is powered by the BCM2836 SoC, an ARM Cortex-A7 that has served us well over the years. The ‘2836 is going out of production, and now the Raspberry Pi foundation is making the Pi 2 with the chip found in the Raspberry Pi 3, the BCM2837. Effectively, the Pi 2 is now a wireless-less (?) version of the Pi 3. It still costs $35, the same as the Pi 3, making it a rather dumb purchase for the home hacker. There are a lot of Pi 2s in industry, though, and they don’t need WiFi and Bluetooth throwing a wrench in the works.

So you’re using a Raspberry Pi as a media server, but you have far too many videos for a measly SD card. What’s the solution? A real server, first off, but there is another option. WDLabs released their third iteration of the PiDrive this week. It’s a (spinning) hard disk, SD card for the software, and a USB Y-cable for powering the whole thing. Also offered is a USB thumb drive providing 64 GB of storage, shipped with an SD card with the relevant software.

Mr. Trash Wheel is the greatest Baltimore resident since Edgar Allan Poe, John Waters, and Frank Zappa. Mr. Trash Wheel eats trash, ducks, kegs, and has kept Inner Harbor relatively free of gonoherpasyphilaids for the past few years. Now there’s a new trash wheel. Professor Trash Wheel will be unveiled on December 4th.

YOU MUST VOICE CONTROL ADDITIONAL PYLONS. With an ‘official’ StarCraft Protoss pylon and a Geeetech voice recognition module, [Scott] built a voice controlled lamp.

Everyone loves gigantic Nixie tubes, so here’s a Kickstarter for a gigantic Nixie clock. There are no rewards for just the tube, but here’s a manufacturer of 125mm tall Nixies.

Here’s an interesting think piece from AdvancedManufacturing.org. The STL file format is ancient and holding us all back. This much we have known since the first Makerbot, and it doesn’t help that Thingiverse is still a thing, and people don’t upload their source files. What’s the solution? 3MF and AMF file formats, apparently. OpenSCAD was not mentioned in this think piece.