Raspberry Pi Weather Station Features Wireless Sensor Nodes

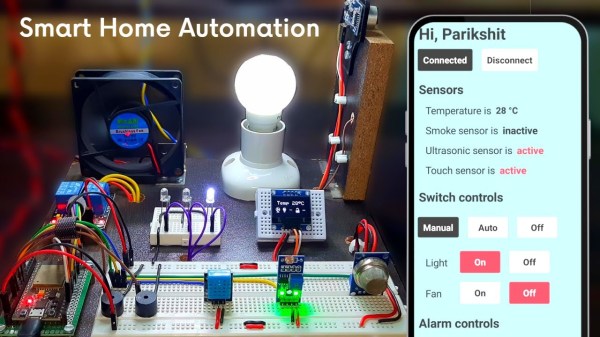
Online weather services are great for providing generic area forecasts, but they don’t provide hyperlocal data specific to your location. [Harald Kreuzer] needed both and built a Raspberry Pi Weather Station that provides weather forecasts for the next 7 days as well as readings from local sensors. The project is completely open source and based on a Raspberry Pi base station which connects to ESP32 based sensor nodes and online services to nicely present the data on a 7″ touch screen display.

The architecture is quite straightforward. The ESP32 based sensor nodes publish their readings to an MQTT broker running on the Raspberry Pi. The Pi subscribes to these sensor node topics to pick up the relevant sensor data. This makes it easy to add additional sensor nodes in future. Weather forecast data is collected by connecting to the OpenWeatherMap API. All of the collected information is then displayed through an app built using the Kivy: open source Python app development framework. Continue reading “Raspberry Pi Weather Station Features Wireless Sensor Nodes”

Custom Controller Ups Heat Pump Efficiency

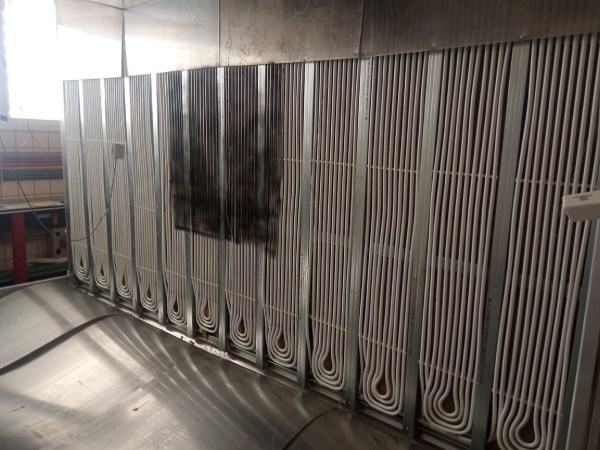
Heat Pumps are an extremely efficient way to maintain climate control in a building. Unlike traditional air conditioners, heat pumps can also effectively work in reverse to warm a home in winter as well as cool it in summer; with up to five times the efficiency of energy use as a traditional electric heater. Even with those tremendous gains in performance, there are still some ways to improve on them as [Martin] shows us with some modifications he made to his heat pump system.

This specific heat pump is being employed not for climate control but for water heating, which sees similar improvements in efficiency over a standard water heater. The problem with [Martin]’s was that even then it was simply running much too often. After sleuthing the energy losses and trying a number of things including a one-way valve on the heating water plumbing to prevent siphoning, he eventually found that the heat pump was ramping up to maximum temperature once per day even if the water tank was already hot. By building a custom master controller for the heat pump which includes some timing relays, the heat pump only runs up to its maximum temperature once per week.

While there are some concerns with Legionnaire’s bacteria if the system is not maintained properly, this modification still meets all of Australia’s stringent building code requirements. His build is more of an investigative journey into a more complex piece of machinery, and his efforts net him a max energy usage of around 1 kWh per day which is 50% more efficient than it was when it was first installed. If you’re looking to investigate more into heat pumps, take a look at this DIY Arduino-controlled mini heat pump.

Continue reading “Custom Controller Ups Heat Pump Efficiency”

USB Temperature Logger With Some Extra Tricks

Many of us electronics hacker types tend to have at least the same common equipment on our benches, namely a multimeter, an oscilloscope, some sort of adjustable power supply, and maybe a logic analyzer. These are great tools covering many bases, but dealing with temperature measurements is often neglected. A sudden need for such often results in just buying a either dedicated measurement unit, or some cheap eBay thermocouple board and just rolling with a few hacks. [Jana Marie Hemsing] had a need for measuring the thermal side of things, and got fed up with hacking with piles of boards, and designed herself a proper instrument for the task.

The result is a very tidy four-channel thermocouple frontend, feeding the data into the host computer via USB. Each of the four channels can either be a K-type input or a NTC thermistor input, decided at board assembly time, but you could just build two units with four channels of each and cover all bases. The K-type thermocouple input is based around the MAX31855 series device. While the ‘KASA’ suffixed device is probably most common, if you need to dedicate some channels to handling one of the other six or so other common thermocouple types, that just needs the appropriate MAX31855 variant dropping in, and you’re good to go.

For the controller, [Jana] has chosen the common STM32F0x microcontroller, which handles all the USB protocol side of things. The extra functionality added allows direct driving of a heater controller via the DRV8837 H-Bridge, with a extra few open collector outputs for other things you might want to drive. This allows the logger to function as a kind-of thermal IO device. Firmware is written in good old fashioned STM32 HAL, using the standard STM32CubeMX and the GCC toolchain. It looks like the Makefile came via the STM32 Project Generator route. The firmware has a neat trick up its sleeve too; with a flick of the switch on the back, the firmware can switch between outputting CSV data over a standard USB CDC link (a virtual serial port), or it can present a SCPI terminal interface, enabling integration into existing SCPI-based test flows. Nice work!

We’ve seen a few logging projects on these fair pages, like this battery powered ESP32 logger device. If IoT logging is more your thing, here you go.

Portable Pizza Oven Has Temperature Level Over 900

While it’s possible to make pizza from scratch at home right down to the dough itself, it’ll be a struggle to replicate the taste and exquisite mouthfeel without a pizza oven. Pizzas cook best at temperatures well over the 260°C/500°F limit on most household ovens while pizza ovens can typically get much hotter than that. Most of us won’t have the resources to put a commercial grade wood-fired brick oven in our homes, but the next best thing is this portable pizza oven from [Andrew W].

The build starts with some sheet metal to form the outer and inner covers for the oven. [Andrew] has found with some testing that a curved shape seems to produce the best results, so the sheet metal goes through rollers to get its shape before being welded together. With the oven’s rough shape completed, he fabricates two different burners. One sits at the back of the oven with its own diffuser to keep the oven as hot as possible and the other sits underneath a cordierite stone to heat from the bottom. Both are fed gas from custom copper plumbing and when it fires up it reaches temperatures hot enough that it can cook a pizza in just a few minutes. With some foldable legs the oven also ends up being fairly portable, and its small size means that it can heat up faster than a conventional oven too.

This is [Andrew]’s third prototype oven, and it seems like he has the recipe perfected. In fact, we featured one of his previous versions almost two years ago and are excited to see the progress he’s made in this build. The only downside to having something like this would be the potential health implications of always being able to make delicious pizzas, but that is a risk we’d be willing to take.

Continue reading “Portable Pizza Oven Has Temperature Level Over 900”

NTP server heated with Bitcoin mining dongles

Bitcoin Mining ASICs Repurposed To Keep NTP Server On Track

They say time is money, but if that’s true, money must also be time. It’s all figurative, of course, but in the case of this NTP server heater powered by Bitcoin mining dongles, money actually does become time.

This is an example of the lengths to which Network Time Protocol aficionados will go in search of slightly better performance from their NTP servers. [Folkert van Heusden], having heard that thermal stability keeps NTP servers happy, used a picnic cooler as an environmental chamber for his  Pi- and GPS-based NTP rig. Heat is added to the chamber thanks to seven Block Erupter ASIC miner dongles, which are turned on by a Python script when a microcontroller sends an MQTT message that the temperature has dropped below the setpoint.

Each dongle produces about 2.5 Watts of heat when it’s working, making them pretty effective heaters. Alas, heat is all they produce at the moment — [Folkert] just has them working on the same hash over and over. He does say that he has plans to let the miners do useful work at some point, not so much for profit but to at least help out the network a bit.

This seems like a bit of a long way around to solve this problem, but since the mining dongles are basically obsolete now — we talked about them way back in 2013 — it has a nice hacky feeling to it that we appreciate.

Your Plants Can Take Care Of Themselves Now

One of [Sasa]’s life goals is to be able to sit back in his home and watch as robots perform all of his work for him. In order to work towards this goal, he has decided to start with some home automation which will take care of all of his house plants for him. This project is built from the ground up, too, and is the first part of a series of videos which will outline the construction of a complete, open-source plant care machine.

The first video starts with the sensors for the plants. [Sasa] decided to go with a completely custom module based on the STM32 microcontroller since commercial offerings had poor communications designs and other flaws. The small board is designed to be placed in the soil, and has sensors for soil moisture as well as other sensors for amount of light available and the ambient temperature. The improvements over the commercial modules include communication over I2C, allowing a large number of modules to communicate over a minimum of wires and be arranged in any way needed.

For this build everything is open-source and available on [Sasa]’s GitHub page, including PCB layouts and code for the microcontrollers. We’re looking forward to the rest of the videos where he plans to lay out the central unit for handling all of these sensors, and a custom dashboard for controlling them as well. Perhaps there will also be an option for adding a way to physically listen to the plants communicate their needs as well.

Continue reading “Your Plants Can Take Care Of Themselves Now”

Open-Source Thermostat Won’t Anger Your Landlord

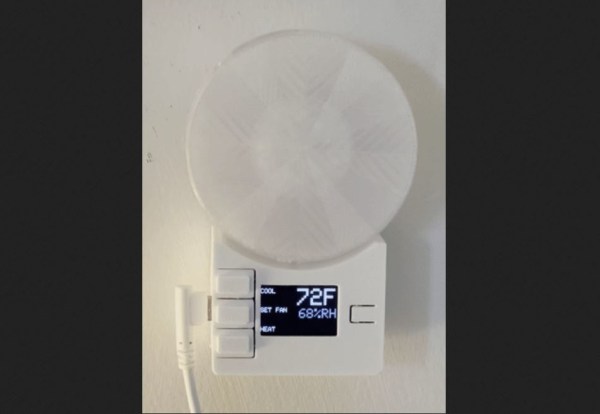
[Nathan Petersen] built a Hackable Open-Source Thermostat to smooth out temperature fluctuations caused by the large hysteresis of the bimetallic strip thermostat in his apartment. While it may be tempting to adjust the “anticipator” to take care of the problem or even replace the bimetallic thermostat with an electronic version, building your own thermostat from scratch is a good way to add to your project portfolio while making your way through college. Plus, he got to hone his hardware and software design chops.

The hardware is designed around the STM32, using a cheap, minimal variant since the device just needs to sense temperature and control the furnace in on-off mode. The TMP117 high-accuracy, low-power, temperature sensor was selected for temperature measurement since accuracy was an essential feature of the project. Dry-contact output for the furnace is via a normally-open solid state relay (opto-isolator). For the user interface, instead of going the easy-route and using an I2C/SPI OLED or LCD display, [Nathan] used three 7-segment LED displays, each driven by an 8-channel constant current driver. The advantage is that the display can be viewed from across the room, and it’s brightness adjusted via PWM. Temperature set-point adjustment is via a simple slide potentiometer, whose analog voltage is read by the micro-controller ADC. To remind about battery replacement, a second ADC channel on the micro-controller monitors the battery voltage via a voltage divider. The PCB components are mostly surface mount, but the packages selected are easy enough to hand solder.

[Nathan]’s Github repo provides the hardware and firmware source files. The board is designed in Altium, but folks using KiCad can use either the awesome Altium2KiCad converter or the online service for conversion. (The results, with some minor errors that can be easily fixed, are quite usable.) Serendipitously, his PCB layout worked like a charm the first time around, without requiring any rework or bodge wires.

The firmware is a few hundred lines of custom bare-metal C code, consisting of drivers to interface with the hardware peripherals, a UI section to handle the user interface, and the control section with the algorithm for running the furnace. [Nathan] walks us through his code, digging into some control theory and filtering basics. After making a few code tweaks and running the thermostat for some time, [Nathan] concludes that it is able to achieve +0.1°F / -0.5°F temperature regulation with furnace cycles lasting about 10-15 minutes (i.e. 4-6 cycles per hour). Obviously, his well insulated apartment and a decent furnace are also major contributing factors. Moving on, for the next version, [Nathan] wants to add data collection capabilities by adding some memory and SD card storage, and use an RTC to allow seasonal adjustments or time-based set-points.

This is his first attempt at a “functional’ useful project, but he does love to build the occasional toy, such as this POV Top.