MIT Extracts Power From Temperature Fluctuations

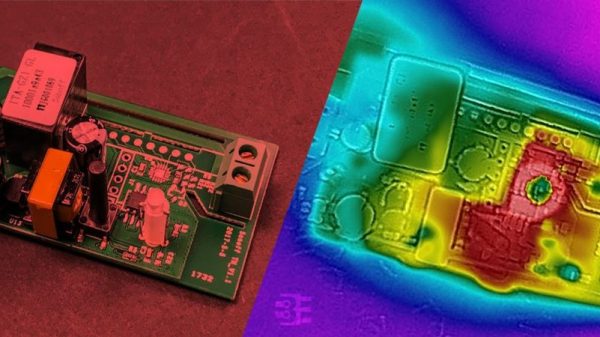
As a civilization, we are proficient with the “boil water, make steam” method of turning various heat sources into power we feed our infrastructure. Away from that, we can use solar panels. But what if direct sunlight is not available either? A team at MIT demonstrated how to extract power from daily temperature swings.

Running on temperature difference between day and night is arguably a very indirect form of solar energy. It could work in shaded areas where solar panels would not. But lacking a time machine, or an equally improbable portal to the other side of the planet, how did they bring thermal gradient between day and night together?

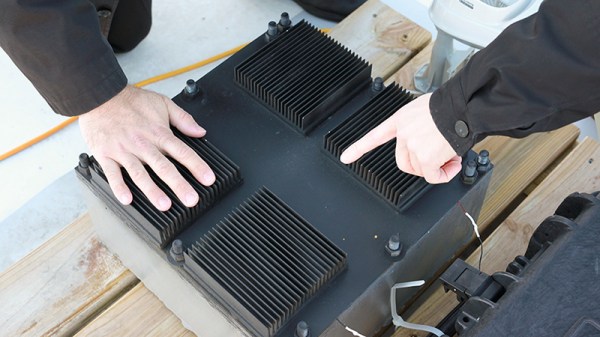
This team called their invention a “thermal resonator”: an assembly of materials tuned to work over a specific range of time and temperature. When successful, the device output temperature is out-of-phase with its input: cold in one section while the other is hot, and vice versa. Energy can then be harvested from the temperature differential via “conventional thermoelectrics”.

Power output of the initial prototype is modest. Given a 10 degree Celsius daily swing in temperature, it could produce 1.3 milliwatt at maximum potential of 350 millivolt. While the Hackaday coin-cell challenge participants and other pioneers of low-power electronics could probably do something interesting, the rest of us will have to wait for thermal resonator designs to evolve and improve on its way out of the lab.

[via Engadget]

Simple Jig Gives Plastic Homes To Orphaned Projects

Look around your bench and chances are pretty good that there’s a PCB or scrap of perfboard or even a breadboard sitting there, wires and LEDs sprouting off it, doing something useful and interesting. Taking it to the next level with a snazzy enclosure just seems too hard sometimes, especially if you don’t have access to a 3D printer or laser cutter. But whipping up plastic enclosures can be quick and easy with this simple acrylic bending outfit.

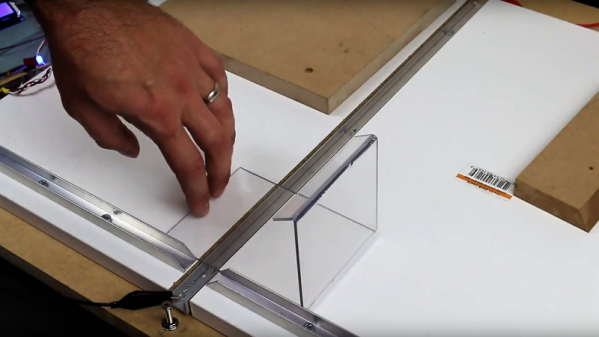
At its heart [Derek]’s bending rig is not much different from any of the many hot-wire foam cutters we’ve featured. A nichrome wire with a tensioning spring is stretched across a slot in a flat work surface. The slot contains an aluminum channel to reflect the heat from the wire upward and to protect the MDF bed; we wonder if perhaps an angle section set in a V-groove might not be more effective, and whether more vertical adjustment range would provide the wider heating area needed for wider radius bends. It works great as is, though, and [Derek] took the time to build a simple timer to control the heating element, for which of course he promptly built a nice looking enclosure.

We can imagine the possibilities here are endless, especially if you use colored acrylic or Lexan and add in some solvent welding. We’ve covered acrylic enclosure techniques before; here’s a post that covers the basics.

Continue reading “Simple Jig Gives Plastic Homes To Orphaned Projects”

Thermal Panorama One Pixel At A Time

Inspiration can strike from the strangest places. Unearthing a forgotten Melexis MLX90614 thermopile from his  ‘inbox,’ [Saulius Lukse] used it to build a panoramic thermal camera.

[Lukse] made use of an ATmega328 to control the thermal sensor, and used the project to test a pair of two rotary stage motors he designed for tilt and pan, with some slip rings to keep it in motion as it captures a scene. That said, taking a 720 x 360 panoramic image one pixel at a time takes over an hour, and compiling all that information into an intelligible picture is no small feat either. An occasional hiccup are dead pixels in the image, but those are quickly filled in by averaging the temperature of adjoining pixels.

The camera  rig works — and it does turn out a nice picture — but [Lukse]  says an upgraded infrared camera to captured larger images at a time and higher resolution would not be unwelcome.


Another clever use of a thermopile might take you the route of this thermal flashlight. if you don’t build your own thermal camera outright.

[Thanks for the tip, Imn!]

Old Heatsink Lets Ham Push Duty Cycle For Digital Modes

Listen to the amateur radio bands long enough, and you’ll likely come to the conclusion that hams never stop talking. Of course it only seems that way, and the duty cycle for a transmitter operating in one of the voice modes is likely to be pretty low. But digital modes can up the duty cycle and really stress the finals on a rig, so this field-expedient heat sink for a ham transceiver is a handy trick to keep in mind.

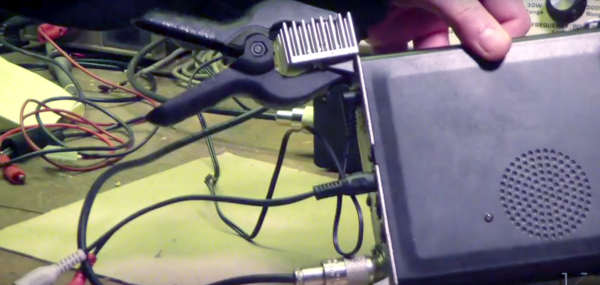
This hacklet comes by way of [Kevin Loughin (KB9RLW)], who is trying to use his “shack-in-a-box” Yaesu FT-817 for digital modes like PSK31. Digital modes essentially turn the transceiver into a low-baud modem and thus messages can take a long time to send. This poses a problem for the 5-watt FT-817, which was designed for portable operations and doesn’t have the cooling fans and heavy heatsinks that a big base station rig does. [Kevin] found that an old 486 CPU heatsink clamped to a lug on the rear panel added enough thermal mass to keep the finals much cooler, even with a four-minute dead key into a dummy load at the radio’s full 5-watt output.

You may scoff at the simplicity of this solution, and we’ll concede that it’s far from an epic hack. But sometimes it’s the simple fixes that it pays to keep in mind. However, if your project needs a little less seat-of-the-pants and a little more engineering, be sure to check out [Bil Herd]’s primer on thermal management.
Continue reading “Old Heatsink Lets Ham Push Duty Cycle For Digital Modes”

Multi Sensor Security Camera Has You Covered

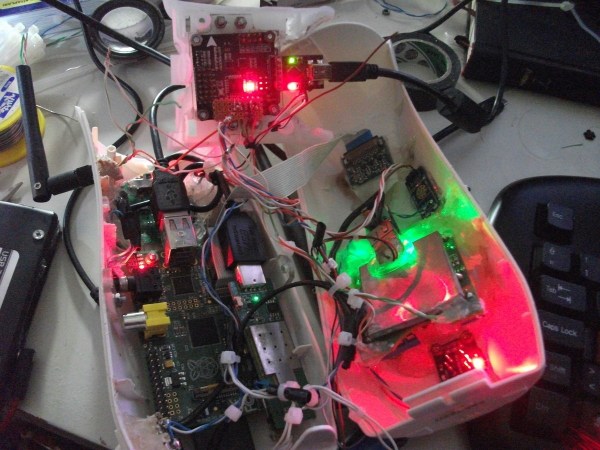
Security in the home — especially a new home — is a primary concern for many. There are many options for security systems on the market, but for those will the skills, taking matters into your own hands can add peace of mind when protected by a system of one’s own design. [Armagan C.] has created  their near-ideal multi-sensor security module to keep a watchful eye out for would-be burglars.

Upgrading from their previous Arduino + Ethernet camera — which loved to trigger false alarms — [Armagan] opted for a used Raspberry Pi model B+ camera module and WiFi connection this time around. They also upgraded the unit with a thermal sensor, LPG & CO2 gas sensor, and a motion tracking alarm. [Armagan] has also set up a live streaming  feature that records video in 1hr segments — deleting them daily — and circumvented an issue with file descriptor leak by using a crashed drone’s flight controller to route the sensor data via serial port. It is also proving superior to conventional alarms because the custom software negates the need to disarm security zones during midnight trips to the washroom.

Continue reading “Multi Sensor Security Camera Has You Covered”

Hackaday Reviews: Flir One Android

The Flir One thermal camera caused quite a stir when it was launched back in 2014. Both the Flir One and its prime competitor Seek Thermal represented the first “cheap” thermal cameras available to the public. At the heart of the Flir One was the Lepton module, which could be purchased directly from Flir Systems, but only in quantity. [Mike Harrison] jumped on board early, cutting into his Flir One and reverse engineering the Lepton module within, including the SPI data required to talk to it. He even managed to create the world’s smallest thermal imager using a the TFT screen from an Ipod Nano.

flircamA few things have changed since then. You can buy Lepton modules in single quantity at DigiKey now. Flir also introduced a second generation of the Flir One. This device contains an updated version of the Lepton. The new version has a resolution of 160 x 120 pixels, doubled from the original module. There are two flavors: The iOS version with a lightning port, and an Android version with a micro USB connector. I’m an Android user myself, so this review focuses on the Android edition.

The module itself is smaller than I expected. It comes with a snap-on case and a lanyard. While you’ll look a bit like a dork wearing the lanyard, it does come in handy to keep the imager from getting lost or dropped. The Flir One has an internal battery, which of course needs to be topped off before it can be used. Mine charged up in about half an hour.

Continue reading “Hackaday Reviews: Flir One Android”

Thermal Printer Brain Transplant

Thermal Printer Brain Transplant Is Two Hacks In One

You know how sometimes you just can’t resist collecting old hardware, so you promise yourself that you will get around to working on it some day? [Danny] actually followed through on one of those promises after discovering an old Radio Shack TRS-80 TP-10 thermal printer in one of his boxes of old gear. It looks similar to a receipt printer you might see printing receipts at any brick and mortar store today. The original printer worked well enough, but [Danny] wasn’t satisfied with its 32 character per line limitation. He also wanted to be able to print more complex graphics. To accomplish this goal, he realized he was going to have to give this printer a brain transplant.

First, [Danny] wanted to find new paper for the printer. He only had one half of a roll left and it was 30 years old. He quickly realized that he could buy thermal paper for fax machines, but it would be too wide at 8.5 inches. Luckily, he was able to use a neighbor’s saw to cut the paper down to the right size. After a test run, he knew he was in business. The new fax paper actually looked better than the old stuff.

The next step was to figure out exactly how this printer works. If he was going to replace the CPU, he was going to need to know exactly how it functioned. He started by looking at the PCB to determine the various primary functions of the printer. He needed to know which functions were controlled by which CPU pins. After some Google-Fu, [Danny] was able to find the original manual for the printer. He was lucky in that the manual contained the schematic for the circuit.

Once he knew how everything was hooked up, [Danny] realized that he would need to learn how the CPU controlled all of the various functions. A logic analyzer would make his work much easier, but he didn’t happen to have one lying around. [Danny] he did what any skilled hacker would do. He built his own!

He built the analyzer around an ATMega664. It can sample eight signals every three microseconds. He claims it will fill its 64k of memory in about one fifth of a second. He got his new analyzer hooked up to the printer and then got to work coding his own logic visualization software. This visualization would provide him with a window to the inner workings of the circuit.

Now that he was able to see exactly how the printer functioned, [Danny] knew he would be able to code new software into a bigger and badder CPU. He chose to use another ATMega microcontroller. After a fair bit of trial and error, [Danny] ended up with working firmware. The new firmware can print up to 80 characters per line, which is more than double the original amount. It is also capable of printing simple black and white graphics.

[Danny] has published the source code and schematics for all of his circuits and utilities. You can find them at the bottom of his project page. Also, be sure to catch the demonstration video below. Continue reading “Thermal Printer Brain Transplant Is Two Hacks In One”