Simple Ultrasound Machine Shows The Skeleton Lurking Inside Us All

That first glimpse of a child in the womb as a black and white image on a screen is a thrilling moment for any parent-to-be, made possible by several hundred thousand dollars worth of precision medical instrumentation. This ultrasound machine cobbled together from eBay parts and modules is not that machine by a long shot, but it’s still a very cool project that actually gives a peek inside the skin.

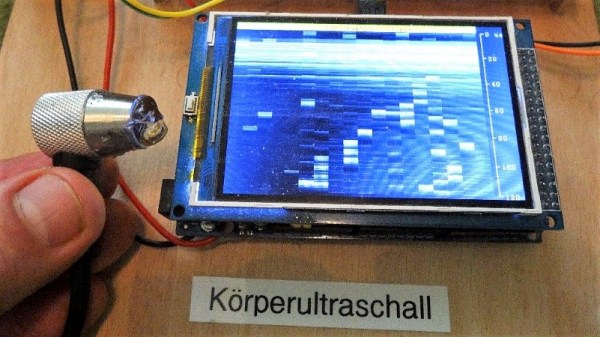
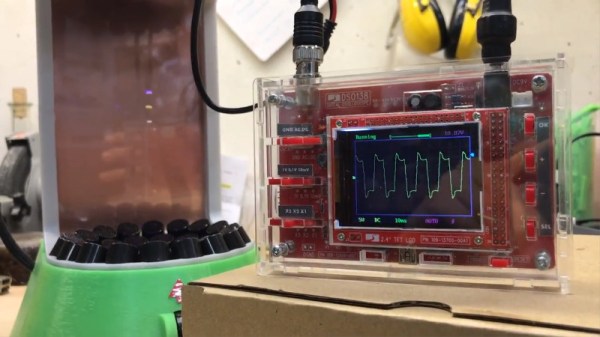
The ultrasound transducer used by [stoppi71] in this build has an unusual source: a commercial paint-thickness meter. Cue the jokes about watching paint dry, but coatings measurement is serious stuff. Even so, the meter in question only ran about $40 on eBay, and provided the perfect transducer for the build. The sender needs a 100V pulse at about 5 MHz, so [stoppi71] had some fun with a boost converter and a 74121 Schmitt-trigger one-shot driving a MOSFET to switch the high voltage. On the receive side, the faint echo is sent through a three-stage amp using AD811 op amps before going through an LM7171 op amp acting as a rectifier and peak detector. Echos are sent to an Arduino Due for display on a 320×480 LCD. The resolution isn’t great, but the video below shows that it’s enough to see reflections from the skin of [stoppi71]’s forearm and from the bones within.

[stoppi71] says that he was inspired to tackle this build by Murgen, an open-source ultrasound project. That project got further refined and entered into the “Best Product” category in the 2018 Hackaday Prize. We like that because focusing on turning projects into products is what this year’s Hackaday Prize is all about.

Continue reading “Simple Ultrasound Machine Shows The Skeleton Lurking Inside Us All”

Flex PCBs Make Force-Mapping Pressure Sensor For Amputee

What prosthetic limbs can do these days is nothing short of miraculous, and can change the life of an amputee in so many ways. But no matter what advanced sensors and actuators are added to the prosthetic, it has to interface with the wearer’s body, and that can lead to problems.

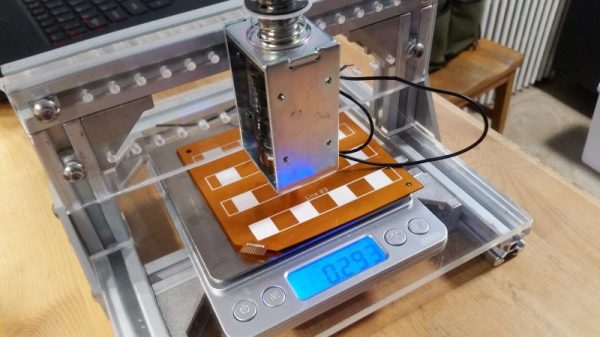
Measuring and mapping the pressure on the residual limb is the business of this flexible force-sensing matrix. The idea for a two-dimensional force map came from one of [chris.coulson]’s classmates, an amputee who developed a single-channel pressure sensor to help him solve a painful fitting problem. [chris.coulson] was reminded of a piezoresistive yoga mat build from [Marco Reps], which we featured a while back, and figured a scaled-down version might be just the thing to map pressure points across the prosthetic interface. Rather than the expensive and tediously-applied web of copper tape [Marco] used, [chris] chose flexible PCBs to sandwich the Velostat piezoresistive material. An interface board multiplexes the 16 elements of the sensor array to a PIC which gathers and records testing data. [chris] even built a test stand with a solenoid to apply pressure to the sensor and test its frequency response to determine what sorts of measurements are possible.

We think the project is a great application for flex PCBs, and a perfect entry into our Flexible PCB Contest. You should enter too. Even though [chris] has a prototype, you don’t need one to enter: just an idea would do. Do something up on Fritzing, make a full EAGLE schematic, or just jot a block diagram down on a napkin. We want to see your ideas, and if it’s good enough you can win a flex PCB to get you started. What are you waiting for?

DIY Ribbon Element Upgrades A Studio Microphone

For those with some experience with pro audio, the term “ribbon microphone” tends to conjure up an image of one of those big, chunky mics from the Golden Age of radio, the kind adorned with the station’s callsign and crooned into by the latest heartthrob dreamboat singer. This DIY ribbon mic is none of those things, but it’s still really cool.

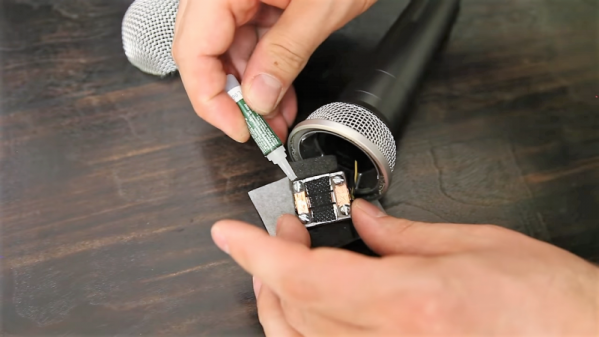
Of course the ribbon mic isn’t always huge, and the technology behind it is far from obsolete. [Frank Olsen]’s ribbon mic starts out with gutting a run-of-the-mill studio mic of its element, leaving only the body and connector behind. The element that he constructs, mostly from small scraps of aluminum and blocks of acrylic, looks very much like the ribbon element in commercial mics: a pair of magnets with a thin, corrugated strip of foil suspended between them. The foil was corrugated by passing it through a jig that [Frank] built, which is a neat tool, but he says that a paper crimper used for crafting would work too. There’s some pretty fussy work behind the cartridge build, but everything went together and fit nicely in the old mic body. The video below was narrated using the mic, so we know it works.

Fun fact: the ribbon microphone was invented by Walter Schottky. That Walter Schottky. Need more on how these mics work? Our colleague [Al Williams] has you covered with this article on the basics.

Continue reading “DIY Ribbon Element Upgrades A Studio Microphone”

72 Tranducers For Acoustic Levitation

Levitation has a way of arousing curiousity and wonder wherever it appears. There’s a multitude of ways to do it, each with their own strengths and weaknesses and ideal use cases. [Julius Kramer] tried his hand at acoustic levitation, and decided to share his build.

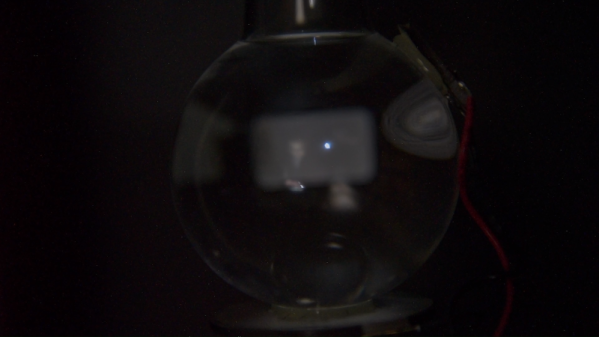
The build relies on an astounding number of ultrasonic transducers – 72, in fact. The device operates at 40 kHz to be well above the human range of hearing. 36 each are placed in the top and bottom shells of the device’s 3D printed chassis. Through careful construction, the transducers are placed an integer multiple of half the wavelength apart. This allows the device to create a standing wave, with several low-energy nodes in which small objects can be levitated. In this case, [Julius] uses small scraps of styrofoam, but notes that water droplets can also be used if one is careful to avoid spilling any on the electronics.

The transducers are energised with a square wave generated by an Arduino Nano. This allows the possibility of the frequency and phase of the wave to be altered, which can help tune the device and allow some movement in the vertical axis. Unfortunately, movement in the other axes isn’t possible as the transducers appear to be connected in parallel. However, this could be a good upgrade in a later revision.

This project shows that a device relying on incredibly precise measurement and control can now be constructed at home with a 3D printer and some off the shelf electronics.

Now that you’ve whet your whistle, perhaps you’d like to tackle laser levitation?

[Thanks to Baldpower for the tip!]


The Diaphragm Is The Coil In These Flexible PCB Speakers

Speakers used to be largish electromechanical affairs, with magnets, moving coils, and paper cones all working together to move air around in a pleasing way. They’ve gotten much smaller, of course, small enough to screw directly into your ears or live inside the slimmest of smartphones and still delivery reasonable sound quality. The basic mechanism hasn’t changed much, but that doesn’t mean there aren’t other ways to make transduce electrical signals into acoustic waves.

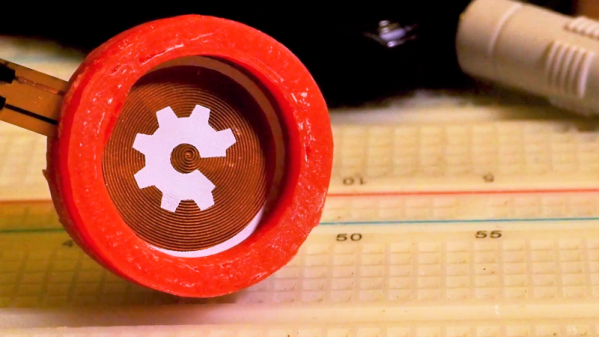
Take these speakers made from flexible printed circuit boards, for instance. While working on his flexible PCB soft actuators, [Carl Bugeja] noticed that the PWM signals coursing through the coils on the thin PCB material while they were positioned over a magnet made an audible beeping. He decided to capitalize on that and try to make a decent speaker from the PCBs. An early prototype hooked to a simple amplifier showed promise, so he 3D-printed a ring to support the PCB like a diaphragm over a small neodymium magnet. The sound quality was decent, but the volume was low, so [Carl] experimented with a paper cone attached to the PCB to crank it up a bit. That didn’t help much, but common objects acting as resonators seemed to work fairly well. Check out the results in the video below.

This is very much a work in progress, but given [Carl]’s record with PCB creations from robotic fish to stepper motors built right into the PCB, we’d say he’ll make substantial improvements. Follow his and others’ progress in the Musical Instruments Challenge part of the 2018 Hackaday Prize.

Continue reading “The Diaphragm Is The Coil In These Flexible PCB Speakers”

Fail Of The Week: The Little Ultrasonic Knife That Couldn’t

We all know the feeling of an idea that sounded great when it was rattling around in our head, only to disappoint when we actually build the thing. It’s a natural consequence of trying new stuff, and when it happens, we salvage what we can and move on, hopefully in wisdom.

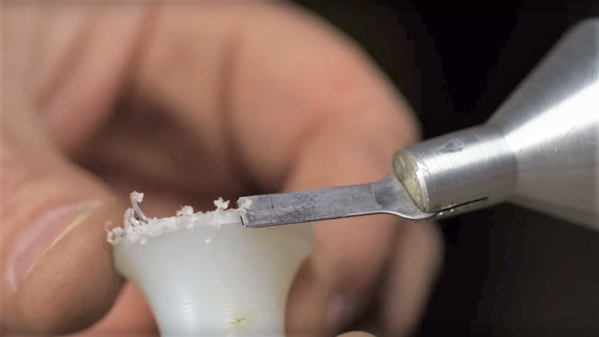
The thing that at least semi-defeated [This Old Tony] was an attempt to build an ultrasonic cutter, and it didn’t go well. Not that any blood was shed in the video below, although there seemed like there would be the way [Old Tony] was handling those X-Acto blades. His basic approach was to harvest the transducer and driver from a cheap ultrasonic cleaner and retask the lot into a tool to vibrate a knife rapidly enough to power it through tough materials with ease.

Spoiler alert: it didn’t work very well. We think the primary issue was using a transducer that was vastly underpowered compared to commercial (and expensive) ultrasonic cutters, but we suspect the horn he machined was probably not optimized either. To be fair, modeling the acoustic performance of something like that isn’t easy, so we can’t expect much. But still, it seems like the cutter could have worked better. Share your thoughts on how to make version 2.0 better in the comments.

The video is longish, but it’s as entertaining as any of [Old Tony]’s videos, and packed full of incidental gems, like the details of cavitation. We enjoyed it, even if the results were suboptimal. If you want to see a [This Old Tony] project that really delivers, check out his beautiful boring head build.

Continue reading “Fail Of The Week: The Little Ultrasonic Knife That Couldn’t”

Floating Ants And Drops Of Liquid With An Acoustic Levitator

Amuse your friends, amaze your enemies, and perplex ants and other insects, insofar as they are capable of perplexment. Accomplish all this and more with this handy dandy homebrew acoustic levitator.

Before anyone gets to thinking about using this technique to build a hoverboard that actually hovers, it’s best that you scale your expectations way, way down. Still, being able to float drops of liquid and small life forms is no mean feat, and looks like a ton of fun to boot. [Asier Marzo]’s Instructable’s post fulfills a promise he made when he first published results for what the popular press then breathlessly dubbed a “tractor beam,” which we covered back in January. This levitator clearly has roots in the earlier work, what with 3D-printed hemispherical sections bristling with ultrasonic transducers all wired in phase. A second section was added to create standing acoustic waves in the middle of the space, and as the video below shows, just about anything light enough and as least as cooperative as an ant can be manipulated in the Z-axis.

There’s plenty of room to expand on [Asier]’s design, and probably more practical applications than annoying bugs. Surface-mount devices are pretty tiny — perhaps an acoustic pick and place is possible?

Continue reading “Floating Ants And Drops Of Liquid With An Acoustic Levitator”