The new firmware boasts an improved UI and multiple measurement units, including Sievert, Rem, and counts per minute or second. You can hold the measurement or compute a dose or average rate. The new firmware also has a host of customizations and can accommodate different tubes.
There are, however, two really key features. First, the new firmware offers about 40% more battery life than the stock version. Second, there is now an onboard nuclear chess game! That way, you can enjoy yourself while you are getting irradiated. There are also a few suggested hardware mods that are optional to improve measurements and increase the buzzer volume, among other things.
[Marek] has an impressive collection of old Soviet-style Geiger counters. These are handy tools to have in some specific situations, but for most of us they would be curiosities. Even so, they need some help from the modern world to work well, and [Marek] has come up with some pretty creative ways of bringing them into the 21st century. This version, for example, adds WiFi capabilities.
This build is based on the STS-5 Geiger tube but the real heavy lifting is handled by an ESP8266 which also provides a wireless network connection. There are some limitations to using an ESP8266 to control a time-sensitive device like a Geiger tube, especially the lack of local storage, but [Marek] solves this problem by including a real-time clock and locally caching data until a network connection is re-established. Future plans for the device include adding temperature and atmospheric temperature sensors.
Eventually this Geiger counter will be installed in a watertight enclosure outside so [Marek] can keep an eye on the background radiation of his neighborhood. Previously he was doing this with another build, but that one only had access to the network over an Ethernet cable, so this one is quite an upgrade.
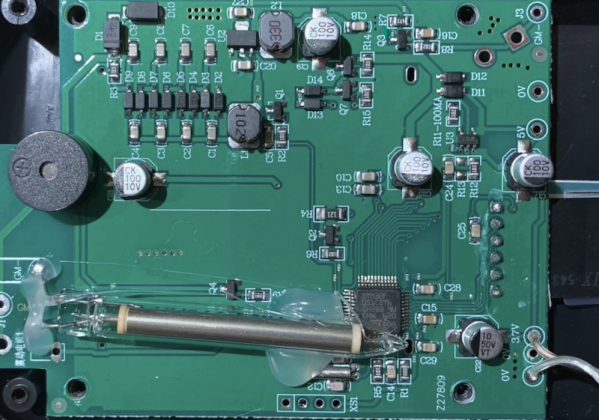
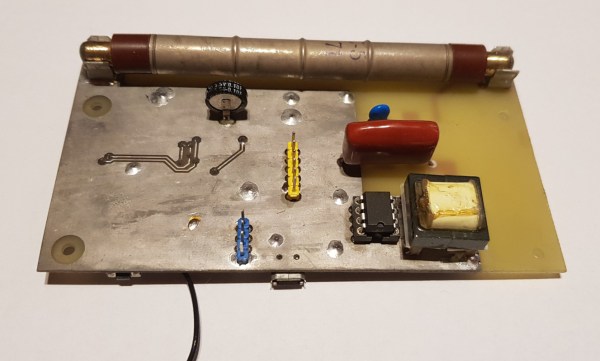
Over the years we’ve covered many projects aimed at detecting elevated radiation levels, and a fair number of them have been Internet connected in some way. But as they are often built around the Soviet-era SBM-20 Geiger–Müller tube, these devices have generally adhered to a fairly conservative design. With the current situation in Europe heightening concerns over potential radiation exposure, [g3gg0] thought it was a good a time as any to revisit the idea of an Internet-connected Geiger counter using more modern components.
Now to be clear, even this modernized approach still makes use of that same SBM-20 tube. There’s such an incredible wealth of information floating around out there about how to work with them that you’d almost put yourself at a disadvantage to chose something else to base your design on. Put simply, it’s hard to go wrong with a classic.
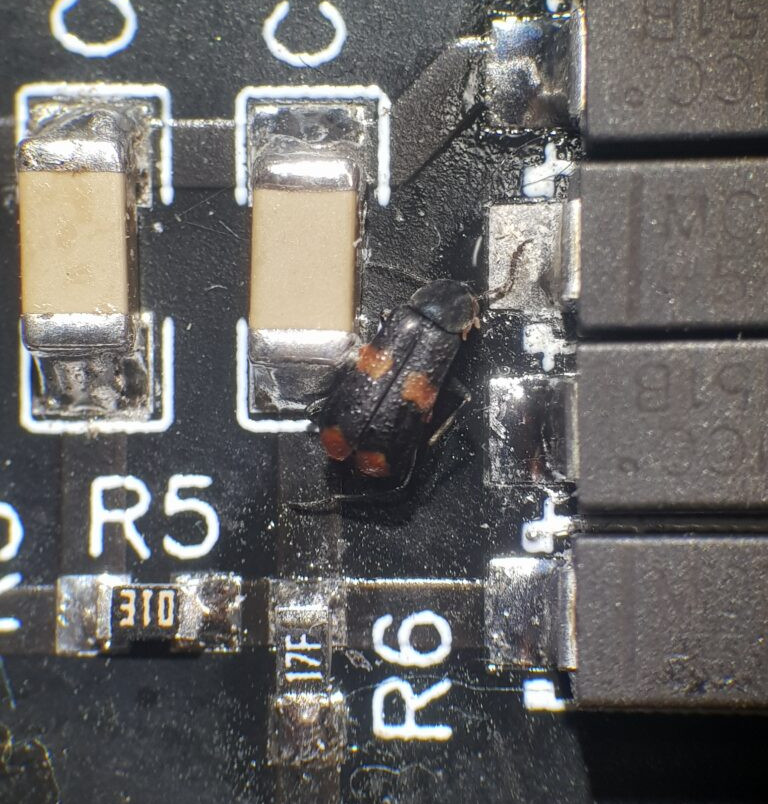
An unfortunate bug was discovered in the HV circuit.
That said, [g3gg0] decided early on that the design would use as many SMD components as possible, a considerable departure from many of the SBM-20 counters we’ve seen. That meant coming up with a new high-voltage power supply capable of providing the tube with the necessary 400 V, which from the sound of things, took a few attempts to complete. The final result is perhaps the smallest and cleanest looking board we’ve ever seen play host to this particular tube.
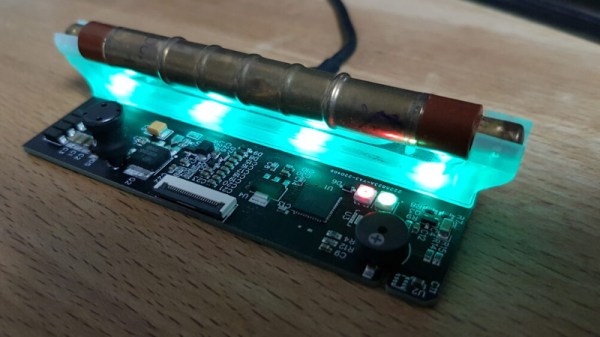
To run the show, [g3gg0] selected the ESP32-PICO-D4. You certainly don’t need such a powerful microcontroller to read the impulses from the SBM-20 tube and publish them via MQTT, but to be fair, the chip has a number of other duties. It’s handling the WS2812 RGB LEDs that go off in response to detected particles, running the (apparently optional) 2.9 inch WaveShare electronic paper display, and also pulling data from a BME280 environmental sensor as well as a CCS811 VOC sensor — so it’s keeping fairly busy.
As impressive as this build is, we do hate that it had to be built. From certain world leaders dropping casual comments about the strength of their nuclear arsenal to foolhardy attempts to capture the Chernobyl power station, having access to a reliable Geiger counter isn’t an unreasonable precaution right now. For everyone’s sake, let’s hope the fancy RGB LEDs on this particular build remain as dark as possible.
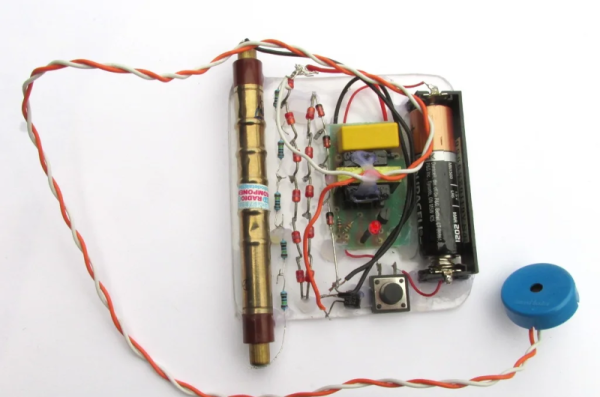
With all the focus on biological problems, we might forget that sometimes it’s handy to know about radiation hazards, too. [Ryan Harrington] shows us how to make a Geiger counter with very few parts, and you can see the results in the video below.
The glut of surplus Russian tubes has made this a common project, but we were amused to see the main part of the high-voltage supply was gutted from a cheap electronic flyswatter sourced from Harbor Freight. Even without a coupon, it only costs about $4.
There’s also a stack of zener diodes, a transistor, and some resistors. A battery, a piezo speaker, and a switch round out the bill of materials. Even then, the switch was upcycled from the flyswatter, so there’s not much to buy.
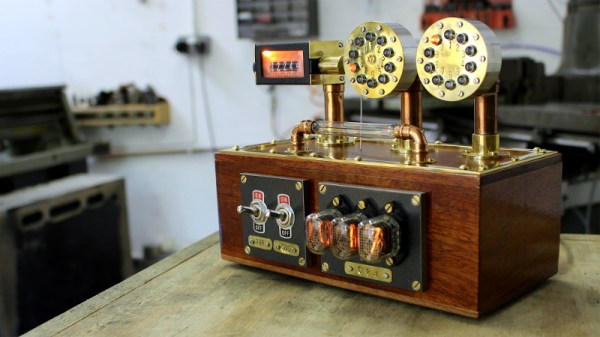
It took nearly a year for [Chris Crocker-White] to assemble this glorious mahogany and brass Geiger counter, but we think you’ll agree with us that it was time well spent. From the servo-actuated counter to the Nixie tubes and LED faux-decatrons, this project is an absolute love letter to antiquated methods of displaying information. Although for good measure, the internal Raspberry Pi also pushes all the collected radiation data into the cloud.
[Chris] says the design of this radiation monitor was influenced by his interest in steampunk and personal experience working on actual steam engines, but more specifically, he also drew inspiration from a counter built by [Richard Mudhar].
Based on a design published in Maplin back in 1987, [Richard] included a physical counter and LED “dekatron” displays as an homage to a 1960s era counter he’d used back in his school days. [Chris] put a modern spin on the electronics and added the glowing display of real-time Counts Per Minute (CPM) as an extra bonus; because who doesn’t like some Nixies in their steampunk?
Internally, the pulses generated by a common Geiger counter board are picked up by some custom electronics to drive the servo and LEDs. Triggered by those same pulses, the Raspberry Pi 3A+ updates the Nixie display and pushes the data out to the cloud for analysis and graphing. Note that the J305β Geiger tube from the detector has been relocated to the outside of the machine, with two copper elbows used as connectors. This improves the sensitivity of the instrument, but perhaps even more importantly, looks awesome.
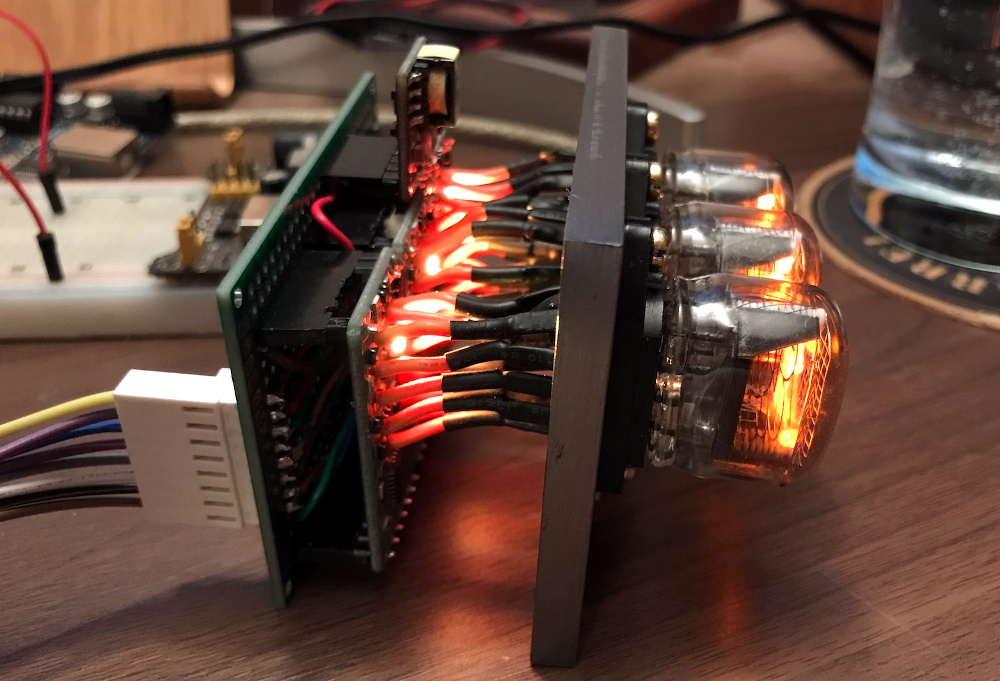
A few things were harder than expected, however. To make the device directional, [Nick] designed and built a PCB Yagi antenna but it wasn’t practical. Not only was it far too big, it would also have required going to four layers on a PCB that was already expensive. The solution he settled on — inspired by a friend’s joke about just dropping the badge into a Pringles can — was to surround the PCB omni antenna with a copper pipe end cap from the plumbing section of any hardware store. [Nick] figured that soldering that to the ground plane should result in a simple, cheap, and attractive directional antenna mod. Did it work? We’ll all have to wait and see.
Sadly, [Nick] wasn’t able to finish in time for last year’s DEFCON. Hardware revisions mounted, and fabrication times for his specialized PCB were longer than usual. Worse news is that this year’s is cancelled, or rather is going virtual, which means he’s going to have to deauth himself. The good news is that now he’s got another 12-month extension. Watch the brief video of the functional prototype, embedded below.
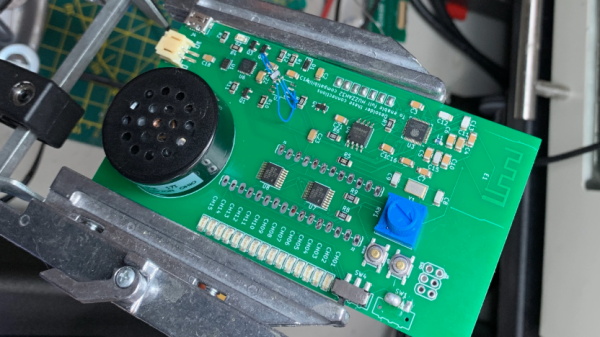
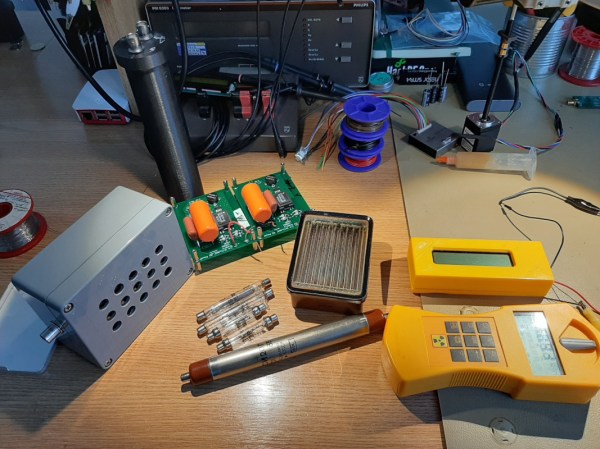
Even if you don’t work in a nuclear power plant, you might still want to use a Geiger counter simply out of curiosity. It turns out that there are a lot of things around which emit ionizing radiation naturally, for example granite, the sun, or bananas. If you’ve ever wondered about any of these objects, or just the space you live in, it turns out that putting together a simple Geiger counter is pretty straightforward as [Alex] shows us.
The core of the Geiger counter is the tube that detects the radiation. That’s not something you’ll be able to make on your own (probably) but once you have it the rest of the build comes together quickly. A few circuit boards to provide the tube with the high voltage it needs, a power source, and a 3D printed case make this Geiger counter look like it was ordered from a Fluke catalog.
The project isn’t quite finished ([Alex] is still waiting on a BNC connector to arrive) but seems to work great and isn’t too complicated to put together, as far as Geiger counters go. He did use a lathe for some parts which not everyone will have on hand, but a quick trip to a makerspace or machinist will get you that part too. We’ve seen some other parts bin Geiger counters too, so there’s always a way around things like this.