A Macro Keyboard In A Micro Package

Remember back in the early-to-mid 2000s when pretty much every cheap USB keyboard you could find started including an abundance of media keys in its layout? Nowadays, especially if you have a customized or reduced-sized mechanical keyboard, those are nowhere to be seen. Whenever our modern selves need those extra keys, we have to turn to external peripherals, and [Gary’s] Knobo is one that looks like it could’ve come straight out of a fancy retail package.

The Knobo is a small macro keypad with 8 mechanical Cherry-style keys and a clickable rotary encoder knob as its main feature. Each key and knob gesture can be customized to any macro, and with five gestures possible with the knob, that gives you a total of thirteen inputs. On top of that, the build and presentation look so sleek and clean we’d swear this was a product straight off of Teenage Engineering’s money-printing machine.

The actions you can do with those inputs range from simple media controls with a volume knob all the way to shortcuts to make a Photoshop artist’s life easier. Right now you can only reprogram the Knobo’s Arduino-based firmware with an In-Circuit Serial Programmer to change what the inputs do, but [Gary] is currently working on configuration software so that users without any programming knowledge will be able to customize it too.

Knobs are just one of those things that everyone wants to use to control their computers, much like giant red buttons. Alternative input devices can range from accessibility-designed to just downright playful. Whatever the inspiration is for them, it’s always nice to see the creativity of these projects.


Continue reading “A Macro Keyboard In A Micro Package”

The Not Quite USB-C Of Nintendo Switch Accessories

Historically gaming consoles are sold at little-to-no profit in order to entice customers with a low up-front price. The real profits roll in afterwards from sales of games and accessories. Seeking a slice of the latter, aftermarket accessory makers jump in with reverse-engineered compatible products at varying levels of “compatible”.

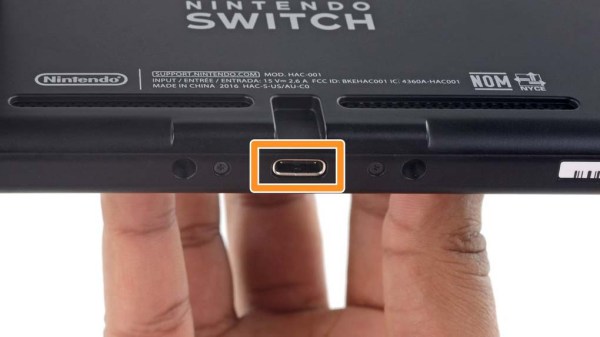
When the Nintendo Switch was released with a standard USB-C port for accessories, we had hoped those days of hit-or-miss reverse engineering were over, but reality fell short. Redditor [VECTORDRIVER] summarized a few parts of this story where Nintendo deviated from spec, and accessory makers still got things wrong.

Officially, Nintendo declared the Switch USB-C compliant. But as we’ve recently covered, USB-C is a big and complicated beast. Determined to find the root of their issues, confused consumers banded together on the internet to gather anecdotal evidence and speculate. One theory is that Nintendo’s official dock deviated from official USB-C dimensions in pursuit of a specific tactile feel; namely reducing tolerance on proper USB-C pin alignment and compensating with an internal mechanism. With Nintendo playing fast and loose with the specs, it makes developing properly functioning aftermarket accessories all the more difficult.

But that’s not the only way a company can slip up with their aftermarket dock. A teardown revealed Nyko didn’t use a dedicated chip to manage USB power delivery, choosing instead to implement it in software running on ATmega8. We can speculate on why (parts cost? time to market?) but more importantly we can read the actual voltage on its output pins which are too high. Every use becomes a risky game of “will this Switch tolerate above-spec voltage today?” We expect that as USB-C becomes more common, it would soon be cheapest and easiest to use a dedicated chip, eliminating the work of an independent implementation and risk of doing it wrong.

These are fairly typical early teething problems for a new complex technology on their road to ubiquity. Early USB keyboard and mice didn’t always work, and certain combination of early PCI-Express cards and motherboards caused damage. Hopefully USB-C problems — and memories of them — will fade in time as well.

[via Ars Technica]

[Main image source: iFixit Nintendo Switch Teardown]

Play Tetris On A Transistor Tester, Because Why Not?

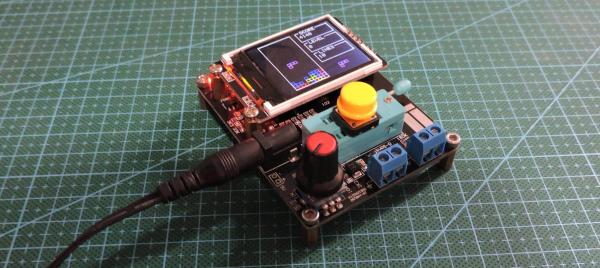
[Robson] had been using the same multimeter since he was 15. It wasn’t a typical multimeter, either. He had programmed it to also play the Google Chrome jumping dinosaur game, and also used it as a badge at various conferences. But with all that abuse, the ribbon cable broke and he set about on other projects. Like this transistor tester that was just asking to have Tetris programmed onto its tiny screen.

The transistor tester is a GM328A made for various transistor testing applications, but is also an LCR meter. [Robson]’s old meter didn’t even test for capacitance but he was able to get many years of use out of that one, so this device should serve him even better. Once it was delivered he set about adding more features, namely Tetris. It’s based on an ATmega chip, which quite easy to work with (it’s the same chip as you’ll find in the Arduino Uno but [Robson’s] gone the Makefile route instead of spinning up that IDE). Not only did he add more features, but he also found a mistake in the frequency counter circuitry that he fixed on his own through the course of the project.

If you’ve always thought that the lack of games on your multimeter was a total deal breaker, this project is worth a read. Even if you just have a random device lying around that happens to be based on an ATmega chip of some sort, this is a good primer of getting that device to do other things as well. This situation is a fairly common one to be in, too.

Continue reading “Play Tetris On A Transistor Tester, Because Why Not?”

A Z80 Homebrew Console, With A Bit Of Modern Help

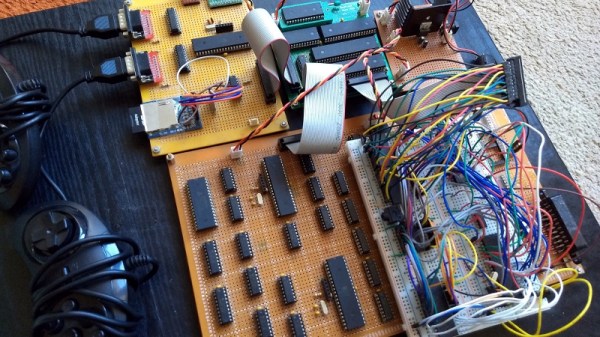
We see a lot of retrocomputing projects here at Hackaday that take devices from the 8-bit era and re-create them in the 21st century. Sometimes they remain period-accurate and stick to all contemporary devices, but in other cases they take full advantage of four decades of advancing technology. [Pkiller]’s Z80 console is one of this later category, creating peripherals for the classic CPU using microcontrollers in the place of the banks of 74 logic or ULA chips that might have graced a 1980s machine.

The video generation hardware produces a PAL signal using an interesting technique involving two RAM buffers. An ATmega644 microcontroller composites a single frame into one of the buffers while another ATmega644 is generating the previous frame of video from the other buffer. On each change of frame the buffers are switched between the two microcontrollers, requiring some extra 74 logic chips. Another AtMega chip provides the Z80 with I/O interfacing, and the sound comes via another dual-buffer microcontroller setup and a quick return to classic hardware with a YM3438 FM synthesis chip. The result can be seen in the video below, and would have not looked out of place in a late-’80s or even early-’90s living room.

Some people might ask why so much trouble should be gone to in the pursuit of a project like this one, but to do so is to miss the point. Sure, a Sega Master System can be had from the usual sources, but in creating  project such as this one the builder has to truly understand the technologies such as PAL generation or the internals of a Z80 in great detail. The result while it is undeniably impressive is almost secondary to the process of reaching it.

Continue reading “A Z80 Homebrew Console, With A Bit Of Modern Help”

See The Fabulous Workmanship In This Smart Pressure Regulator

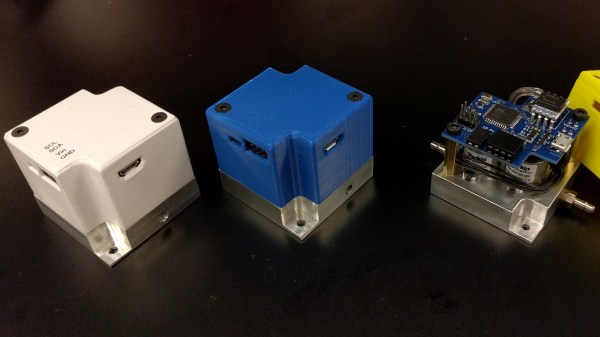
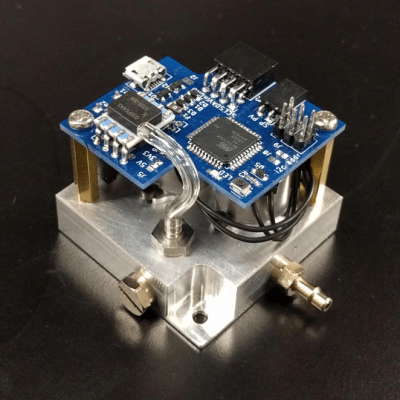
For many projects that require control of air pressure, the usual option is to hook up a pump, maybe with a motor controller to turn it on and off, and work with that. If one’s requirements can’t be filled by that level of equipment and control, then it’s time to look at commercial regulators. [Craig Watson] did exactly that, but found the results as disappointing as they were expensive. He found that commercial offerings — especially at low pressures — tended to leak air, occasionally reported incorrect pressures, and in general just weren’t very precise. Out of a sense of necessity he set out to design his own electronically controlled, closed-loop pressure regulator. The metal block is a custom manifold with valve hardware mounted onto it, and the PCB mounted on top holds the control system. The project logs have some great pictures and details of the prototyping and fabrication process.

This project was the result of [Craig]’s work on a microfluidics control system, conceived because he discovered that much of the equipment involved in these useful systems is prohibitively expensive for small labs or individuals. In the course of developing the electronic pressure regulator, he realized it could have applications beyond microfluidics control, and created it as a modular device that can easily be integrated into other systems and handle either positive or negative pressure. It’s especially well-suited for anything with low air requirements and a limited supply, but with a need for precise control.

Build Your Own Rowing Machine, Now With Digital Readout!

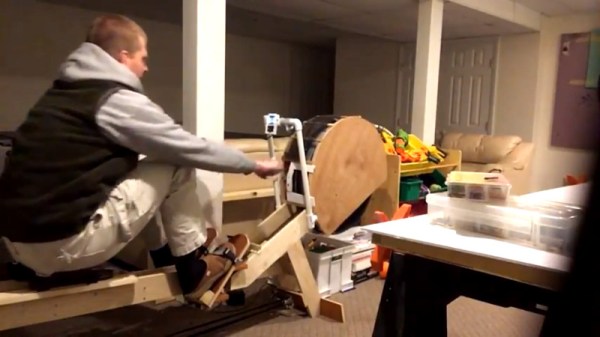
An ergometer is a fancy fitness word for a rowing machine, a device which can be used to work out the muscles used in rowing. It’s an excellent cardio workout that can also build upper body strength, and resistance can be varied depending on the individual’s fitness goals. But perhaps you need to measure your workout to see your progress – in which case, [Dave]’s instrumentation package might be right up your alley.

The basic mechanical build involves a wooden frame, fitted with a rowing setup built around a modified bicycle wheel. The wheel has vanes attached, made of what appears to be cut sections of PVC pipe. These act essentially as dampers, using the air to create the resistance for the rower to work against.

The wheel is instrumented with a chopper wheel and an IR optical switch, which measures the rotational speed of the wheel during rowing. This signal is fed into an ATMega328 which runs the calculations on the rower’s performance. It’s all fed to a Nokia 5110 screen for display, which makes a lovely throwback for those that remember the brick fondly.

[Dave] touches not only on the electronic aspects of the build, but also does an excellent job of breaking down the mathematics behind rowing performance. It’s a great resource that builds on top of the excellent work by the OpenErgo project.

If we’ve whet your thirst for exercise machine hacks, you’d better check out this treadmill to belt grinder mod.

Heartwatch Monitors Your Ticker

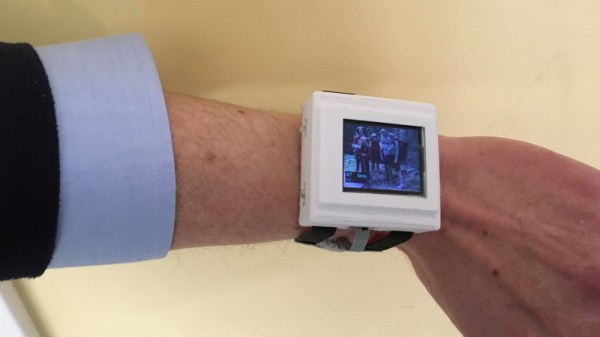
The heart! A pump of the most fantastical kind, it is capable of operating for decades without rest. It’s responsible for supplying vital oxygen to the body’s subsystems, and can be readily monitored with modern technology. [Dave Vernooy] wanted to build a watch that could take heartrate and blood oxygen measurements – so he did.

Named Heartwatch, the device is a DIY smartwatch build with a bunch of exciting features. Heart monitoring is taken care of by the MAX30102 sensor which integrates all the hardware to sense heart rate and oxygen saturation into a single tiny plastic package. There’s then an assortment of accelerometers, gyros and even a color LCD to display all the wonderful information.

It’s all wrapped up in a 3D printed case, with an ATMEGA1284 running the show. The project just goes to show how much can be achieved with an 8-bit processor – there’s not always a need to run a high-powered ARM chip for an embedded project.

There are a fair few DIY smartwatch builds out there – like this classy unit with an OLED screen.