Kved: An Embeddable Key/Value Datastore

At some point when developing embedded applications, you’re going to want to store unique values in non-volatile memory, values that can’t be fixed at compilation time. Many microcontrollers have a small amount of EEPROM memory for this very purpose, but it’s usually rather limited if it’s provided at all. Even if you do have a bit of space on an EEPROM at your disposal, actually formatting your values into the memory and dealing with the pesky problem of wear leveling (necessary for parameters that need to change often) can be a bit of a hassle.

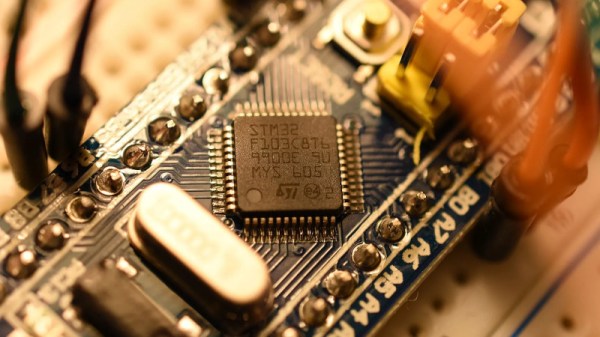
Lucky for us, [Marcelo Barros] decided to share his own implementation, Kved (key/value database) which uses the flash memory instead for such storage. Kved implements a dictionary type data structure, using numeric keys and values, supporting a few integer types. Using the library should be straightforward enough, as [Marcelo] says, all you need are a pair of spare flash sectors and the ability to port the flash the sector read, write, and erase functions. There are plenty of examples of such code available for practically any microcontroller out there, so that should be no barrier. For those who want to play with it right now, the repo currently has ports for the STM32L433RC and STM32F411CE, as well as a simulated version you can compile and run on your computer.

From an implementation perspective, the write algorithm uses a COW (Copy On Write) method. Changed values are invalidated by over-writing the storage location with all-zeros, and re-writing the changed value to a new location, cycling through the unused locations until the sector is full. Data-integrity mechanisms are implemented, preventing corruption of the data structure due to power fail situations, so incorrectly written values will be corrected on start-up and not affect the integrity of the configuration.

When looking around, we found a similar project, Embedis, over on hackaday.IO, as well as this article on the subject of embedded filesystems from a little while back.

Odd Inputs And Peculiar Peripherals: The Morse Keyboard

When it comes to rendering text input into an electronic form,the newest keyboards use USB for wired interfacing, while the oldest Morse keys use a single conductor. Shall the two ever meet? For [Matthew Sparks] the answer is yes, with his “The Gadget” Morse-to-USB HID interface which presents a Morse key to a computer as though it were a USB keyboard.

At its heart is a Seeduino Arduino clone, upon which the Morse key waggles a pin, and which through the extensive magic of software recognizes the keyed characters and converts them into USB key presses for the computer. It’s thus a surprisingly simple project, and the write-up spends far more time proselytizing the art of the carrier wave than it does on Arduino code.

Morse is simultaneously a manual art form, an efficient means of communicating through congested radio bands, and an anachronism, which probably explains its continued appeal in the radio amateur fraternity. We’re not sure how many keyboard warriors will switch to the single key with this project, but we can see that it might be a useful aid to learning as well as a pretty quick input method for the owner of an experienced fist.

Morse has featured in many projects here before, not least in this assistive Morse keyboard.

Linux Fu: Up Your GDB Game!

If you want to buy a car, there are plenty of choices. If you want to buy a jetliner, there are fewer choices. If you want to use the Large Hadron Collider, you have a choice of exactly one. The harder something is to create, the less likely there is to be many of them. If you are looking for a Linux debugger, there are only a few choices, but gdb is certainly the one you will find most often. There is lldb and a handful of non-open commercial offerings, but for the most part you will use gdb to debug software on Linux.

Of course, not everyone’s a fan of gdb’s text-based interface, so there’s no shortage of front ends available for it. In fact, gdb has two potentially built-in interfaces although depending on how you install gdb, you might not have both of them. Of course, if you use an IDE, it very likely is a front end for gdb among other things. But at the core is gdb and — usually — there is a window somewhere that you can stuff gdb commands into. Even emacs — which might be considered the original IDE — can run gdb and gives you a sort-of GUI experience.

Continue reading “Linux Fu: Up Your GDB Game!”

LMN-3: Putting The ‘OP’ In Open Source Synthesizers

Some projects you come across simply leave you in awe when you look at the thought and the resulting amount of work that went into it, not only for the actual implementation, but everything around it. Even more so when it’s a single-developer open source project. [Stone Preston]’s synth / sampler / sequencer / DAW-in-a-box LMN-3 absolutely fits the description here, and it seems like he has set his heart on making sure everyone can built one for themselves, by providing all the design files from case down to the keycaps.

The LMN-3 (LMN as in “lemon”, not “comes before the OP“) is intended as a standalone, portable digital audio workstation, and is built around a Raspberry Pi 4 with a HyperPixel display for the user interface. The UI itself, and with it the core part of the software, was created using the Tracktion Engine, which itself uses the JUCE framework and combines your typical synthesizer, sequencer, and sampler features with the DAW part to handle recording, editing, and mixing. The remaining hardware is a custom-designed PCB with a set of function and keyboard buttons, along with a pitch bend joystick and four rotary encoders with push buttons that serve as main input handlers. Oh yes, and a Teensy board.

The UI is actually entirely controlled via MIDI commands, and custom firmware on the Teensy is translating the input events from buttons, encoders, and joystick accordingly. This essentially decouples the hardware from the software, and using a cross-platform framework underneath, you can also run the UI standalone on your computer and use any 3rd-party MIDI controller you like. Or then, as [Stone] thought really about everything, use a hardware emulator he created in addition. You could even leave out the Raspberry Pi and software altogether and turn this into a pure MIDI controller. If that sounds tempting, but you’re looking for something with more knobs and sliders instead of buttons, check out the Traktorino. And if you actually prefer a mouse as input device, there’s always something running in a browser.

Continue reading “LMN-3: Putting The ‘OP’ In Open Source Synthesizers”

The Weird World Of Liquid Cooling For Datacenters

When it comes to high-performance desktop PCs, particularly in the world of gaming, water cooling is popular and effective. However, in the world of datacenters, servers rely on traditional air cooling more often than not, in combination with huge AC systems that keep server rooms at the appropriate temperature.

However, datacenters can use water cooling, too! It just doesn’t always look quite how you’d expect.

Continue reading “The Weird World Of Liquid Cooling For Datacenters”

Pushing The Limits Of A 16×2 LCD With Bad Apple!!

While low-contrast, blue-on-slightly-less-blue 16-character by 2-line LCDs are extremely popular, they really are made specifically for alphanumeric use. They do an admirable job of displaying a few characters, but they don’t exactly spring to mind as a display for non-character purposes. But displaying video on a 16×2 LCD is possible, as long as you’re willing to stretch the definition of “video” a bit and use some imagination while watching.

Normally, a 16×2 display can only display a single character in each spot, chosen from a fixed character set. But [arduinocelantano] was able to leverage the eight custom character slots the display allows to build up images from arbitrary 5×8 pixel bitmaps. After using ffmpeg to scale the original video to a viewport of eight characters, a Python program was used to turn every frame of the scaled video into code to generate the custom bitmaps for each chunk of the viewport. Even with the low refresh rate of the display and the shrunken frame size, the result is a recognizable video, helped no doubt by the choice of the shadow-puppet Bad Apple!! video. Check it out after the break to see how it looks.

We saw a similar rendering of the same video on LCD a while back; that effort was amazing in that it was an EEPROM-only implementation, along with a somewhat bigger LCD with better contrast. That project served as inspiration for [arduinocelantano]’s build here, which in some ways we think looks a bit better — perhaps it’s the inverted pixels. Either way, hats off to both builders for pushing past the normal constraints and teaching us something interesting.

Continue reading “Pushing The Limits Of A 16×2 LCD With Bad Apple!!

The Little 3D-Printed Tugboat That Could

If you’ve ever spent time watching the goings-on at a seaport, you must have seen tugboats at work: those little boats that push, pull and nudge enormous cargo ships through tight corners in the harbor. They manage to do that thanks to hugely powerful engines sitting inside their relatively small hulls; their power-to-tonnage ratio can be ten times that of most commercial ships.

One hardware hacker who enjoys building similarly-overpowered machinery is [Luis Marx], and it might not come as a surprise that his latest project is an actual tugboat. Living on the shores of Lake Constance in southern Germany, [Luis] likes to spend time on the water, but got fed up with the chore of paddling. Local regulations restrict the use of outboard motors but allow the use of R/C model boats; therefore, building an R/C tugboat to move yourself around the lake should be perfectly legal.

While we’re not sure if the Lake Constance Police will follow the same reasoning, [Luis]’s model tugboat is a wonderful piece of engineering. With a design inspired by 3DBenchy, the standard 3D printer benchmark that probably anyone with a 3D printer has printed at some point, it took about 30 hours to create the parts plus a generous helping of epoxy resin to make it all waterproof. A beefy lithium-ion battery pack drives two brush-less DC motors designed for racing drones, which together can put out nearly one kilowatt of power.

That, unfortunately, turned out to be way more than the little boat could handle: any attempt at using it simply caused it to leap out of the water and land on its back. Setting the motor controller to around 50% made it much more controllable, yet still strong enough to move [Luis] around on his standup paddle board. The boat is controlled through a custom-made handheld R/C controller that communicates with the ESP8266 inside the boat through WiFi. With no rudder, left-right control is effected by simply reducing the power of one motor by half.

A fully-charged battery pack provides enough juice for about 40 minutes of tugging, so it’s probably a good idea to bring along paddles in any case. Unless, of course, you’ve also got a solar-powered autonomous tugboat ready to come to your rescue.

Continue reading “The Little 3D-Printed Tugboat That Could”