A Tiny Arcade Machine With Tinier Buttons

Building a MAME machine around a Raspberry Pi has been the standard build for years now, and tiny versions of full-sized arcade machines have gone from curiosity to commonplace. [diygizmo] just built one of these tiny arcades, but the fit and finish of this one puts it above all others. There’s a real, miniature joystick in there, along with 3D printed adapters for tact switches to make this one look like a lilliputian version of a full size standup MAME cabinet.

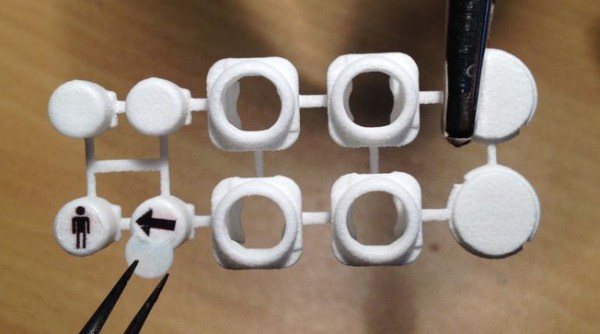
The entire enclosure is 3D printed, and most of the electronics are exactly what you would expect: A Raspberry Pi, 2.5″ LCD, and a battery-powered speaker takes up most of the BOM. Where this build gets interesting is the buttons and joystick: after what we’re sure was a crazy amount of googling, [diygizmo] found something that looks like a normal arcade joystick, only smaller. Unable to find a suitable replacement for arcade buttons, [diygizmo] just printed their own, tucked a tact switch behind the plastic, and wired everything up.

Add in some decals, paint, and the same techniques used to create plastic model miniatures, and you have a perfect representation of a miniature arcade machine.

Controlling A Block Camera With An RC Transmitter

The world of drones and FPV remote-controlled aircraft is rapidly expanding, airframes are getting bigger, and the demand for even cooler AV gear is higher than ever. [elad] got his hands on a Sony block camera that is able to zoom in on a scene – great if you want to get close to the action while still flying a safe distance away. Controlling the zoom on these cameras is usually done through RS232, but [elad] made it work with an RC transmitter.

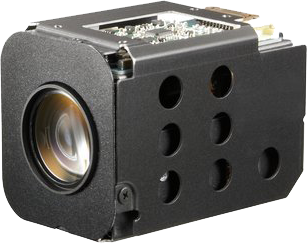
The camera [elad] is using is a Sony FCB-EX11D block camera with a standard SD resolution sensor. This camera has 10x optical zoom, making it a great solution to aerial surveillance, the only problem being the RS232 connection and the VISCA protocol. [elad] used an Arduino to listen in on the elevator channel from an RC receiver, translating that to something the camera will understand. The result is a controllable zoom on a camera that could easily take to the skies.

The entire camera package, with Arduino and electronics included, weighs in at about 100 grams. That’s about the same as a GoPro, and would fit perfectly on a camera gimbal. The only problem is getting a transmitter with enough channels or someone else to operate the camera while flying. Video below.

Continue reading “Controlling A Block Camera With An RC Transmitter”

Checking Email With The ESP8266

Ever so slowly, everyone’s favorite WiFi adapter is making its way into Internet-enabled projects. [jimeer01] created a device that reads the subject and sender lines from the latest email in his inbox and displays it on an LCD using the ESP8266 WiFi chip.

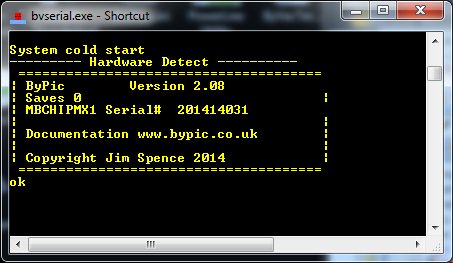
[jimeer] is using a ByPic for writing to the LCD and querying an inbox through an ESP8266 module. The ByPic is a board built around the BV_Basic firmware, stuffing a PIC microcontroller in an Arduino form factor and giving it a BASIC interpreter. Because this board isn’t ‘compile and flash’ like an Arduino, it’s perfectly suited for changing WiFi configurations and IMAP server credentials on the fly.

The device grabs the latest email in an inbox and displays the date, sender, and subject on the display. After scrolling through those lines, the PIC hits the ESP8266 to query the server again, grabbing the latest email, and repeating the whole process again, all without needing to connect the device to a computer. Video below.

Continue reading “Checking Email With The ESP8266”

Stereo Vision And Depth Mapping With Two Raspi Camera Modules

The Raspberry Pi has a port for a camera connector, allowing it to capture 1080p video and stream it to a network without having to deal with the craziness of webcams and the improbability of capturing 1080p video over USB. The Raspberry Pi compute module is a little more advanced; it breaks out two camera connectors, theoretically giving the Raspberry Pi stereo vision and depth mapping. [David Barker] put a compute module and two cameras together making this build a reality.

The use of stereo vision for computer vision and robotics research has been around much longer than other methods of depth mapping like a repurposed Kinect, but so far the hardware to do this has been a little hard to come by. You need two cameras, obviously, but the software techniques are well understood in the relevant literature.

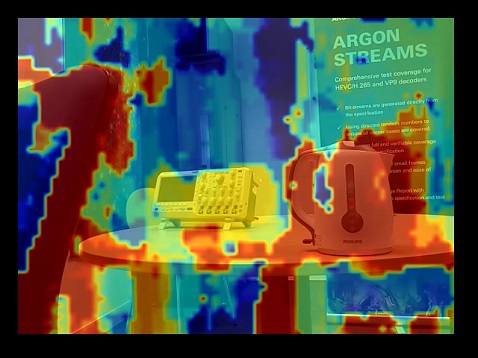
[David] connected two cameras to a Pi compute module and implemented three different versions of the software techniques: one in Python and NumPy, running on an 3GHz x86 box, a version in C, running on x86 and the Pi’s ARM core, and another in assembler for the VideoCore on the Pi. Assembly is the way to go here – on the x86 platform, Python could do the parallax computations in 63 seconds, and C could manage it in 56 milliseconds. On the Pi, C took 1 second, and the VideoCore took 90 milliseconds. This translates to a frame rate of about 12FPS on the Pi, more than enough for some very, very interesting robotics work.

There are some better pictures of what this setup can do over on the Raspi blog. We couldn’t find a link to the software that made this possible, so if anyone has a link, drop it in the comments.

The Tale Of Two Wearable Game Boys

We’re well past the time when Halloween costume submissions stop hitting the tip line, but like ever year we’re expecting a few to trickle in until at least Thanksgiving. Remember, kids: documentation is the worst part of any project.

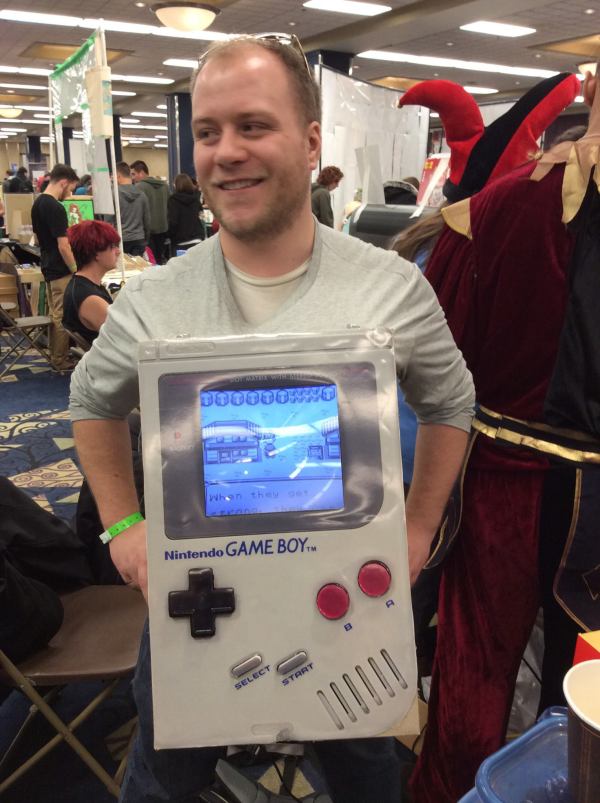
[Troy] sent us a link to his wearable Game Boy costume. It’s exactly what you think it is: an old-school brick Game Boy that [Troy] wore around to a few parties last weekend. This one has a twist, though. There’s a laptop in there, making this Game Boy playable.

The build started off as a large cardboard box [Troy] covered with a scaled-up image of everyone’s favorite use of AA batteries. The D-pad and buttons were printed out at a local hackerspace, secured to a piece of plywood, and connected to an Arduino Due. The screen, in all its green and black glory, was taken from an old netbook. It was a widescreen display, but with a bezel around the display the only way to tell it’s not original is from the backlight.

Loaded up with Pokemon Blue, the large-scale Game Boy works like it should, enthralling guests at wherever [Troy] ended up last Friday. It also looks like a rather quick build, and something we could easily put together when we remember it next October 30th.

[Troy] wasn’t the only person with this idea. A few hours before he sent in a link to his wearable Game Boy costume, [Shawn] sent in his completely unrelated but extremely similar project. It’s a wearable brick Game Boy, a bit bigger, playing Tetris instead of Pokemon.

[Shawn]’s build uses a cardboard box overlaid with a printout of a scaled-up Game Boy. Again, a laptop serves as the emulator and screen, input is handled by a ‘duino clone, and the buttons are slightly similar, but made out of cardboard.

Both are brilliant builds, adding a huge Game Boy to next year’s list of possible Halloween costume ideas. Videos of both below.

Continue reading “The Tale Of Two Wearable Game Boys”

The Hackaday Prize: The Hacker Behind The First Tricorder

Smartphones are the most common expression of [Gene Roddneberry]’s dream of a small device packed with sensors, but so far, the suite of sensors in the latest and greatest smartphone are only used to tell Uber where to pick you up, or upload pics to an Instagram account. It’s not an ideal situation, but keep in mind the Federation of the 24th century was still transitioning to a post-scarcity economy; we still have about 400 years until angel investors, startups, and accelerators are rendered obsolete.

Until then, [Peter Jansen] has dedicated a few years of his life to making the Tricorder of the Star Trek universe a reality. It’s his entry for The Hackaday Prize, and made it to the finals selection, giving [Peter] a one in five chance of winning a trip to space.

[Peter]’s entry, the Open Source Science Tricorder or the Arducorder Mini, is loaded down with sensors. With the right software, it’s able to tell [Peter] the health of leaves, how good the shielding is on [Peter]’s CT scanner, push all the data to the web, and provide a way to sense just about anything happening in the environment. You can check out [Peter]’s video for The Hackaday Prize finals below, and an interview after that.

Continue reading “The Hackaday Prize: The Hacker Behind The First Tricorder”

IPhone-Controlled Daft Punk Helmet

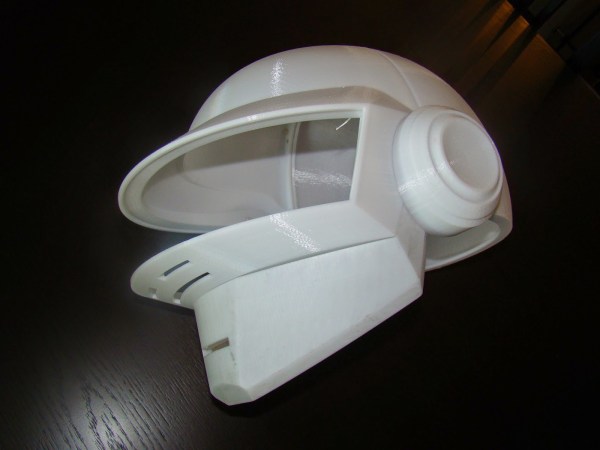
A few years ago, [Marc] had access to a really big, very expensive 3D printer. Daft Punk helmets were – and still are – extremely cool builds, so with a bit of modeling, [Marc] and his friend [Alex] put together a model and printed out a Daft Punk [Thomas] helmet with the intention of turning it into the keystone of a great costume. A few things got in the way, and the [Thomas] helmet was left on a shelf for a few years. Fast forward to a few months ago and [Marc] took up the project again. The result is a 3D printed Daft Punk helmet loaded up with 320 WS2811 LEDs.

The 3D printed helmet was modeled well and printed in polycarbonate, but with any extrusion-based printer, there will be ridges and layers to sand, fill, prime and paint. This task was delegated to another friend, [Shaggy], while [Marc] got busy on the electronics.

The LEDs for the visor and ‘earmuffs’ are WS2811 LEDs, but not the SMD versions we’re so used to seeing. These are 8mm through-hole LEDs mounted in a lasercut piece of acrylic. Control of the LEDs is done with a Teensy 3.1 with [Paul Stoffregen]’s OctoWS2811 library. With the matrix wired up, batteries installed, WiFi capability added, and the helmet painted (not chromed; that will probably happen later, though), [Marc] had a copy of the [Thomas] helmet controllable through an iPhone.

If you’d like to check out more of [Marc]’s work, we posted something on his RGB LED suit and pneumatic Star Trek doors a few years ago.

Video below.

Continue reading “IPhone-Controlled Daft Punk Helmet”