Installing Linux Like It’s 1989

A common example of the sheer amount of computing power available to almost anyone today is comparing a smartphone to the Apollo guidance computer. This classic computer was the first to use integrated circuits so it’s fairly obvious that most modern technology would be orders of magnitude more powerful, but we don’t need to go back to the 1960s to see this disparity. Simply going back to 1989 and getting a Compaq laptop from that era running again, while using a Raspberry Pi Zero to help it along, illustrates this point well enough.

[befinitiv] was able to get a Raspberry Pi installed inside of the original computer case, and didn’t simply connect the original keyboard and display and then call it a completed build. The original 286 processor is connected to the Pi with a serial link, so both devices can communicate with each other. Booting up the computer into DOS and running a small piece of software allows the computer into a Linux terminal emulator hosted on the Raspberry Pi. The terminal can be exited and the computer will return back to its original DOS setup. This also helps to bypass the floppy disk drive for transferring files to the 286 as well, since files can be retrieved wirelessly on the Pi and then sent to the 286.

This is quite an interesting mashup of new and old technology, and with the Pi being around two orders of magnitude more powerful than the 286 and wedged into vacant space inside the original case, [befinitiv] points out that this amalgamation of computers is “borderline useful”. It’s certainly an upgrade for the Compaq, and for others attempting to get ancient hardware on the internet, don’t forget that you can always use hardware like this to access Hackaday’s retro site.

Continue reading “Installing Linux Like It’s 1989”

Tiny Operating System For Tiny Computer

Before the World Wide Web became ubiquitous as the de facto way to access electronic information, there were many other ways of retrieving information online. One of the most successful of these was Minitel, a French videotex service that lasted from 1980 all the way until 2012. But just because the service has been deactivated doesn’t mean its hardware can’t be used for modern builds like this Arduino-based operating system. (Google Translate from French)

Called ZARDOS, the operating system is built to run on an Arduino MEGA although a smaller version is available for the Uno. The Arduino is connected by a serial cable to the Minitel terminal. It can take input from a keyboard and PS/2 mouse and displays video on the terminal screen with the same cable. There is functionality built-in for accessing data on a cartridge system based on SD cards which greatly expands the limited capabilities of the Atmel chip as well, and there is also support for a speaker and a Videotex printer.

Even though the build uses a modern microcontroller, it gives us flashbacks to pre-WWW days with its retro terminal. All of the code is available on the project site for anyone looking to build an Arduino-based operating system, although it will take a little bit of hardware hacking to build a Minitel terminal like this. Either way, it’s a great way to revive some antique French hardware similar to a build we’ve seen which converts one into a Linux terminal.

Thanks to [troisieme_type] for the tip!

Emulating A Power Grid

The electric power grid, as it exists today, was designed about a century ago to accommodate large, dispersed power plants owned and controlled by the utilities themselves. At the time this seemed like a great idea, but as technology and society have progressed the power grid remains stubbornly rooted in this past. Efforts to modify it to accommodate solar and wind farms, electric cars, and other modern technology need to take great effort to work with the ancient grid setup, often requiring intricate modeling like this visual power grid emulator.

The model is known as LEGOS, the Lite Emulator of Grid Operations, and comes from researchers at RWTH Aachen University. Its goal is to simulate a modern power grid with various generation sources and loads such as homes, offices, or hospitals. It uses a DC circuit to simulate power flow, which is visualized with LEDs. The entire model is modular, so components can be added or subtracted easily to quickly show how the power flow changes as a result of modifications to the grid. There is also a robust automation layer to the entire project, allowing real-time data acquisition of the model to be gathered and analyzed using an open source cloud service called FIWARE.

In order to modernize the grid, simulations like these are needed to make sure there are no knock-on effects of adding or changing such a complex system in ways it was never intended to be changed. Researchers in Europe like the ones developing LEGOS are ahead of the curve, as smart grid technology continues to filter in to all areas of the modern electrical infrastructure. It could also find uses for modeling power grids in areas where changes to the grid can happen rapidly as a result of natural disasters.

Can The Solenoid Engine Power A Car?

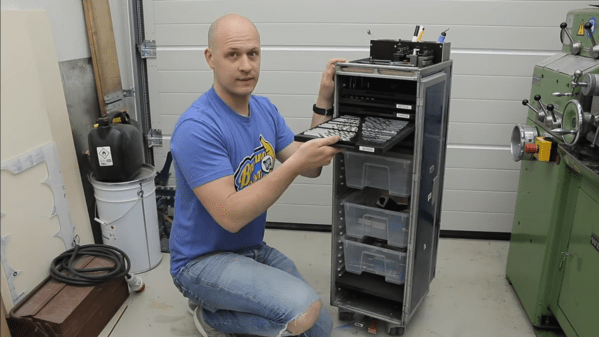
[Emiel] aka [The Practical Engineer] makes all kinds of fun projects in his fully-featured shop, and one of his tangents has been building a series of solenoid engines. These engines mimic the function of an internal combustion engine, with each solenoid acting as a piston. The only problem with [Emiel]’s concept engines, though, was that he never actually put them into a vehicle to prove their effectiveness. This build finally proves that they can work at powering a vehicle.

The project starts with a new engine. [Emiel] chose a V4 design using four solenoids and an Arduino-based controller. After some trouble getting it to operate properly, he scavenged a small circuit board he built in his V8 solenoid engine to help with timing. With that installed, the solenoids click away and spin the crankshaft at a single constant speed. The vehicle itself was mostly 3D printed, with two aluminum tubes as support structures to mount the engine. Even the wheels were 3D printed with a special rubber coating applied to them. With a small drive train assembled, it’s off to the races for this tiny prototype.

While the small car doesn’t have steering and only goes at a constant speed, the proof of concept that these tiny electric engines actually work is a welcomed addition to [Emiel]’s collection of videos on these curious engines. Of course they’re not as efficient as driving the wheels directly with an electric motor, but we all know there’s no fun in that. If you haven’t seen his most intricate build, the V8 is certainly worth checking out, and also shows off the timing circuitry he repurposed for this car.

Continue reading “Can The Solenoid Engine Power A Car?”

VGA From Scratch On A Homebrew 8-bit Computer

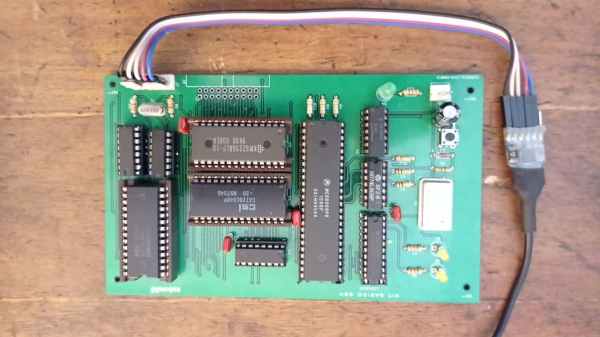
[James Sharman] has built an impressive 8-bit homebrew computer. Based on TTL logic chips, it has a pipelined design which makes it capable of Commodore-level computing, but [James] hasn’t quite finished everything yet. While it is currently built on its own custom PCB, it has a limiting LCD display which isn’t up to the standards of the rest of the build. To resolve this issue, he decided to implement VGA from scratch.

This isn’t a bit-bang VGA implementation, either. He plans for full resolution (640×480) which will push the limits of his hardware. He also sets goals of a 24-bit DAC which will allow for millions of colors, the ability to use sprites, and hardware scrolling. Since he’s doing all of this from scratch, the plan is to keep it as simple as possible and make gradual improvements to the build as he goes. To that end, the first iteration uses a single latching chip with some other passive components. After adding some code to the CPU to support the new video style, [James] is able to display an image on his monitor.

While the image of the parrot he’s displaying isn’t exactly perfect yet, it’s a great start for his build and he does plan to make improvements to it in future videos. We’d say he’s well on his way to reproducing a full 8-bit retrocomputer. Although VGA is long outdated for modern computers, the standard is straightforward to implement and limited versions can even be done with very small microcontrollers.

Thanks to [BaldPower] for the tip!

Continue reading “VGA From Scratch On A Homebrew 8-bit Computer”

Tiny Tesla Valves Etched In Glass

While it’s in vogue right now to name fancy new technology after Tesla, the actual inventor had plenty of his own creations that would come to bear his namesake, including Tesla coils, Tesla oscillators, Tesla turbines and even the infamous Tesla tower. One of the lesser known inventions of his is the Tesla valve, a check valve that allows flow in one direction without any moving parts, and [Huygens Optics] shows us a method of etching tiny versions of these valves into glass.

The build starts out with a fairly lengthy warning, which is standard practice when working with hydroflouric acid. The acid is needed to actually perform the etching, but it’s much more complicated than a typical etch due to the small size of the Tesla valves. He starts by mixing a buffered oxide etch, a mix of the hydroflouric acid, ammonia, and hydrochloric acid, which gives a much more even etching than any single acid alone. Similar to etching PCBs, a protective mask is needed to ensure that the etch only occurs where it’s needed. For that there are several options, each with their own benefits and downsides, but in the end [Huygens Optics] ends up with one of the smallest Tesla valves ever produced.

In fact, the valves are so small that they can only be seen with the aid of a microscope. While viewing them under the microscope he was able to test with a small drop of water to confirm that they do work as intended. And, while the valves that he is creating in this build are designed to work on liquids, [Huygens Optics] notes that the reason for making them this small was to make tiny optical components which they are known for.

Continue reading “Tiny Tesla Valves Etched In Glass”

Using Heaters To Display Time

We’re always fans of interesting clock builds around here, whether it’s a word clock, marble clock, or in this case a clock using a unique display method. Of course, since this is a build by Hackaday’s own [Moritz v. Sivers] the display that was chosen for this build was a custom thermochromic display. These displays use heat-sensitive material to change color, and his latest build leverages that into one of the more colorful clock builds we’ve seen.

The clock’s display is built around a piece of thermochromic film encased in clear acrylic. The way the film operates is based on an LCD display, but using heat to display the segments. For this build, as opposed to his previous builds using larger displays, he needed to refine the method he used for generating the heat required for the color change. For that he swapped out the Peltier devices for surface mount resistors and completely redesigned the drivers and the PCBs around this new method.

Of course, the actual clock mechanism is worth a mention as well. The device uses an ESP8266 board to handle the operation of the clock, and it is able to use its wireless capabilities to get the current time via NTP. All of the files needed to recreate this are available on the project page as well, including code, CAD files, and PCB layouts. It’s always good to have an interesting clock around your home, but if you’re not a fan of electronic clocks like this we can recommend any number of mechanical clocks as well.

Continue reading “Using Heaters To Display Time”