[Ncrmnt] had a busted tablet PC with an Allwinner A23 SoC inside. He combined two of our favorite past-times, Linux hacking and 3D printing, to make a rather sweet little single-board-computer out of it, giving the tablet a second life.
Step one was to make sure that the thing works. Normally, you’d hook up a wired serial terminal and start hacking. [Ncrmnt] took it one step further and wired in a HC-05 Bluetooth serial module, so he can pull up the debug terminal wirelessly. The rest of the hackery was just crafting a bootable SD card and poking around in the Android system that was still resident in the flash memory of the system.
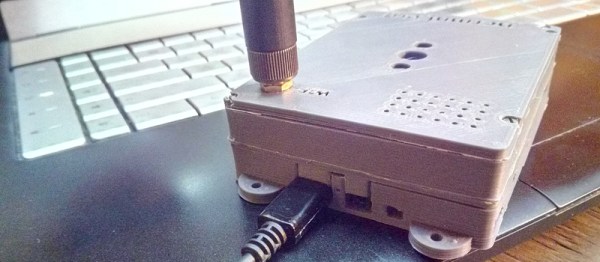
Once the board was proven workable, [Ncrmnt] designed and printed a sweet custom case using Solvespace, a constraint-based 3D CAD modeler that was new to us until recently. The case (after three prints) was a perfect fit for the irregularly shaped system board, a 3.7 V LiIon battery, and a speaker. He then added some nice mounting tabs. All in all, this is a nice-looking and functional mini-computer made out of stuff that was destined for the trash. It’s fast, it’s open-source, and it’s powerful. Best of all, it’s not in the dumpster.
There are pictures and more details on his blog, as well as [Ncrmnt]’s TV-stick to computer conversion that we’ve covered before.