David Murray and Kevin Williams with an early X16 prototype

Commander X16: A Dreamy 8 Bit Computer Comes Closer To Reality

Imagine the ultimate homage to 1980s 8-bit home computers. It might  look like [David Murray] aka The 8-Bit Guy’s Commander X16.

As a core group of geeks, hackers, and developers age, we yearn for the computers of our youth. VIC-20s, Commodore Pets, 64s, 128s, Ataris, Apple IIes, and the list goes on and on. For many of us, our first hands on experience with a computer was with such a machine that is now called “retro”. Sadly, many of these relics are getting more expensive as demand increases and supplies dwindle. Working examples are harder to find, and even those can break down. Original monitors, peripherals, and accessories are also getting scarcer. This is all quite understandable when we consider that some of these classics are over 40 years old.

What was it that we loved about these old rigs that makes them so attractive? [David] decided to distil what makes a classic a classic, and then turn that list into a spec list for what he calls his “Dream Computer”. He found that things like a printed and spiral bound manual were a big part of the charm and utility of these early home computers. Booting directly to a prompt and being able to directly control the hardware was another highly desirable trait.

[David] also took the time to determine what people don’t like about these retro machines: Wacky keyboard layouts, composite video output, and glacially slow storage. Swapping multiple floppies to load a program or respooling a cassette tape is just as undesirable in 2021 as it was in 1981. Who knew?

X16 Prototype #3
The X16’s’ prototyping is still in progress.

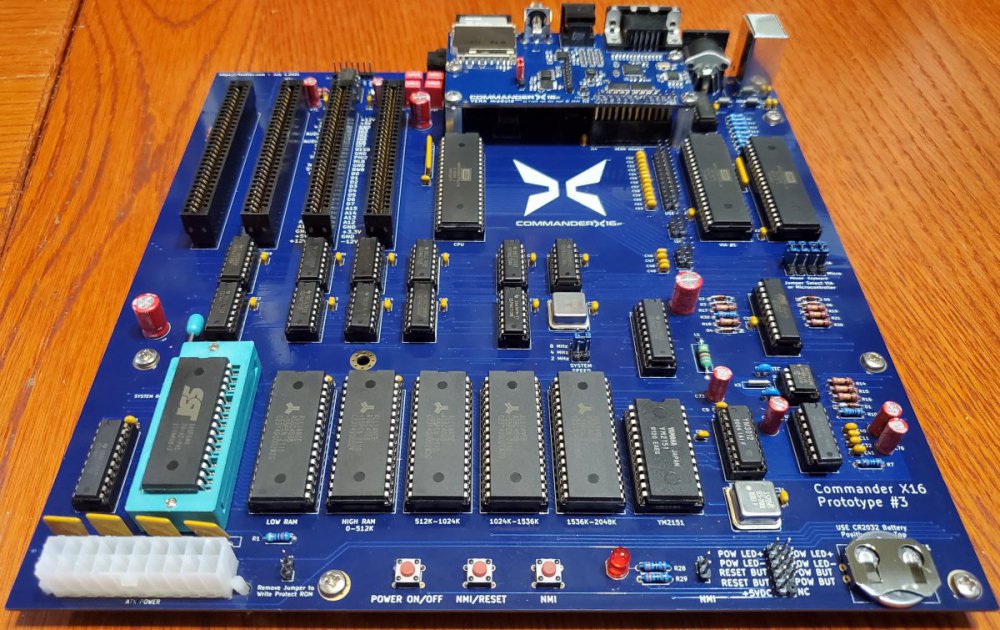
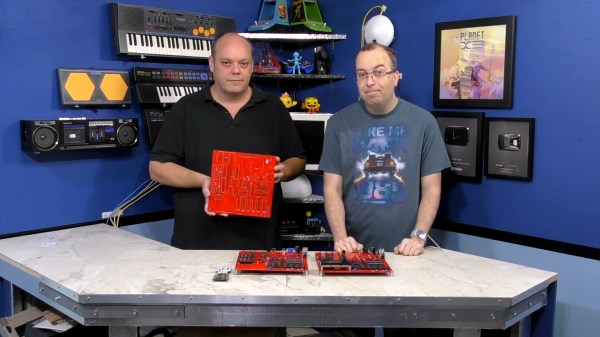
The result of [David]’s research is the Commander X16. Inspired by the VIC-20, it’s a fresh take on the retrocomputer that only uses parts that are currently available. You can see the first video in a series about the development of the X16 below the break. Be aware that a lot of progress has been made since the video came out in 2019, but it still provides an excellent starting point for learning about the project.

The X16’s specifications read like dream list made in the mid 80s: 256 color VGA, up to 2MB memory, an 8 MHz 6502, plenty of expansion ports, and even ports for SNES style controllers.  And what else will this dream machine include? You guessed it: A spiral bound manual!

It’s not possible to list all of the great features of the X16 in this space, so check out the Commander X16 FAQ for all the details. If this project makes your heart go pitter patter, you may be interested to know that they need help with software development! An emulator is available for development. The goal is to have a healthy software ecosystem in place when the X16 launches.

You may also enjoy reading about other 6502 retrocomputer reports such as this “Brain in a vat” 6502 computer, or a guided tour of the birthplace of the 6502 and the Commodore 64 with our very own Bil Herd.

Thank you to [Truth] for bringing us a report of this fine project via the Tip Line. Keep those tips coming!

Continue reading “Commander X16: A Dreamy 8 Bit Computer Comes Closer To Reality”

Spiffy Summer Project Sources Solar Sounds From Scraps

[Gijs Gieskes] has a long history of producing electronic art and sound contraptions, and his Zonneliedjes (sunsongs) project is certainly an entertaining perpetuation of his sonic creations. With the stated goal of making music from sunlight, the sunsongs most prominent feature is solar panels.

Although It’s not clear how the photons transform into the rhythmic crashes and random beep-boop sounds, the results are quite satisfying. We have a strong suspicion that the same principals that turn random junk into BEAM robots are at work, maybe with some circuit bending sprinkled on for good measure. One detail we were able to glean from a picture of the device he calls “mobile” was a 40106 oscillator, which [Gijs] has used in previous projects.

The construction style that [Gijs] uses reminds us of the “Manhattan” construction style the amateur radio homebrewing community favors. Squares of copper PCB are glued directly to the back of the solar cells and the circuits are built atop them. Looking carefully at the pictures we can also see what look like cutoff leads, suggesting a healthy amount of experimentation to get the desired results, which we can all relate to.

Be sure to check out the video after the break, and also [Gijs] website. He’s been hacking away at projects such as these for a very long time, and we’ve even featured his projects going back more than 15 years. Thanks for the continued hacks, [Gijs]. We look forward to seeing what you come up with next!

If the terms “BEAM robotics” and “circuit bending” are unfamiliar to your ears (or if a refresh is due), be sure to check out our recent re-introduction to BEAM robotics and our classic “Intro to Circuit Bending” to get acquainted. Continue reading “Spiffy Summer Project Sources Solar Sounds From Scraps”

Solving Ultra High Vacuum Leaks Has An Elementary Solution

When we think of a vacuum leak we generally think of a car that just doesn’t want to run quite right. Most normally aspirated internal combustion engines rely on the vacuum created by the pistons to draw in the air fuel mixture that’s produced by the carburetor or fuel injection system. Identifying the leak usually involves spraying something combustible around common trouble areas while the engine is running. Changes to the engine speed indicate when the combustible gas enters the intake manifold and the leak can be found.

What if your vacuum leak is in a highly specialized piece of scientific equipment where the pressures are about 12 times orders of magnitude lower than atmospheric pressure, and the leak is so small it’s only letting a few atoms into the vacuum chamber at a time? [AlphaPhoenix] takes dives deep into this very subject in his video “Air-tight vs. Vacuum-tight.” which you can watch below the break.

Not only does [AlphaPhoenix] discuss how a perfect pressure vessel is sealed, he also explains the specialized troubleshooting methods used which turn out not to be all that different from troubleshooting an automotive vacuum leak- only in this case, several magnitudes more complex and elemental in nature.

We also enjoyed the comments section, where [AlphaPhoenix] addresses some of the most common questions surrounding the video: Torque patterns, the scarcity of the gasses used, and leaving well enough alone.

Does talking about vacuums get you pumped? Perhaps you’d enjoy such vacuum hacks as putting the toothpaste back in the tube in your homemade vacuum chamber.

Thank you [Morgan] for sending this one in. Be sure to send in your own hacks, projects, and fantastic finds through the Tip Line!

Continue reading “Solving Ultra High Vacuum Leaks Has An Elementary Solution”

Robot Pet Is A Chip Off The Old Logic Block

When [Ezra Thomas] needed inspiration for his senior design project, he only needed to look as far as his own robot. Built during his high school years from the classic 1979 Frank DaCosta book “How to Build Your Own Working Robot Pet”, [Ezra] had learned the hard way the many limitations and complexities of the wire wrapped 74xx series logic chips surrounding its 8085 processor.

[Ezra] embarked on a quest to recreate the monstrosity in miniature, calling it Pet on a Chip. Using a modern FPGA chip allows the electronics to shrink by an order of magnitude and provides flexibility for future expansion. Implementing an 8 bit CPU on the amply sized FPGA left plenty of room for a VGA GPU, motor controller, serial UART, and more. Programming the CPU is handled by a custom assembler written in Python.

The results? Twelve times less weight, thirteen times less power draw, better performance, and a lot of room for growth. [Ezra] hints at an I2C bus expansion as well as a higher level programming language to make software development less of a hurdle.

The Pet On A Chip is a wonderfully engineered project and we hope that we’ll be seeing more such from [Ezra] as time goes by. Watch his Pet On A Chip in action in the video below the break.

If [Ezra]’s FPGA escapades have you wondering how to get started, you can check out this introduction to FPGA from the 2019 Hackaday Superconference. And if you have your own FPGA creation to share, please let us know via the Tip Line!

Continue reading “Robot Pet Is A Chip Off The Old Logic Block”

Surplus Syringes Make Satisfactory Tuner For Amateur Radio Experimentation

Amateur Radio as a hobby has a long history of encouraging experimentation using whatever one might have on hand. When [Tom Essenpreis] wanted to use his 14 MHz antenna outside of its designed frequency range, he knew he’d need an impedance matching circuit. The most common type is an L-Match circuit which uses a variable capacitor and a variable inductor to adjust the usable frequency range (resonance) of an antenna. While inefficient in some specific configurations, they excel at bridging the gap between the 50 ohm impedance of the radio and the unknown impedance of an antenna.

No doubt raiding his junk box for parts, [Tom] hacked together a variable capacitor and inductor using ferrite rods from AM radios, hot glue, magnet wire, copper tape, and some surplus 60ml syringes. You can see that he ground out the center of the plunger to make room for ferrite rods. Winding the outside of the syringe with magnet wire, the alignment of the ferrite can be adjusted via the plunger, changing the characteristics of the element to tune the circuit. [Tom] reports that he was able to make an on-air contact using his newly made tuner, and we’re sure he enjoyed putting his improvised equipment to use.

If Amateur Radio isn’t your thing, then maybe we can entice you with this syringe based rocket, syringe actuated 3D printed drill press, or vacuum syringe powered dragster. Have your own hack to share? By all means, submit it to the Tip Line!

USB Mouse Hack For Pachyderm Protection

When most of us think of seismometers, our minds conjure up images of broken buildings, buckled roads, and search and rescue teams digging through rubble. But when [Subir Bhaduri] his team were challenged with solving real world problems as frugally as possible as part of the 2020 Frugal Science course, he thought of farmers in rural India for whom losing crops due to raiding elephants is a reality. Such raids can and have caused loss of life for humans and elephants alike. How could he apply scientific means to prevent such conflicts, and do it on the cheap?

Whether inspiration came from using a computer mouse with the cursor speed turned up to “orbital velocity” is debatable, but [Subir] set forth to find out if such sensitivity could be leveraged for the seismic detection of the aforementioned elephants. His proof of concept is a fantastically frugal low cost seismograph using an optical mouse and some cheap PVC pipe and fittings.

We invite you to watch the video below the break to find out how it works. You’ll be impressed as we were by [Subir]’s practical application of engineering principles. And keep your eyes open for the beautiful magnetic damper hack. It’s a real treat!

If pontificating pesky pachyderms p-waves piques your interest, perhaps you’ll appreciate previous projects which produce data with piezo pickups and plumbing parts.

Continue reading “USB Mouse Hack For Pachyderm Protection”

Practical Print Makes IPad A Magnificent Eye Piece

Be it the ever shrinking size of components, the miniscule size of the printing on such pieces, or the steady march of time that makes visits to the optometrist an annual ritual, many of us could use some assistance when things start getting fuzzy at the workbench. Arm-mounted LED magnifying lenses can be a handy helper. Zooming in on a macro photo on a smartphone is also a common option that we’ve used many times.

[Timo Birnschein] started down a similar path when he realized that his iPad Pro comes with an app called simply “Magnifier”. A 12” iPad isn’t exactly the most convenient device to hold while trying to solder small parts, so he spent some time designing and 3D printing a specialty iPad stand that he calls a “Quick and Dirty High Performance EE Microscope.” We call it a magnificent tool hack!

Rotating the iPad diagonally so that the camera is closest to the subject leaves plenty of room to work and makes great use of the available screen space. [Timo] reports that at 50% magnification the 12” screen makes even 0603 SMD parts easy to read. Now he rejoices to have more to do with his iPad than watching YouTube and reading Hackaday- although we don’t know why you couldn’t do both.

The STL files have been released on Thingverse for your experimentation. [Timo] notes that he’d like to add an LED ring to brighten things up, and a fume extractor to protect the delicate lens on the iPad. We have to wonder if some plastic wrap over the lens might produce the same effect at almost no cost. Whatever [Timo] decides to do, we’re sure it’ll be brilliant.

If you don’t have an iPad and a 3D printer, you might enjoy an earlier post that shows how you can use your phone as a microscope. If Lego and Raspberry Pi are your go-to parts, you can set your sights on this Lego/Pi/Arduino microscope.

Do you have your own preferred solution for seeing yourself through a hazy situation? Be sure to write it up, and then drop it in the Tip Line!