A Drop-In Upgrade Module For Cheap Rotary Tools

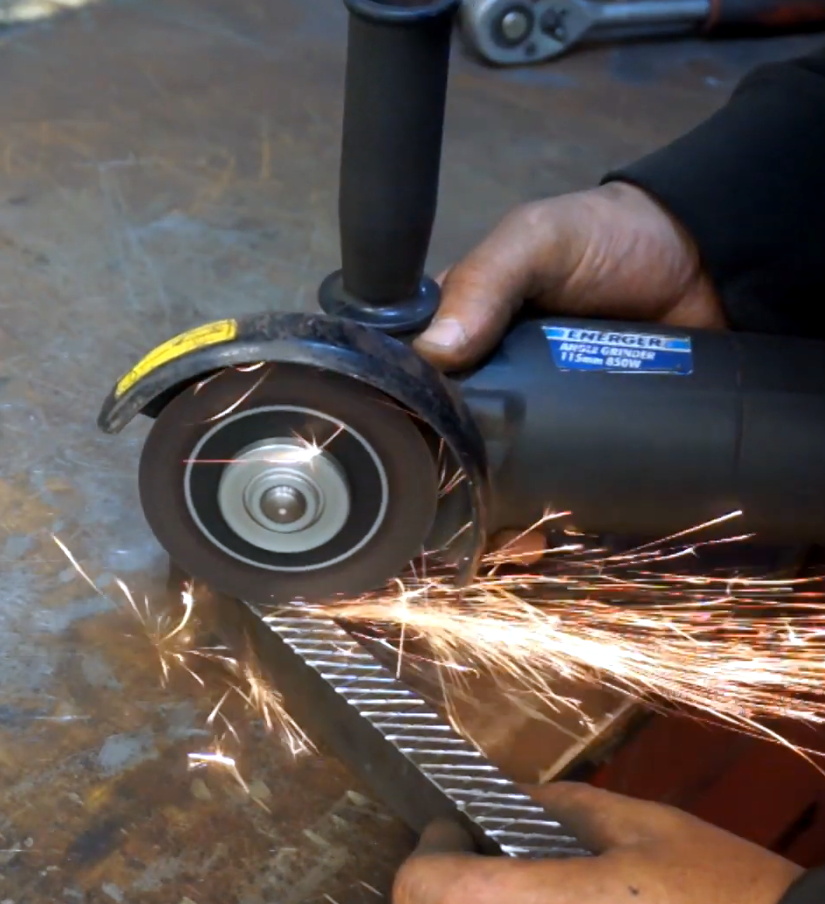
We’ve all seen them, the rotary tools that look almost, but not quite exactly, like a Dremel. They cost just a fraction of the real thing, and even use the same bits as the official Bosch-owned version. At first glance, they might seem like a perfect solution for the hacker who’s trying to kit out their workshop on a tight budget. There’s only one problem: the similarities between the two are only skin deep.

Recovering components from the original controller

As [Vitaly Puzrin] explains, one of the big problems with these clones are the simplistic electronics which have a tendency to stall out the motor at low RPM. So he’s developed a drop-in replacement speed controller for his particular Dremel clone that solves this problem. While the module design probably won’t work on every clone out there in its current form, he feels confident that with help from the community it could be adapted to other models.

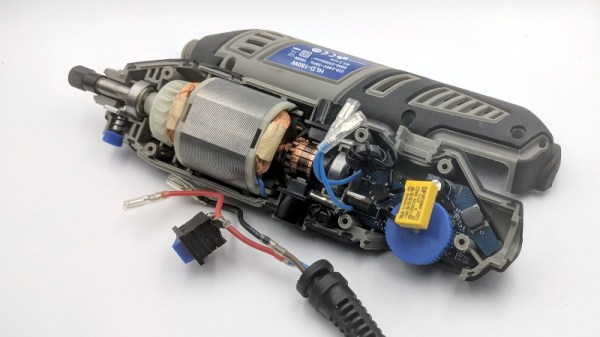
Of course, the first step to replacing the speed controller in your not-a-Dremel is removing the crusty old one. But before you chuck it, you’ll need to recover a few key components. Specifically the potentiometer, filter capacitor, and the motor terminals. You could possibly source the latter components from the parts bin, but the potentiometer is likely going to be designed to match the tool so you’ll want that at least.

The microprocessor controlled upgrade board uses back EMF to detect the motor’s current speed without the need for any additional sensors; important for a retrofit module like this. [Vitaly] says that conceptually this should work on any AC brushed motor, and the source code for the firmware is open if you need to make any tweaks. But hacker beware, the current version of the PCB doesn’t have any AC isolation; you’ll need to take special care if you want to hook it up to your computer’s USB port.

On the other hand, if you’re willing to buy a cheap rotary tool just to crack it open and replace the electronics, you might as well just build your own. If you’re feeling particularly adventurous, you can always abandon the electric motor and spin it up with a tiny turbine. Continue reading “A Drop-In Upgrade Module For Cheap Rotary Tools”

Hydraulic Bench Vise A Masterpiece Of Scrap Metal And Angle Grinding

For most of us, a vise is the sort of thing you clamp onto the edge of a workbench and crank down by hand. It might even be made of plastic, depending on the kind of work you find yourself doing with it. But it’s safe to say that [WorkshopFromScratch] won’t be soldering any PCBs in the jaws of this nearly 100 lb hydraulic vise that he built from, well… scratch.

In the video after the break, he takes an array of scrap metal including what appears to be a chunk of racking from the Home Depot and a rusted plate that looks like it could be peeled off the hull of a sunken ship, and turns it into a monsterous vise with five tons of clamping force. Outside of a handful of bolts, a couple of gas struts, and the hydraulic bottle jack that that provides the muscle, everything is hand-cut and welded together. No fancy machining here; if you’ve got an angle grinder, a welder, and of course the aforementioned stock of scrap metal, you’ve got the makings of your own mega vise.

The piece of racking is cut down the center to form the base of the vise, but most everything else is formed from individual shapes cut out of the plate and welded together. Considering the piecemeal construction methods, the final result looks very professional. The trick is to grind all the surfaces, including the welds, down until everything looks consistent. Then follow that with a coat of primer and then your finish color.

While the whole build is very impressive, our favorite part has to be the hand-cut cross hatching on the jaws. With the workpiece in one hand and angle grinder in the other, he cuts the pattern out with an accuracy that almost looks mechanical. If we didn’t know better, we might think [WorkshopFromScratch] was some kind of metalworking android from the future.

Being able to work with metal is a fantastic skill to have, and we’re always impressed to see what folks can produce with a welder and some scrapyard finds. Especially when they build tools and equipment that can be put to practical use.

Continue reading “Hydraulic Bench Vise A Masterpiece Of Scrap Metal And Angle Grinding”

External Buffer Boosts 3D Printer Filament Splicing On The Palette 2

There was a time when most of us thought the next logical step for desktop 3D printing was to add additional extruders and hotends, allowing the machine to print in multiple colors or materials. Unfortunately such arrangements quickly become ungainly, and even with just two extruders, calibration can be a nightmare. Because of this, development has been trending towards systems that use just one hotend and simply alternate the filament being fed into it. But such systems have their own problems.

Arguably the biggest issue is how long it takes to switch filaments. The Palette 2 uses a physical buffer of spliced filament to try and keep ahead of the printer, but as [Kurt Skauen] demonstrates, there are considerable performance gains to be had by building a bigger buffer. He says there’s still some calibration issues to contend with, but judging by the video after the break, we’d say he is certainly on the right track.

The buffer is necessary to give the spliced filament time to cool and bond before being fed into the printer, but as currently designed, the machine simply can’t store enough of it to keep up with high print speeds. The stock buffer area holds 125mm worth of spliced filament, but the modification [Kurt] has designed adds a whopping 280mm on top of that to reach more than three times the stock capacity.

He’s successfully tested printing at speeds as high as 200mm/s with his upgraded buffer, a big improvement over what he was seeing with the original buffer area. This despite the fact that Mosaic (the company that produces the Palette) claim the original buffer size was already more than sufficient. It seems we’ve found ourselves in the middle of a debate between Mosaic and some very vocal members of the community, and while we don’t want to take sides, it’s hard to ignore [Kurt]’s findings.

Want to make your own? [Kurt] has released all the information necessary for others to duplicate his work, including the STLs for all printed parts and a list of the bearings, springs, and fasteners you’ll need to put it together. It looks like a fairly large undertaking, but with the potential for such a considerable speed boost, we don’t doubt others will be willing to take the plunge. One person who printed and assembled an earlier version of the buffer upgrade reports their print speeds with a 0.8 mm nozzle have more than doubled.

The Palette has come a long way from we first saw it in 2016, and since then, Prusa has thrown their orange hat into the ring with their own filament-switching upgrade. Neither machine is without its niggling issues, but they’re still probably our best shot at taking desktop 3D printing to the next level.

Continue reading “External Buffer Boosts 3D Printer Filament Splicing On The Palette 2”

Custom Bases Make LEGO Spacecraft Even Cooler

If you’re reading Hackaday, we’re willing to bet that you either own the LEGO Saturn V and Lunar Module models, or at the very least know somebody who does. Even if you thought you’d finally outgrown playing with little plastic bricks (a critical mistake, but one we’ll ignore for now), these two kits just have an undeniable appeal to them. You might never get a chance to work for NASA, but you can at least point to the Saturn V rocket hanging on your wall and say you built it yourself.

[Ben Brooks] thought these fantastic models deserved equally impressive stands, so he built “exhaust plumes” that both craft could proudly perch on. With the addition of some RGB LEDs and a Particle Photon to drive them, he added incredible lighting effects that really bring the display to life. There are also sound effects provided by an Adafruit Audio FX board, and for the Lander, an LCD display that mimics the Apollo Guidance Computer DSKY that astronauts used to safely navigate to the Moon and back.

In his write-up on Hackaday.io, [Ben] makes it clear that he was inspired by previous projects that added an illuminated column of smoke under the LEGO Saturn V, but we think his additions are more than worthy of praise. Playing real audio from the Apollo missions that’s synchronized to the light show honestly makes for a better display than we’ve seen in some museums, and he even rigged up a wireless link so that his neighbor’s kids can trigger a “launch” that they can watch from their window.

For the Lunar Module, he 3D printed an enclosure for the Photon and Adafruit quad alphanumeric display that stands in for the DSKY. There’s even lighted indicators for the 1201/1202 program alarms that popped up as Neil Armstrong and Buzz Aldrin descended to the lunar surface 50 years ago.

While many of us aren’t old enough to have our own first hand memories of the Moon landing, projects like this prove that the incredible accomplishments of the Apollo program never fail to inspire. Who knows? Those kids that are watching [Ben]’s Saturn V from next door might one day get to make the trip themselves.

Continue reading “Custom Bases Make LEGO Spacecraft Even Cooler”

Live Apollo 11 Transcript On EInk Display

There are few moments in history that have ever been recorded in more detail or analyzed as thoroughly as the Apollo 11 mission to the Moon. Getting three men to our nearest celestial neighbor and back in one piece took a lot of careful planning, and recording every moment of their journey was critical to making sure things were going smoothly. As we celebrate the 50th anniversary of man’s first steps off our world, these records give us a way to virtually tag along with Armstrong, Aldrin, and Collins.

As part of the 50th anniversary festivities at the Parkes Radio Telescope in Australia, [Andrew] created a badge that would let him wear a little piece of Apollo 11. Using an ESP32 and an eInk screen, it replays the mission transcript between the crew and ground control in real-time. It’s a unique way to experience the mission made possible by that meticulous data collection that’s a hallmark of the National Aeronautics and Space Administration.

[Andrew] was inspired by the “Apollo 11 In Real Time” website, but rather than pulling the content from the Internet, he’s loaded the mission transcripts onto the ESP32’s SPIFFS filesystem as a CSV file. Not that the badge is completely offline, it does need to connect to the Internet (via a hotspot on his phone) so it can keep its internal clock synchronized with NTP. Keeping everything local does reduce power consumption compared to streaming it from the Internet, but he admits that otherwise he didn’t give much thought to energy efficiency and there’s definitely some room for improvement.

The LILYGO TTGO board he’s using combines the ESP32 with a 2.13 inch eInk display, in a formfactor not unlike the Badgy we’ve covered previously. He was able to find a STL for a 3D printed case on Thingiverse which he modified to fit a battery. Unfortunately the original model was released under a license that prevents him from distributing his modified version, but it doesn’t sound too difficult to replicate if you’re interested in building your own running ticker of humanity’s greatest adventure.

Put Those IPad Displays To Work With This EDP Adapter

Regardless of how you might feel about Apple and the ecosystem they’ve cultured over the years, you’ve got to give them some credit in the hardware department. Their “Retina” displays are a perfect example; when they brought the 2,048 by 1,536 panel to the iPad 3, the technology instantly became the envy of every tablet owner. But what if you want to use one of these gorgeous screens outside of Apple’s walled garden?

As it turns out, there are a number of options out there to use these screens on other devices, but [Arthur Jordan] wasn’t quite happy with any of them. So he did what any self respecting hacker would do, and built his own adapter for iPad 3 and 4 screens. Not that he did it completely in the dark; his design is based on the open source Adafruit Qualia driver, which in turn was based on research done by [Mike’s Mods]. A perfect example of the open source community at work.

The resulting board allows you to connect the Retina display from the iPad 3 or 4 to any device that features Embedded DisplayPort (eDP). Rather than put a dedicated port on his board, [Arthur] just left bare pads where you can solder up whatever interface method your particular gadget might use. In his case, he wanted to hook it up to an x86 UP Core SBC, so he even came up with a seperate adapter that breaks out that board’s diminutive display connector to something that can be soldered by hand.

So what’s different between the board [Arthur] developed and Adafruit’s Qualia? Primarily its been made smaller by deleting the DisplayPort connectors in favor of those bare pads, but he’s also dumped the backlight control hardware and 3.3V regulator that in his experience hasn’t been necessary with the eDP devices he’s worked with. So if space is a concern in your build, this version might be what you’re after.

We’ve seen other Retina display adapters in the past, and of course the iPad isn’t the only high-end device that’s had a screen good enough to reuse on its own. The lesson here is that if you put a must-have feature in your product, don’t be surprised when some hacker comes along and figures out how to liberate it for their own purposes.

Getting Hackers Excited About Cable Robots

Ever since he looked into them as a way to water and care for his plants, [Tom] has been fascinated with cable robots. These high-flying gadgets can move in three dimensions over huge areas, provided you’ve got the ability to string up the aforementioned cables. But despite their flexibility, there hasn’t been a whole lot of hobbyist level development with these unique systems.

With his entry into the 2019 Hackaday Prize, [Tom] is hoping to change that. He’s learned a lot by building his own cable robots, and now wants to take it to the next level. Ideally with collaboration from the community, if he can find other hackers looking to outfit their homes or workshops with their own miniature sky cranes.

So what can you do with a cable robot? In the video after the break, [Tom] shows one of his creations dutifully transporting beer cans across the room and stacking them into a pyramid. Admittedly this isn’t a particularly useful capability (unless you run a bar, perhaps), but it does show the speed and dexterity of the system even when crossing large distances. If you’ve ever wanted to play the home edition of “Automate the Freight”, this one’s for you.

The system uses a trio of 36 volt stepper motors powered by a homebrew SLA7078 driver that [Tom] designed himself. Each stepper turns a geared-down spindle to which a strong cable is attached. With some clever routing around the workspace, careful orchestration of these small winches can be used to move the point where all the cables meet in 3D space. All that’s left is mounting your gadget of choice to this central point, and away you go.

We’ve seen the concept used commercially, but as far as hobbyist projects go, the most activity we’ve seen in this space would have to be the various room sized 3D printers that have popped up over the years. It would be interesting to see what kind of interesting projects the community could come up with if they had something with a little more muscle.

Continue reading “Getting Hackers Excited About Cable Robots”