Uncovering The Echo Dot’s Hidden USB Port

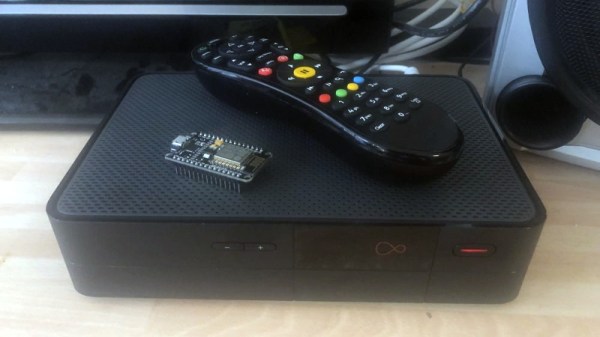
If you upgraded to Amazon’s latest Echo Dot, you might have been surprised to find that the diminutive voice assistant had shed its USB port. Earlier models of the Dot used a garden variety micro USB port for power, which hackers eventually figured out also provided a helpful way to snoop around inside the device’s firmware. The fact that the USB port was deleted on the latest Echo Dot in favor of a simple barrel connector for power was seen by some as a sign that Amazon was trying to keep curious owners out of their hardware.

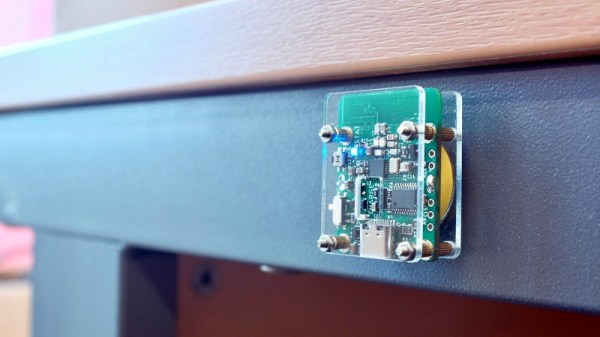
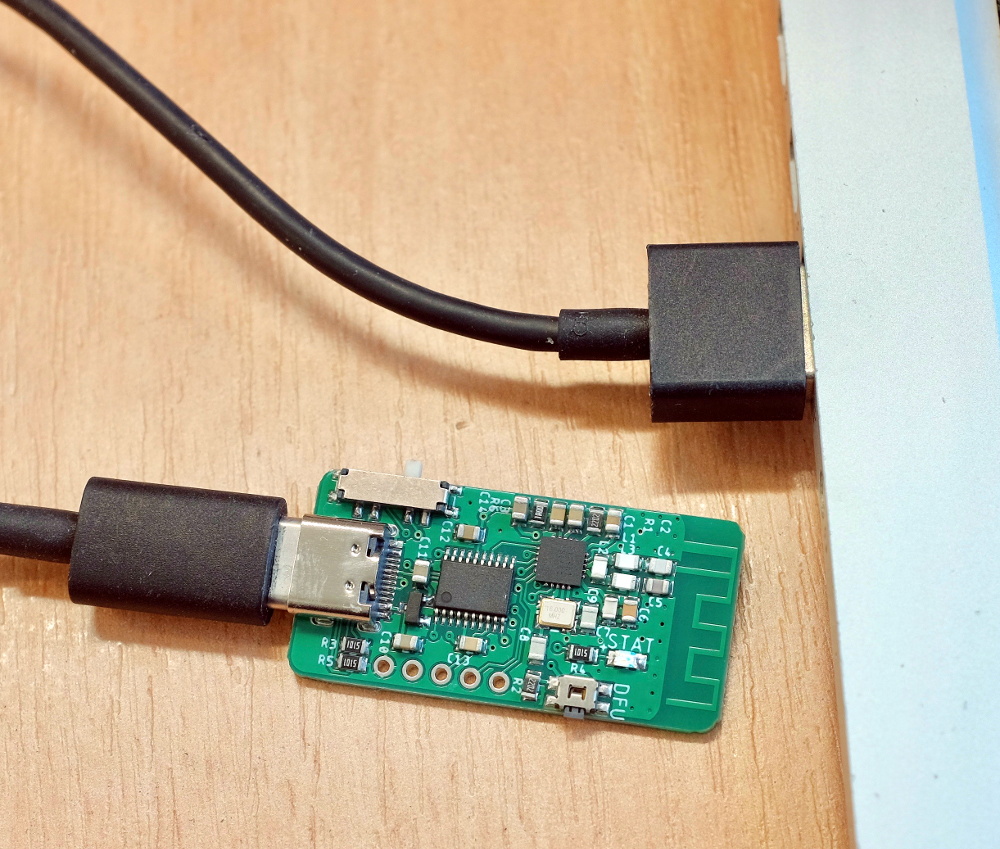
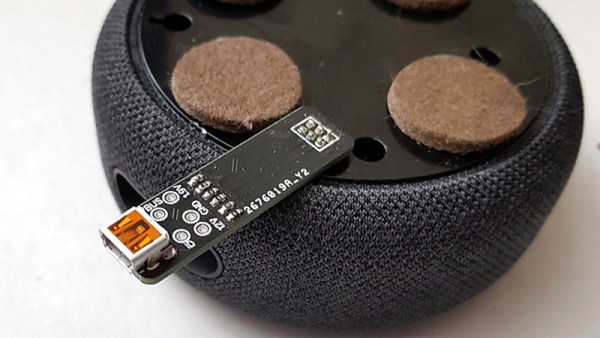
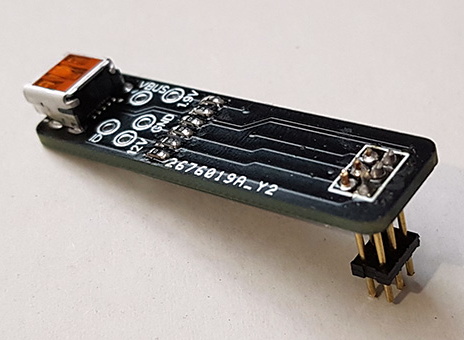
But as [Brian Dorey] shows, all they did was put a bump in the road. While they removed the external USB connector, the traces for it are still on the board waiting to be accessed. Even better, it turns out the USB data lines are connected to the test points located on the bottom of the Dot. All you need is a simple breakout that will connect through the existing opening in the device’s case, and you’ve got your USB port back.

So what can you do with USB on the Echo Dot? Well, not much right now. [Brian] found that the Dot shows up as a Mediatek device under Linux using lsusb, and fastboot can see it and even confirms the presence of a locked bootloader. It’s going to take some work from the community to see how deep this particular rabbit hole goes.

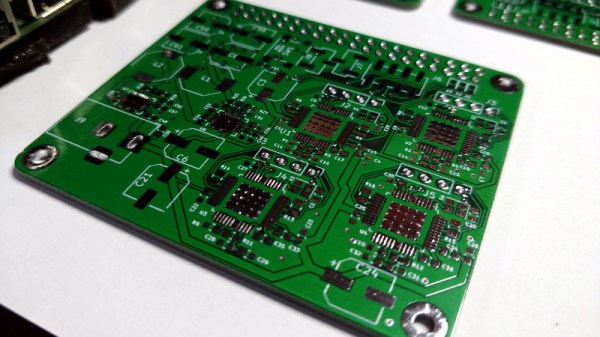
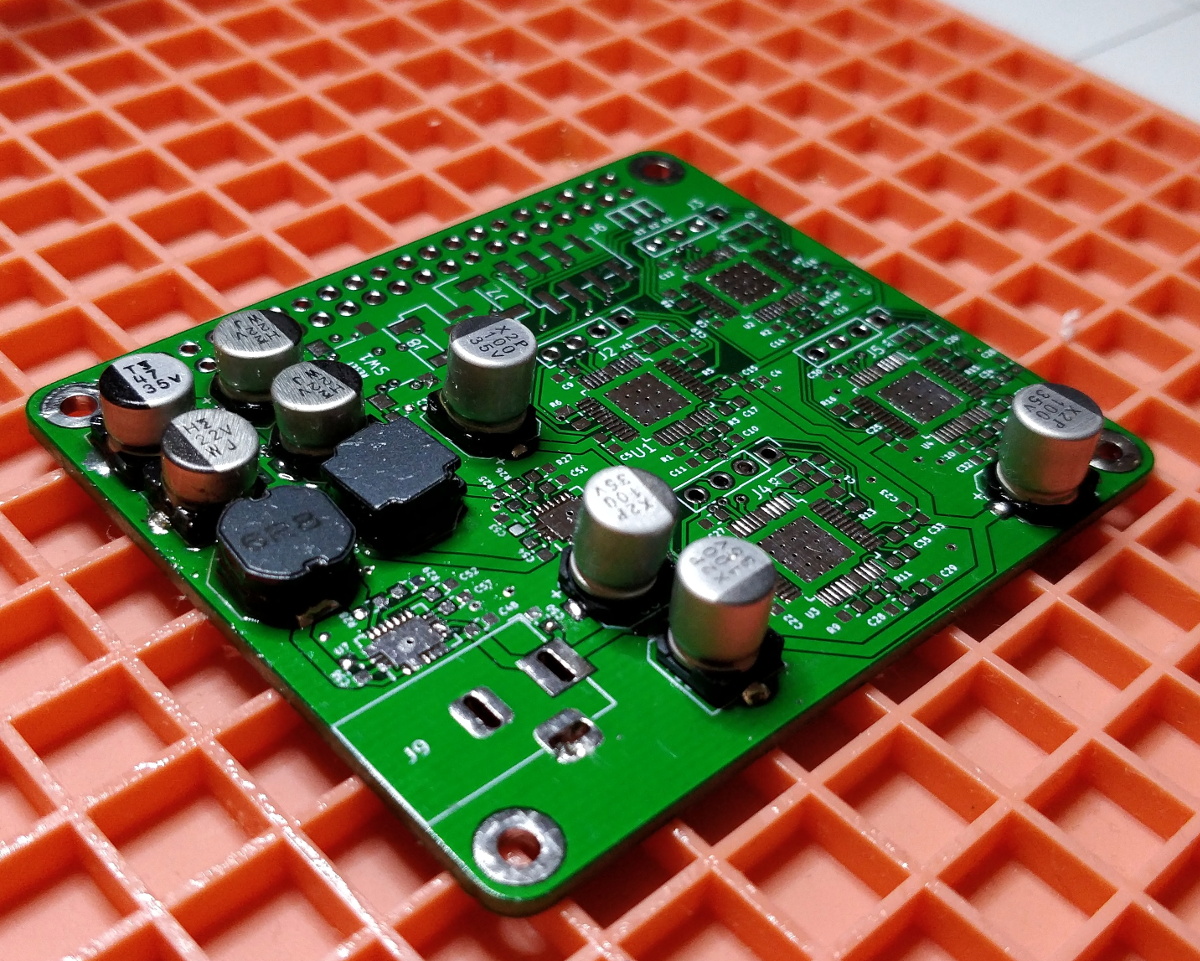
Even if you’re not interested in restoring its USB port, [Brian] has uncovered a wealth of fascinating hardware information about the Echo Dot during his deep-dive. He’s mapped out many of the test points located throughout the device’s PCBs, and found a few interesting points that might be worth further investigation. For example, he found that driving one of the pins high would trigger the Dot to mute its microphones; which could be useful for anyone looking to cover Alexa’s ears.

[Brian] first cracked open the Echo Dot last month, after scoring one for cheap during Amazon’s Prime Day sale. It looks like he’s making fairly rapid progress on unraveling the mysteries of this popular gadget, and we’re very interested in seeing where this research takes us.

India Launched A Moon Orbiter, Lander, And Rover All In One Shot With Chandrayaan-2

On July 22nd, India launched an ambitious mission to simultaneously deliver an orbiter, lander, and rover to the Moon. Launched from the Satish Dhawan Space Centre on a domestically-built GSLV Mk III rocket, Chandrayaan-2 is expected to enter lunar orbit on August 20th. If everything goes well, the mission’s lander module will touch down on September 7th.

Attempting a multifaceted mission of this nature is a bold move, but the Indian Space Research Organisation (ISRO) does have the benefit of experience. The Chandrayaan-1 mission, launched in 2008, spent nearly a year operating in lunar orbit. That mission also included the so-called Moon Impact Probe (MIP), which deliberately crashed into the surface near the Shackleton crater. The MIP wasn’t designed to survive the impact, but it still secured India a position on the short list of countries that have placed an object on the lunar surface.

If the lander component of Chandrayaan-2, named Vikram after Indian space pioneer Vikram Sarabhai, can safely touch down on the lunar surface it will be a historic accomplishment for the ISRO. To date, the only countries to perform a controlled landing on the Moon are the Soviet Union, the United States, and China. Earlier in the year, it seemed Israel would secure its position as the fourth country to perform the feat with their Beresheet spacecraft, but a last second fault caused the craft to crash into the surface. The loss of Beresheet, while unfortunate, has given India an unexpected chance to take the coveted fourth position despite Israel’s head start.

We have a few months before the big event, but so far, everything has gone according to plan for Chandrayaan-2. As we await word that the spacecraft has successfully entered orbit around the Moon, let’s take a closer look at how this ambitious mission is supposed to work.

Continue reading “India Launched A Moon Orbiter, Lander, And Rover All In One Shot With Chandrayaan-2”

Data Mining Home Water Usage; Your Water Meter Knows You A Bit Too Well

The average person has become depressingly comfortable with the surveillance dystopia we live in. For better or for worse, they’ve come to accept the fact that data about their lives is constantly being collected and analyzed. We’re at the point where a sizable chunk of people believe their smartphone is listening in on their personal conversations and tailoring advertisements to overheard keywords, yet it’s unlikely they’re troubled enough by the idea that they’d actually turn off the phone.

But even the most privacy-conscious among us probably wouldn’t consider our water usage to be any great secret. After all, what could anyone possibly learn from studying how much water you use? Well, as [Jason Bowling] has proven with his fascinating water-meter data research, it turns out you can learn a whole hell of a lot by watching water use patterns. By polling a whole-house water flow meter every second and running the resulting data through various machine learning algorithms, [Jason] found there is a lot of personal information hidden in this seemingly innocuous data stream.

The key is that every water-consuming device in your home has a discernible “fingerprint” that, with enough time, can be identified and tracked. Appliances that always use the same amount of water, like an ice maker or dishwasher, are obvious spikes among the noise. But [Jason] was able to pick up even more subtle differences, such as which individual toilet in the home had been flushed and when.

Further, if you watch the data long enough, you can even start to identify information about individuals within the home. Want to know how many kids are in the family? Monitoring for frequent baths that don’t fill the tub all the way would be a good start. Want to know how restful somebody’s sleep was? A count of how many times the toilet was flushed overnight could give you an idea.

In terms of the privacy implications of what [Jason] has discovered, we’re mildly horrified. Especially since we’ve already seen how utility meters can be sniffed with nothing more exotic than an RTL-SDR. But on the other hand, his write-up is a fantastic look at how you can put machine learning to work in even the most unlikely of applications. The information he’s collected on using Python to classify time series data and create visualizations will undoubtedly be of interest to anyone who’s got a big data problem they’re looking to solve.

Bolt-On Stepper Motor Driver For The Raspberry Pi

For his entry into the 2019 Hackaday Prize, [Tobius Daichi] is working on adding some motion control capabilities to everyone’s favorite Linux SBC. His 3+Pi board attaches to the Raspberry Pi’s GPIO header and gives you a convenient way to control four individual stepper motors. Perfect for a 3D printer, laser cutter, CNC, or anything else you can think of that needs to move in a few dimensions.

But such a simplistic description of the 3+Pi might be underselling it a bit. While [Tobius] says he was inspired by the classic Arduino CNC Shield that powers countless DIY 3D printers, he’s managed to improve on the concept. Rather than having the host Pi communicate directly with the stepper drivers, the 3+Pi features an onboard STM32F302CBT6 that handles the actual motor control. The Pi just needs to tell it what to do over UART.

If you’re looking to do things in real-time, having an onboard microcontroller handle the low-level aspects of talking to the stepper drivers can be a big help. A natural extension for this board could be support for the Klipper firmware, which leverages the fact that the Raspberry Pi is many times more powerful than your average 3D printer control board. With the Pi handling the math and providing the microcontroller instructions, Klipper allows for faster and more accurate printing than the microcontroller alone could accomplish.

As for the stepper drivers themselves, [Tobius] has decided to go with the Trinamic TMC2041-LA-T. This chip is notable as it puts dual drivers in one 48-QFN package, which is great if you’re looking to save space on your board. Some might complain that the 3+Pi doesn’t allow for easily swapping out the stepper drivers if you manage to cook one like on the Arduino CNC shield, but realistically you could say the same about many purpose-built stepper control boards.

[Tobius] is tackling this project by himself currently, but does mention that he’s open to teaming up with anyone who’s got an interest in this sort of thing. There have been previous attempts at creating Linux-powered 3D printer controllers in the past, but we think this approach holds particular promise if for no other reason than the Raspberry Pi’s popularity.

PaperLedger: An E-Ink Cryptocurrency Ticker

For a long time it seemed like e-ink displays were outside the reach of us lowly hackers, as beyond the handful of repurposed Kindles that graced these pages, we saw precious few projects utilizing this relatively exotic display. But that’s changed over the last couple of years, and we’re thrilled to start seeing hackers bend this incredible technology to their will.

A perfect example is PaperLedger, an entry into the 2019 Hackaday Prize by [AIFanatic]. This wireless device is designed to display the current price of various cryptocurrencies on its 2.9-inch e-ink screen and provide audible price alerts with its built-in speaker. It even has a web portal where users can configure the hardware or view more in-depth price information.

The PaperLedger is based on the TTGO T5 V2.2 ESP32, but it looks like [AIFanatic] is in the process of spinning up a new board for the MIT licensed project to address some nagging issues for this particular application. Unfortunately, it doesn’t look like there are any pictures of the new board yet, but a description of the changes on the Hackaday.IO page shows that most of the work seems to be going into improving support for running on batteries.

Even if you’re not interested in cryptocurrency, the PaperLedger looks like a fantastic little e-ink monitor for pretty much anything else you’d like to keep a close eye on. The GPLv3 licensed firmware is available on the project’s GitHub page, so expanding or completely changing the device’s functionality shouldn’t be too tricky for anyone with a desire to do so and a working knowledge of C++.

We’ve seen several projects using the various TTGO boards that mate an ESP32 with a display at this point, and it looks like a great platform to check out if you want to push some data to a little WiFi screen with the minimum amount of hassle.

ESP8266 Controls TiVo Over The Network

Remember the TiVo? The set-top DVR that was once so popular of a hacking target that Hackaday had a dedicated subdomain for it has today largely faded into obscurity as time-shifted viewing has given way to Internet streaming services like Netflix and Hulu. But make no mistake, while the TiVo may no longer be the centerpiece of the average home entertainment center, there’s a diehard group of antennaed aficionados that are still rocking (and hacking) them.

One such TiVotee is [Thomas McQueen], who recently discovered his TiVo-powered Virgin Media V6 DVR was listening for commands on the network. After finding some official documentation for the protocol and firing off a couple of test commands from his computer’s telnet client, he realized he had an opportunity to flex his microcontroller muscle and create a library that would allow controlling the set-top box with the ESP8266 or other network-capable MCU.

[Thomas] built his project on-top of the basic Arduino WiFi library, making every effort to make it as generalized as possible so it could work on a multitude of platforms and with various targets. He even made sure to give all his functions friendly names that won’t leave users scratching their head when they read through example code down the road. We’ve seen far too many software projects that were poorly documented or obtusely programmed, so it’s always good to see somebody putting some forethought into their code.

The library makes it easy to add TiVo control to your project, but [Thomas] went one step further and came up with an example application that provides a web interface on the ESP8266 or ESP32. Any device with a web browser, such as a smartphone, can connect to the UI and fire off commands to the TiVo. His next step is to combine his library with some code to talk to Amazon’s Alexa so he’ll be able to control playback with his voice.

We’ll hand it to these TiVo users, they’re a tenacious lot. Earlier in the year, we covered how one dedicated TiVo fan managed to brute-force the child lock on his DVR using the Arduino and an IR LED.

Laser Trip Wire Hides What You’re (Not) Working On

We assume your office policy allows for reading Hackaday during work hours. But what about cruising reddit, or playing Universal Paperclips? There’s a special kind of stress experienced when attempting to keep one eye on your display and the other on the doorway; all the while convinced the boss is about to waltz into the room and be utterly disappointed in you.

But fear not, for [dekuNukem] has found the solution with Daytripper. This wireless laser tripwire communicates back to your computer using NRF24 (2.4 Ghz on the ISM band) and can be used to invisibly cordon off a door or hallway and fire a scripted action on your computer if its beam has been broken. Nominally this is used to send the keyboard command that hides all open windows, but we’re sure the imaginative readers of Hackaday could come up with all sorts of alternate uses for this capability.

The Daytripper transmitter uses a laser time-of-flight sensor, in this case the very small VL53L0X by STMicroelectronics. It’s best situated so the laser will be bounced straight back at it. It has a range of about four feet, which is perfect for covering a door, though a wide hallway could give it some trouble. [dekuNukem] admits that the 5 Hz scan rate means a sufficiently fast moving adversary might slip past the sensor, but if they’re trying that hard to see what’s on your monitor, they probably deserve a peek.

On the receiver side, there’s a small board that plugs into your computer and mimics a USB keyboard. It has a selector switch on the side that allows the user to set what key sequence will be “typed” once the system has been tripped. It has built-in support for minimizing all windows or locking the computer, or you can set it to send ALT + Pause, which you can listen for and act on however you see fit.

If you want to build your own Daytripper, the firmware and hardware are both available on GitHub under an MIT license. For those who prefer instant gratification, [dekuNukem] is doing a small production run and offering them up on Tindie.