Getting Started With Free ARM Cores On Xilinx

We reported earlier about Xilinx offering free-to-use ARM Cortex M1 and M3 cores. [Adam Taylor] posted his experiences getting things working and there’s also a video done by [Geek Til It Hertz] based on the material that you can see in the second video, below.

The post covers using the Arty A35T or Arty S50 FPGA boards (based on Artix FPGAs) and the Xilinx Vivado software. Although Vivado will allow you to do conventional FPGA development, it also can work to compose function blocks to produce CPUs and that’s really what’s going on here.

Continue reading “Getting Started With Free ARM Cores On Xilinx”

New Transistor Uses Metal And Air Instead Of Semiconductors

The more things change, the more things stay the same. Early electronic devices used a spark gap. These have been almost completely replaced with tubes and then semiconductor devices such as transistors. However, transistors will soon reach a theoretical limit on how small they can be which is causing researchers to find the next thing. If the  Royal Melbourne Institute of Technology has its way, we’ll go back to something that has more in common with a spark gap than a conventional transistor. You can find the source paper on the Nano Papers website although the text is behind a paywall.

The transistor uses metal, but instead of a semiconductor channel — which is packed with atoms that cause collisions as electrons flow through the channel — the new device uses an air gap. You might well think that if fewer atoms in the channel are better, why not use a vacuum?

Continue reading “New Transistor Uses Metal And Air Instead Of Semiconductors”

Etch-a-Sketch 3D Printed With Cell Phone

Most of us have fond memories of the Etch-a-Sketch from childhood. [Potent Printables] wanted to update the designs so he 3D printed an XY carriage for a stylus that works with a cell phone drawing program. You can see the video below and the 3D model details on Thingiverse.

The design is fun all by itself, but it also gave us a few ideas. For one thing, if you motorized it you could make some pretty clever drawing toys. But there could be a more practical use, too.

Continue reading “Etch-a-Sketch 3D Printed With Cell Phone”

3D Printed Brushed Motor Is Easy To Visualize

A motor — or a generator — requires some normal magnets and some electromagnets. The usual arrangement is to have a brushed commutator that both powers the electromagnets and switches their polarity as the motor spins. Permanent magnets don’t rotate and attract or repel the electromagnets as they swing by. That can be a little hard to visualize, but if you 3D Print [Miller’s Planet’s] working model — or just watch the video below — you can see how it all works.

We imagine the hardest part of this is winding the large electromagnets. Getting the axle — a nail — centered is hard too, but from the video, it looks like it isn’t that critical. There was a problem with the link to the 3D model files, but it looks like this one works.

Continue reading “3D Printed Brushed Motor Is Easy To Visualize”

Retrotechtacular: Before The Internet: MUDPIE

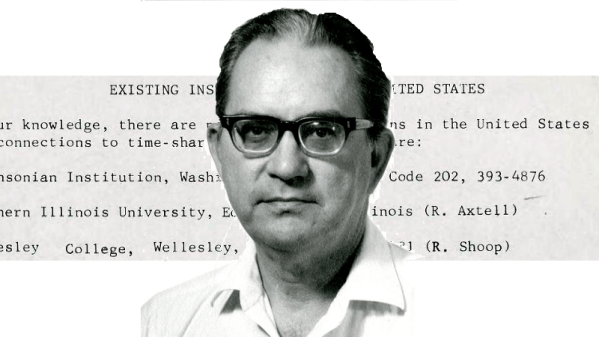
It is easy to forget how disconnected computers used to be. There was a time when sites with similar computers would do a tape rotation where a tape (or whatever media) would arrive in the mail. You’d spend some time looking at what was on it and then add anything interesting that you had to the end of it before sending it on to the next person. Eventually, the tape would come back to you, presumably loaded with more things. Late in 1967, Dr. James Peters started a newsletter called MUDPIE — Museum and University Data Program and Information Exchange. The newsletter would wind up with 26 issues over five years and while it started out with as few as 25 members, it would grow to over 250.

The newsletter was a real hardcopy newsletter, because as Dr. Peters put it:

MUDPIE represents an attempt to keep everyone up to date on the development of time-shared computing in museums and universities engaged in systematic research. Several individuals receiving this first copy had written asking the same questions, and this is a quick way of answering them. There was a tremendous temptation to set it up so that it could be received only through the teletype and computer — but that proved to be a little too advanced for the present!

Continue reading “Retrotechtacular: Before The Internet: MUDPIE”

The Arduino Hits The Rails

Certain hobbies come in clusters. It isn’t uncommon to see, for example, ham radio operators that are private pilots. Programmers who are musicians. Electronics people who build model trains. This last seems like a great fit since you can do lots of interesting things with simple electronics and small-scale trains. [Jimmy] at the aptly-named DIY and Digital Railroad channel has several videos on integrating railroad setups with Arduino. These range from building a DCC system for about $45 (see below) to a crossing signal.

There are actually quite a few basic Arduino videos on the channel, although most of them are aimed at beginners. However, the DCC — Digital Command and Control — might be new to you if you are a train neophyte. DCC is a standard defined by the National Model Railroad Association.

Continue reading “The Arduino Hits The Rails”

1,000 Watt Power Supply Tear Down And Repair

[TheSignalPath] wanted to repair a broken Instek PSW80-40.5 because it has a lot of output for a programmable power supply — 1,080 watts, to be exact. This isn’t a cheap supply — it looks like it costs about $2,200 new. The unit wasn’t working and when he took it apart, he found a nasty surprise. There is a base PCB and three identical power supply modules, and virtually no access without disconnecting the boards. He continued the teardown, and you can see the results in the video below.

Each of the power supply modules are two separate PCBs and the design has to account for the high currents required. The power supply is a switching design with some filtering on the motherboard. One of the boards of the power supply module rectifies the incoming line voltage to a high DC voltage (about 400 volts). The second board then does DC to DC conversion to the desired output.

Continue reading “1,000 Watt Power Supply Tear Down And Repair”