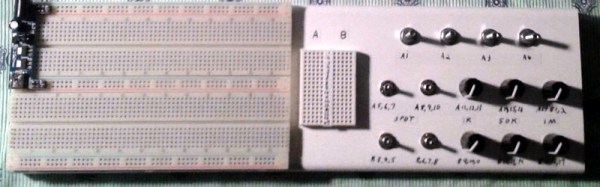
Panel-Mounted Breadboard Accessories

[Chuck Stephens] grew up with Radio Shack 100-in-1 electronic kits. The ones with lots of components and spring terminals that could be wired to be a radio, a burglar alarm, or whatever.[Chuck] graduated to solderless breadboard, but did miss having panel mounted components like pots and switches easily available. So he has been building his own accessory boxes.
Of course, it is easy enough to just connect breadboard wires to component, but [Chuck] went further than that. Using boxes of different types (including a cigar box), he mounted the components properly and also wired them to a breadboard for easy connection.

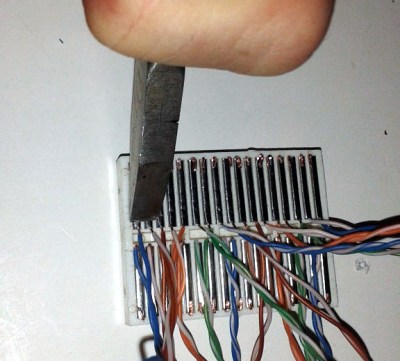
If you’ve ever tried to solder to breadboard springs (we have), you’ve found it is hard to get adhesion to the shiny metal. [Chuck] solved the problem by crimping little wire hooks to the springs. The result is a good looking and functional prototyping aid.

They do make tiny breadboard style contacts (called tie point blocks; good luck finding them) for this kind of application, but the crimp technique works on common breadboards. These are cheap and much easier to find.

Of course, these days, we are as likely to want to mount SMDs than panel mounted controls. Now if we could only figure out where to put the components. If you want something less involved, take a look at the video below.
Continue reading “Panel-Mounted Breadboard Accessories”

Becoming A State Machine Design Mastermind

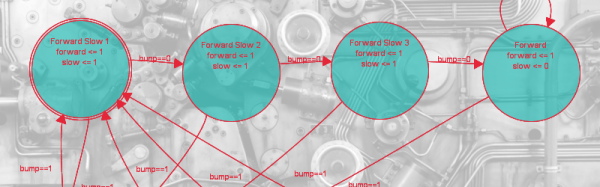
Imagine a robot with an all-around bump sensor. The response to the bump sensor activating depends on the previous state of the robot. If it had been going forward, a bump will send it backwards and vice versa. This robot exhibits behavior that is easy to model as a state machine. That is, the outputs of the machine (motor drive) depend not only on the inputs (the bump sensor) but also on the current state of the machine (going forward or backward).

As state machines go, that’s not an especially complicated one. Many state machines have lots of states with complex conditions. For example, consider a phone switchboard. The reaction to a phone going off hook depends on the state of the line. If the state is ringing, picking up the phone makes a connection. If the state is idle, the phone gets a dial tone. The switchboard also has to have states for timeouts, connection failures, three way calling, and more.

If you master state machines your design and debug cycles will both move along faster. Part of this is understanding and part is knowing about the tools you can choose to use. I’ll cover both below.

Continue reading “Becoming A State Machine Design Mastermind”

Arduino Powered Rubber Band Sentry Turret Is Not A Lie

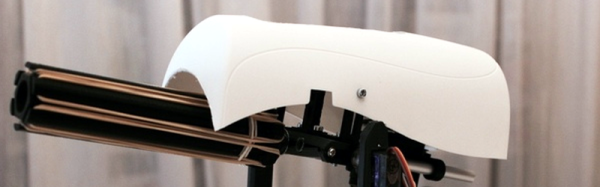
You know that guy in the next cube is sneaking in when you are away and swiping packs of astronaut ice cream out of your desk. Thanks to [Kevin Thomas], if you have an Arduino and a 3D printer, you can build a rubber band sentry gun to protect your geeky comestibles. You’ll also need some metric hardware, an Arduino Uno, and a handful of servo motors.

The video shows [Kevin] manually aiming the gun, but the software can operate the gun autonomously, if you add some sensors to the hardware.  The build details are a bit sparse, but there is a bill of material and that, combined with the 3D printing files and the videos, should allow you to figure it out.

We couldn’t help but wish for a first person view (FPV) camera and control via a cell phone, so you could snipe at those ice cream thieves while hiding in the broom closet. On the other hand, if you got the gun working, adding the remote wouldn’t be hard at all. You probably have a WiFi FPV camera on your quadcopter that finally came out of that tree and there’s lots of ways to do the controls via Bluetooth or WiFi.

Not that you don’t have options. But here at Hackaday HQ, we have lots of rubber bands and not so many green pigs. If you’d rather shoot paintballs, be careful you don’t accidentally repaint the insides of your cube.

Continue reading “Arduino Powered Rubber Band Sentry Turret Is Not A Lie”

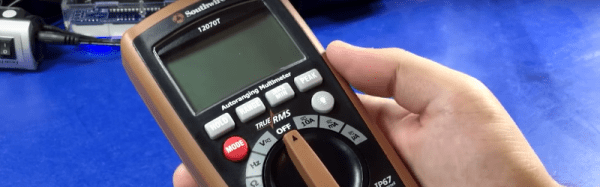
$50 Multimeter Comparison And Teardown

We remember when buying even a modest digital multimeter was a big investment. These days, you can find tool stores giving away cheap meters and if you are willing to spend even a little money, you can buy a meter with tons of features like capacitance, temperature, and other measurements.

Like most things, though, you can pay a little money for a bargain, or you can overpay for a dud. To help you pick, [TechnologyCatalyst] decided to do an extensive video review of 15 different meters in the under $50 price category.

If you are looking for a quick video to watch, you might want to move along. The review is in nine videos ranging from an introduction, to a comparison of build quality, discussion about the displays on each meter, and, of course, the measurement capability of each meter. There’s even a video that shows tear downs so you can see inside the instruments.

Continue reading “$50 Multimeter Comparison And Teardown”

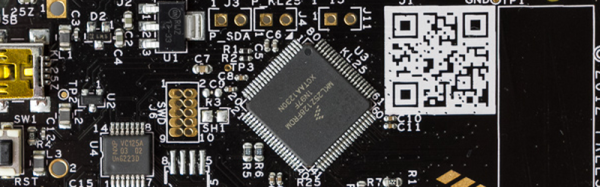
Getting Started With ARM Using Mbed

Even though the Arduino was hardly the first 8 bit microcontroller board to support a bootloader and the C/C++ language, it quickly became the de facto standard for hobby-level microcontrollers as well as a common choice for one-off or prototype projects. I’m sure there are a lot of reasons why this occurred, but in my mind there were three major reasons: price, availability of lots of library and sample code, and the existence of a simplified GUI IDE that you could install in a few minutes. The build process is simple, too, even though if you ever have to actually figure it out, it is quite ugly. For most people, it works, and that makes it not ugly.

I like the ATMega chips. In fact, I had boards based around the ATMega8 and a bootloader way before there was an Arduino. However, they are fairly small parts. It is true that the Arduino infrastructure has grown to support more ATMega chips, many with more memory and I/O and clock speeds. However, 32-bit processors are getting inexpensive enough that for all but the simplest or highest volume projects, you should be thinking about using 32-bit.

If you’ve tried to go that route before, you’ve probably been daunted by the price, especially the price of development tools. Your alternative is to roll your own tool chain which is very doable (and there are some nice scripts out there that will help you). You also need to worry about libraries and how to integrate them. Not to mention, many of the advanced processors require a lot of setup to get, say, an A/D converter turned on. Most processors keep things they aren’t using turned off, and each pin requires setup to select the 4 or 5 things shared on that pin.

All of this has been a barrier to entry. The vendors have all figured this out, though, and many have tried to build tools aimed at breaking up the Arduino market ranging from inexpensive development boards to code-generating wizards, to full blown IDEs. I want to tell you (and show you, in the video below) how you can make the jump from 8-bit to 32-bit much easier than you might think.

Continue reading “Getting Started With ARM Using Mbed”

Zynq And The OPL3 Music Synthesizer

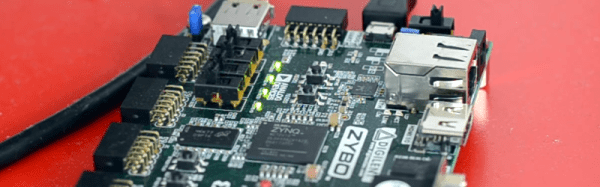
We’re big fans of the Zynq, which is an answer to the question: what do you get when you cross a big ARM processor with a big FPGA? So it isn’t surprising that [GregTaylor’s] project to emulate the OPL3 FM Synthesis chip in an FPGA using the Zynq caught our eye.

The OPL3 (also known as the Yamaha YMF262) was a very common MIDI chip on older PC sound cards. If you had a Sound Blaster Pro or 16 board, you had an OPL3 chip in your PC. The OPL3 was responsible for a lot of the music you associate with vintage video games like Doom. [Greg] not only duplicated the chip’s functions, but also ported imfplay from DOS to run on the Zynq’s ARM processors so he could reproduce those old video game sounds.

The Zybo board that [Greg] uses includes an Analog Devices SSM2603 audio codec with dual 24-bit DACs and 256X oversampling. However, the interface to the codec is isolated in the code, so it ought to be possible to port the design to other hardware without much trouble.

To better match the original device’s sampling rate with the faster CODEC, this design runs at a slightly slower frequency than the OPL3, but thanks to the efficient FPGA logic, the new device can easily keep up with the 49.7 kHz sample rate.

Using an FPGA to emulate an OPL3 might seem to be overkill, but we’ve seen worse. If you prefer to do your synthesis old school, you can probably get a bulk price on 555 chips.

Continue reading “Zynq And The OPL3 Music Synthesizer”

Fisher Price Bluetooth Speaker Hack

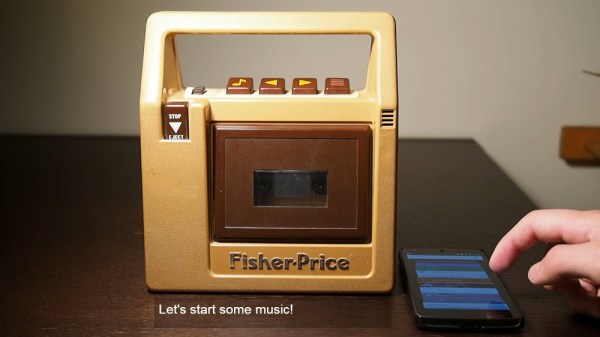
A good hacker hates to throw away electronics. We think [Matt Gruskin] must be a good hacker because where a regular guy would see a junky old 1980’s vintage Fisher Price cassette player, [Matt] saw a retro stylish Bluetooth speaker. His hack took equal parts of electronics and mechanics. It even required some custom 3D printing.

You might think converting a piece of old tech to Bluetooth would be a major technical challenge, but thanks to the availability of highly integrated modules, the electronics worked out to be fairly straightforward. [Matt] selected an off the shelf Bluetooth module and another ready-to-go audio amplifier board. He built a custom board to convert the stereo output to mono and hold the rotary encoder he used for the volume control. An Arduino (what else?) reads the encoder and also provides 3.3V to some of the other electronics.

The really interesting part of the hack is the mechanics. [Matt] managed to modify the existing mechanical buttons to drive the electronics using wire and hot glue. He also added a hidden power switch that doesn’t change the device’s vintage look. Speaking of mechanics, there’s also a custom 3D printed PCB holder allowing for the new board to fit in the original holder. This allows [Matt] to keep the volume control in its original location

Continue reading “Fisher Price Bluetooth Speaker Hack”