Improved Controller For E-Skateboards

[Timo] recently purchased himself a Acton Blink Qu4tro electric skateboard. Performance-wise, the board was great, but the controller left a lot to be desired. There were issues with pairing, battery displays, and just general rideability. Like any good hacker, he decided some reverse engineering was in order, and got to work.

Initial results were disheartening – the skateboard relies on various chips of Chinese origin for which documentation proved impossible to come by. However, as it turned out, the board and controller communicated using the common NRF24L01+ transceiver.

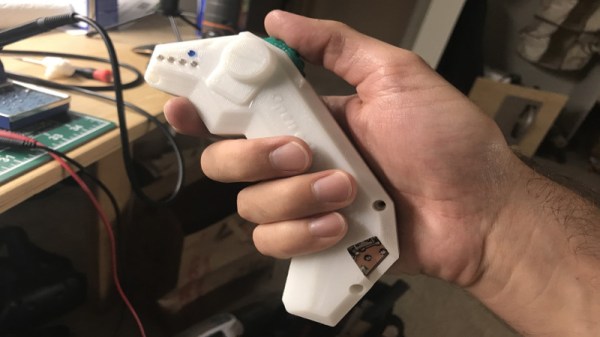
Initial work focused on understanding the pairing process and message protocol. With that done, [Timo] decided the best course of action was to redevelop a controller from scratch, using an Arduino Nano and NRF24L01+ to do the job. [Timo]’s Open esk8 controller improves driveability by removing delays in message transfer, as well as improving on the feel of the controller with a 3D printed chassis redesign.

[Timo] now has a much more usable skateboard, and has racked up over 200 miles in testing since the build. However, if you fancy converting your existing board to electric, check out this project.
A Different Kind Of Hand Controlled Vehicle

It’s generally understood that most vehicles that humans interact with on a daily basis are used with some kind of hand controlled interface. However, this build from [Avisha Kumar]  and [Leul Tesfaye] showcases a rather different take. A single motion input provides both steer and foward/reverse throttle control.

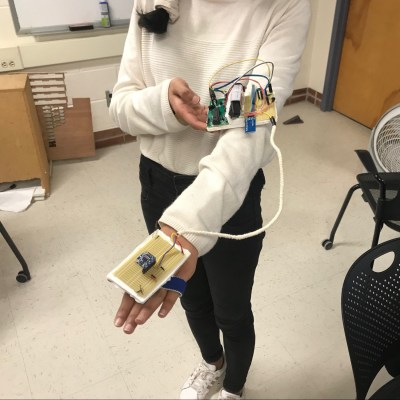
The hand controller lives on a protoboard for ease of testing.

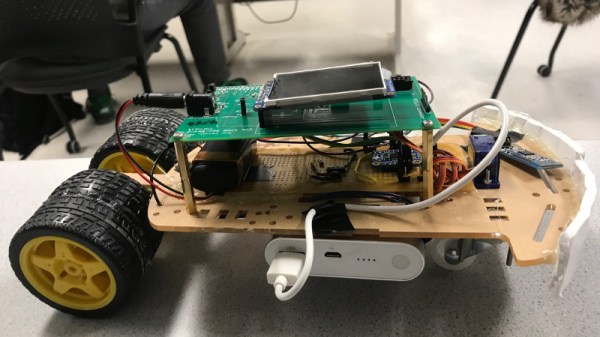
The project consists of a small car, driven with electric motors at the rear, with a servo-controlled caster at the front for steering. Controlled is provided through PIC32 microcontroller receiving signals via Bluetooth. The car is commanded with a hand controller, quite literally — consisting of an accelerometer measuring pitch and roll position of the user’s hand. By tilting the hand left and right affects steering, while the hand is rotated fore and aft for throttle control. Video after the break.

The project was built for a course at Cornell University, and thus is particularly well documented. It provides a nice example of reading sensor inputs and transmitting/receiving data. The actually microcontroller used is less important than the basic demonstration of “Hello World” with robotics concepts. Keep this one in your back pocket for the next time you want to take a new chip for a spin!

We’ve seen similar work before, with a handmade controller using just potentiometers and weights. Continue reading “A Different Kind Of Hand Controlled Vehicle” →

Motorize Your Camera Slider, The Hacker Way

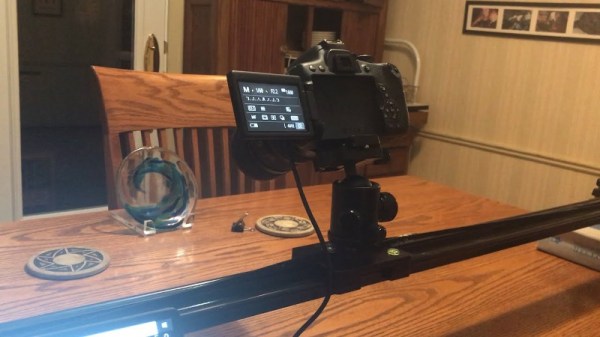
Camera sliders are a fantastic tool for those who wish to shoot beautiful and smooth panning video, or take expressive time-lapse shots. They can also be remarkably expensive, which creates an incentive for the DIYer to innovate at home. [Richard] wanted a motorized slider and didn’t want to break the bank, and thus, a build was born.

Starting with an existing non-motorized camera slider makes things easier, though there’s no reason [Richard]’s techniques couldn’t be applied to a completely DIY build. A NEMA stepper motor is fitted to the frame, and connected to the camera shuttle with a toothed belt. The stepper is controlled by an Arduino, which allows for both timelapse and smooth panning modes, and can be controlled with an IR remote sourced from Amazon. The slider is also interfaced with a Processing sketch, which gives a graphical representation of the slider’s current position on the laptop’s screen, which helps for setting up a shot.

[Richard] has shared the code and a shopping list, and is confident that the build can be completed for under $100. That’s a satisfying price given the quality of shots possible with a good slider.

We see plenty of slider builds here, including this impressive pantograph-type build. Video after the break.

[Thanks to Baldpower for the tip!]

Continue reading “Motorize Your Camera Slider, The Hacker Way” →

Word Clock Don’t Need No Stencil Font

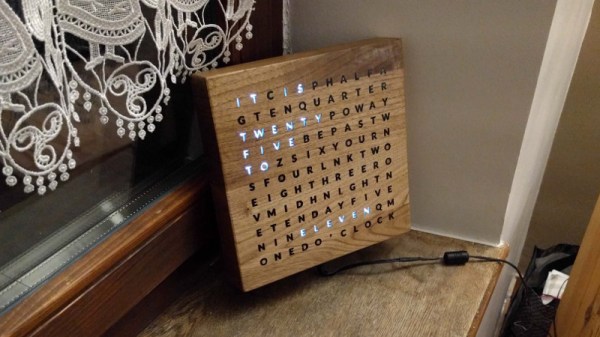
Word clocks use natural language to display the time. They’ve been in vogue in the last 20 years or so, as low-cost digital technology makes them particularly cost effective and easy to build for the average maker. The hardware and software is a solved problem, so presentation is everything. Luckily, [watsaig]’s effort does not disappoint.

The build began with a timeframe of just seven days — a narrow window given [watsaig]’s lack of experience with lasercutting and woodworking. Not content to let that get in the way, it was time to get to work. Wood was sourced from Amazon and designs laid out, before lasercutting began in earnest.

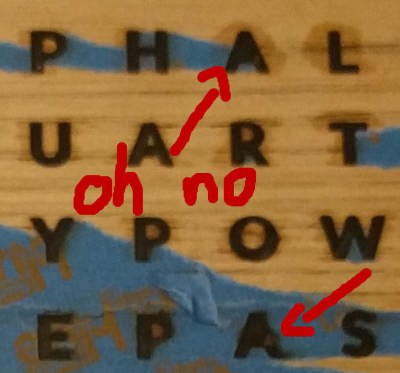
[watsaig] decided to fill all of the letters with epoxy to achieve a flat finished surface that also served as diffuser for the LEDs. To avoid using an unsightly stencil font, the centers (the cut out portion) of letters like O, A, and R had to be placed by hand. Unfortunately his turned out quite badly. When using a squeegee method to work epoxy into the letters, the inserts tended to shift, ruining the face plate.

Undeterred, the clock face was recreated from scratch, and it was determined that a pipette was a far more suitable tool, allowing the letters to be filled with epoxy without unduly disturbing the letter inserts. The final result is visually attractive, finished with a wonderful stain and giving a pleasing glow thanks the careful attention to diffusion and masking. The hidden Happy Birthday message may have been lost in the rush, but it’s the thought that counts, after all.

For a Continental take, check out this word clock in Catalan.

The Umbrella That Tells You The Weather

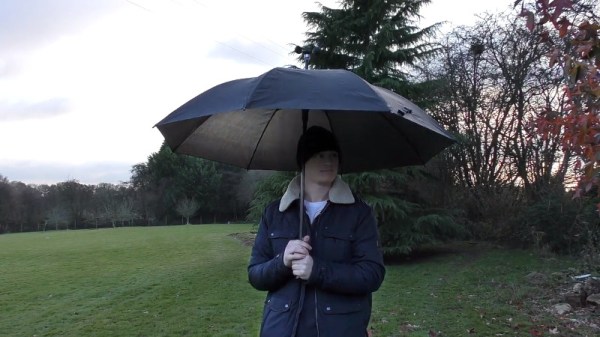
Most people can tell you the various uses of the umbrella — it keeps the rain off, pokes sleeping train passengers awake, and can be used as an improvised defensive weapon when tension in the hot dog line reaches boiling point. A true Englishman would never deign to employ their brolly so imprudently, of course, but they might just give it an upgrade by packing in a full weather station.

Please do not message us to complain about the redundancy of a rain sensor on an umbrella.

The build uses the Particle Photon as the brains of the operation, interfacing it with several sensors. There’s a DHT11 to handle temperature and humidity measurement, an Adafruit barometric pressure sensor, along with a custom-built anemometer using a brushed motor with 3D printed wind cups. Finally, a breadboard is turned into a rain detector, based on the same principles as those used in automotive applications.


The Particle Photon uses WiFi to tether to a smartphone, deliver the collected data to the cloud via Adafruit IO. This enables the data to be collated and processed further on a PC. Yes, it’s 2018, and they have the internet on umbrellas now.

As we reach further into the depths of winter, it’s one project that could very much come in handy, and [The Gentlemen Maker] has been kind enough to share the code on Particle.io. If that’s not good enough, perhaps you could use your umbrella as a WiFi antenna. Video after the break.

Continue reading “The Umbrella That Tells You The Weather” →

Experiment With Lumia, The Cheap And Easy Way

Light is a wonderful medium for art, and there’s all manner of ways to approach it. We’ve always been huge fans of all that blinks and glows, but there’s a whole wide world of other methods and techniques in the lighting arena. Lumia is one that does not always get a lot of mainstream attention, and so [Adam Raugh] has created this video, sharing both the history of the effect, and various ways to create it yourself. 

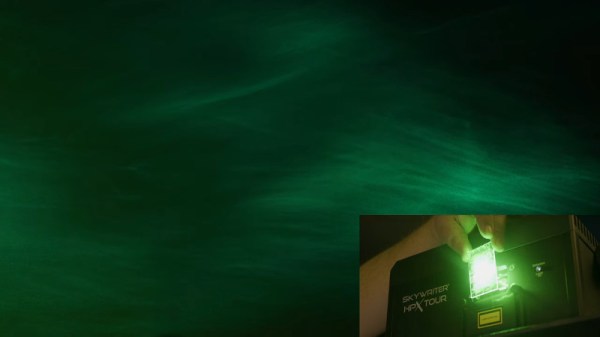
Lumia was once used to refer to a broad swathe of artistic lighting, but these days, more commonly refers to effects that create an aurora-like appearance, as one would see near the poles of our fine Earth. [Adam] first covers the history of the effect, as pioneered by Thomas Wilfred with the Clavilux in the early part of the 20th Century.

The video then covers the basics of creating lumia effects using DIY methods. The key is to combine slow rotation with an organically deformed refractive medium. [Adam]’s rig of choice is a basic laser projector, rotating at just 1/3 of a rotation per minute. This is then combined with a variety of homebrewed refractive media – torture tubes made from glass, acrylic sheets coated with muddled epoxy, and even a crumpled water bottle.

It’s an excellent primer on how to get started with lumia, and [Adam] covers a wide variety of tips and tricks as well as potential pitfalls to avoid.

We see plenty of great lighting projects around these parts – check out the Kinetic Chandelier. Video after the break.

Continue reading “Experiment With Lumia, The Cheap And Easy Way” →

Game Boy Camera – Now In Color

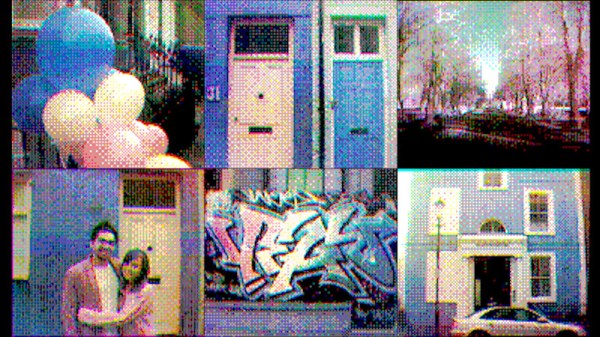
The Game Boy Camera is a legendary piece of 90s gaming hardware, despite not being a game at all. It consisted of a low-resolution greyscale camera, fitted to a Game Boy cartridge, that you could use to photograph your friends, vandalise their pictures, then print them out on a thermal printer. It’s hardware that was fun because of its limitations, not despite them. However, [Matt] wondered if there was a way to use early photographic techniques to get color photos.

The technique is simple – get red, green, and blue filters, and take three photos – one using each filter. Then, combine the photos digitally to create the color image.  This necessitates an amusingly complex process to transfer the photos from Game Boy to PC, of course.

There are some limitations – due to the speed of the Game Boy Camera, it works best with static scenes, as it takes several seconds to shoot. Also, due to the low resolution, it’s best to choose subjects with broad swathes of color. Despite this, [Matt] managed to take some great images with a colorful yet vintage digital charm. There’s other ways to achieve this, of course – like bringing the power of neural networks to bear on your low-res Game Boy images. Video after the break.

Continue reading “Game Boy Camera – Now In Color” →