Raspberry Pi RP2040: Hands-On Experiences From An STM32 Perspective

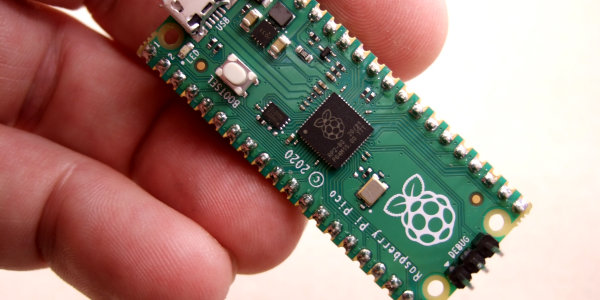
The release of the Raspberry Pi Foundation’s Raspberry Pi Pico board with RP2040 microcontroller has made big waves these past months in the maker community. Many have demonstrated how especially the two Programmable I/O (PIO) state machine peripherals can be used to create DVI video generators and other digital peripherals.

Alongside this excitement, it raises the question of whether any of this will cause any major upheaval for those of us using STM32, SAM and other Cortex-M based MCUs. Would the RP2040 perhaps be a valid option for some of our projects? With the RP2040 being a dual Cortex-M0+ processor MCU, it seems only fair to put it toe to toe with the offerings from one of the current heavyweights in the 32-bit ARM MCU space: ST Microelectronics.

Did the Raspberry Pi Foundation pipsqueak manage to show ST’s engineers how it’s done, or should the former revisit some of their assumptions? And just how hard is it going to be to port low-level code from STM32 to RP2040? Continue reading “Raspberry Pi RP2040: Hands-On Experiences From An STM32 Perspective”

jellyandmarshmallows windTunnel close-up

Perfecting Paper Planes Peering Past Perspex Portals

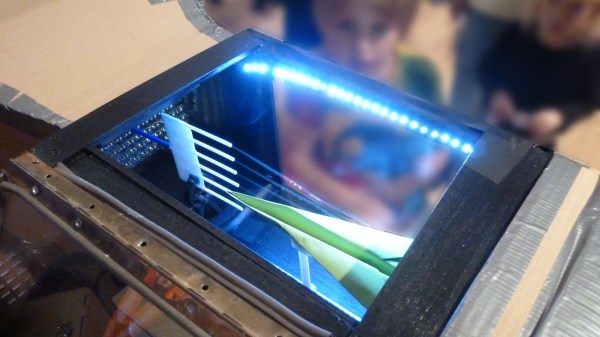
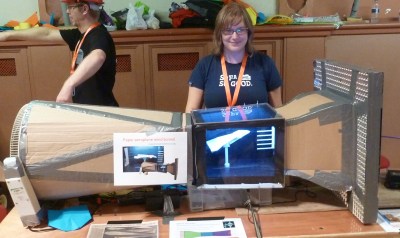
This wind tunnel is a pile of junk and we love it! When making science and engineering accessible to kids, it really helps to show that it doesn’t require a fancy research lab. [Jelly & Marshmallows] show kids that it takes little more than cardboard, duct tape, and dumpster-diving to up your paper airplane game to NASA levels of engineering.

[Jelly & Marshmallows] built their wind tunnel for a Maker Faire using the aforementioned cheap and free materials for the straightener, collector, diffuser, and fan sections. We especially love the efficient hack of using stacked ceiling light diffusers rather than hundreds of straws for the straightener.


The most time went into the working section, custom-built from plywood frames and acrylic windows. Many 3D printed parts came together to convert a smoke-ring gun to emit smoke trails and LEDs were employed to make those trails a little easier to see. We think the magnetic clips for quick changes of aircraft and their position along a steel ruler were inspired.

The kids attending the Maker Faire (we miss those!) loved the exhibit, having the best time hitting a big green arcade button to spin up the fan. It’s the little things in life. How would you get the kids even more involved with analyzing aerodynamics and make the smoke trails more visible?


Thanks for the tip [Rómulo Antão]

Repairing A Vintage HP 9825 The Hard Way

[CuriousMarc] is at it again, this time trying to undo the damage from a poorly designed power circuit, that fried the internals of his HP 9825 computer. (Video, embedded below.)

The power supply on this particular model has a failure mode where a dying transistor can lead to 13 V on the 5 V line. This causes all the havoc one would expect on the internals of a 1970s era portable computer. This particular computer is rather rare, so instead of calling it a lost cause, our protagonist decides to replace the faulty transistor, install a proper overvoltage protection circuit, and then start the tedious hunt for which chips actually let their magic smoke out.
Continue reading “Repairing A Vintage HP 9825 The Hard Way”

Omnibot From The 80s Gets LED Matrix Eyes, Camera

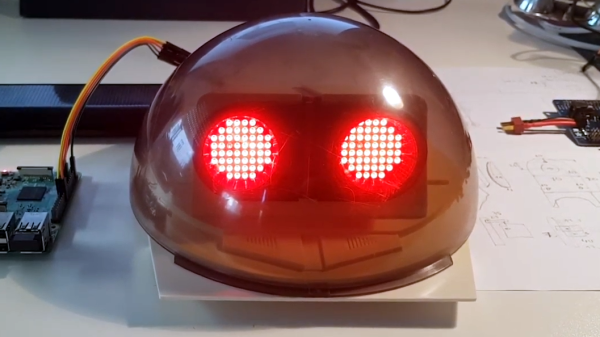
[Ramin assadollahi] has been busy rebuilding and improving an Omnibot 5402, and the last piece of hardware he wanted to upgrade was some LED matrix eyes and a high quality Raspberry Pi camera for computer vision. An Omnibot was something most technical-minded youngsters remember drooling over in the 80s, and when [ramin] bought a couple of used units online, he went straight to the workbench to give the vintage machines some upgrades. After all, the Omnibot 5402 was pretty remarkable for its time, but is capable of much more with some modern hardware. One area that needed improvement was the eyes.

The eyes on the original Omnibot could light up, but that’s about all they were capable of. The first upgrade was installing two 8×8 LED matrix displays to form what [ramin] calls Minimal Expressive Eyes (MEE), powered by a Raspberry Pi. With the help of a 3D-printed adapter and some clever layout, the LED matrix displays fit behind the eye plate, maintaining the original look while opening loads of new output possibilities.

Adding a high quality Raspberry Pi camera with wide-angle lens was a bit more challenging and required and extra long camera ribbon connector, but with the lens nestled just below the eyes, the camera has a good view and isn’t particularly noticeable when the eyes are lit up. Having already upgraded the rest of the hardware, all that remains now is software work and we can’t wait to see the results.

Two short videos of the hardware are embedded below, be sure to give them a peek. And when you’re ready for more 80s-robot-upgrading-action, check out the Hero Jr.

Continue reading “Omnibot From The 80s Gets LED Matrix Eyes, Camera”

FIR Filters For Xilinx

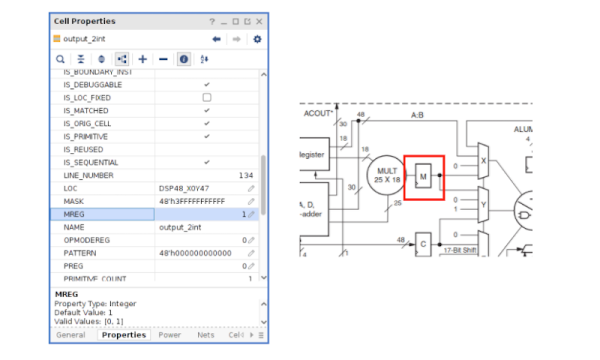
Digital filters are always an interesting topic, and they are especially attractive with FPGAs. [Pabolo] has been working with them in a series of blog posts. The latest covers an 8th order FIR filter in Verilog.  He covers some math, which you can find in many places, but he also shows how an implementation maps to DSP slices in a device. Then to reduce the number of slices, he illustrates folding which trades delay time for slice usage.

Folding takes a multi-stage parallel multiplication and breaks it into fewer multiplications done over a longer period of time. This reuses slices to reduce the number required for high-order filters.

Continue reading “FIR Filters For Xilinx”

Toolchanging Printers Get A Nozzle Hanky Like No Other

When it comes to toolchanging 3D printers, idle nozzles tend to drool. Cleaning out that nozzle goo, though, is critical before switching them into use. And since switching nozzles can happen hundreds of times per print, having a rock-solid cleaning solution is key to making crisp clean parts. [Kevin Mardirossian] wasn’t too thrilled with the existing solutions for cleaning, so he developed the Pebble Wiper, a production worthy nozzle wicking widget that’s wicked away nozzles thousands of times flawlessly.

With a little inspiration from [BigBrain3D’s] retractable purge mechanism, [Kevin] is first purging tools onto a brass brad. Rather than have filament extrude into free space, it collects into a small bloblike “pebble” that cools quickly into a controlled shape. From here, after one quick flick with a servo arm and a small wipe with a silicone basting brush, the nozzle is ready to use. The setup might sound simple, but it’s the result of thousands and thousands of tests with the goal of letting no residual ooze attach itself to the actual part being printed. And that’s after [Kevin] put the time into scratch-building his own toolchanging 3D printer to test it on first. Finally, he’s kindly made the files available online on Github for other hackers’ tinkering and mischief.

So how well does it work? Judging by the results he’s shared, we think spectacularly. Since adopting it, he’s dropped any sacrificial printing artefacts on the bed entirely and been able to consistently pull off stunning multimaterial prints flawlessly with no signs of residual nozzle drool. While toolchanging systems have been great platforms for hacking and exploration, [Kevin’s] Pebble Wiper takes these machines one step closer at hitting “production-level” of reliability that minimizes waste. And who knows? Maybe all those pebbles can be sized to be ground up, remade into filament, and respooled back into usable filament?

Continue reading “Toolchanging Printers Get A Nozzle Hanky Like No Other”

Send Old-Fashioned Pager Messages With New-Fashioned Hardware

In a world of always-connected devices and 24/7 access to email and various social media and messaging platforms, it’s sometimes a good idea to take a step away from the hustle and bustle for peace of mind. But not too big of a step. After all, we sometimes need some limited contact with other humans, so that’s what [EverestX] set out to do with his modern, pocket-sized communication device based on pager technology from days of yore.

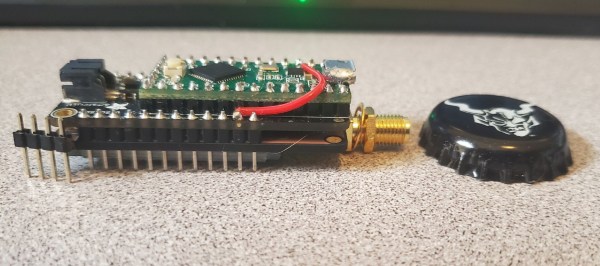
The device uses the POCSAG communications protocol, a current standard for pager communications that allows for an SMS-like experience for those still who still need (or want) to use pagers. [EverestX] was able to adapt some preexisting code and port it to an Atmel 32u4 microcontroller. With a custom PCB, small battery, an antenna, and some incredibly refined soldering skills, he was able to put together this build with an incredibly small footprint, slightly larger than a bottle cap.

Once added to a custom case, [EverestX] has an excellent platform for sending pager messages to all of his friends and can avoid any dreaded voice conversations. Pager hacks have been a favorite around these parts for years, and are still a viable option for modern communications needs despite also being a nostalgic relic of decades past. As an added bonus, the 32u4 microcontroller has some interesting non-pager features that you might want to check out as well.

Thanks to [ch0l0man] for the tip!