TV’s MacGyver would love the breadboard arrangement we saw recently: it uses paperclips and crimping to make circuits that can be more or less permanent with no soldering. The basic idea is simple. A cardboard base has a piece of paper affixed. Metal paperclips are bent straight and glued to the paper using PVA glue (you know, like ordinary Elmer’s; hot glue would probably work, too). You could probably salvage wires out of old house wiring that would work for this, too.
The scheme uses two sizes of paper clips. Large ones are made straight and form the rails, while small paperclips make connections. The rails are bent to have a little “ear” that pushes into the cardboard base to hold them still. A little glue stabilizes them. The ears poke out the back, so the author suggests covering them with duct tape, hot glue, or another piece of cardboard. Using the top of a shoebox would also solve the problem.
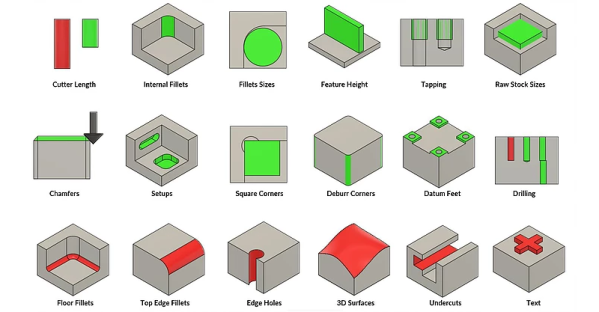
CNC machining is a wonderful thing, taking away a lot of the manual work required in machining and replacing it with accurate, repeatable computer control. However, this doesn’t mean that you can simply click a few buttons and become a great machinist overnight. There are a wide variety of skills involved in utilizing these tools effectively, and [Adam Bender] has created a guide to help budding makers learn the skills of design for CNC milling.
[Adam]’s guide starts from a basic level, considering 3-axis CNC milling with the most commonly used tools. From there, a whole range of tips, tricks, and potential pitfalls are discussed to help new machinists get to grips with CNC milling. Everything from dogbone corners, to tool selection and feature heights are covered, as well as cost-saving techniques like minimising the number of setups required.
These are skills any engineer will learn in a hurry when approaching an experienced CNC machinist, but it’s always better to go in forewarned and forearmed. Of course, for those eager to not just work with, but build their own CNC machine, we’ve covered that base too. Video after the break.
In the practical world we live in, PCBs are often rectangles (or rectangles with rectangles, it’s just rectangles all the way down). When a designer goes to schematic capture things are put down on nice neat grid intersections; and if there isn’t a particular demand during layout the components probably go on a grid too. Routing even the nastiest fractal web of traces is mostly a matter of layers and patience. But if the layout isn’t being done in a CAD tool and needs to be hand assembled free-form this isn’t always as simple. [M Rule] had this very problem and discovered a clever solution, turning things diagonal.
They changed the fitness criteria to the optimization problem that is controlling a lot of LEDs. Instead of minimum pins to drive the goal became “easiest assembly”, which meant avoiding wires snaking back and forth across the layout, a big source of frustration in a big Charlieplexed design. The observation was that if they turned the a rectilinear LED matrix by 45° and wrapped each connection around at the edges it formed what was essentially a large multiplexed matrix. The topology is pretty mind bending, so take a minute to study the illustration and build your mental model.
It looks a little strange, but this display works the same way a normal multiplexed display does but with the added benefit that each trace flows from one side to the other without turning back on itself at any point. To light any LED set the right row/column pair as source/sink and it turns on!
What if you actually need a rectangular display? Well that’s no problem, the matrix can be bent and smooshed as desired to change its shape. At the most extreme the possible display topologies get pretty wild! We’re sure to try thinking laterally next time we need to design an unusual display, maybe there is a more efficient matrix to be found.
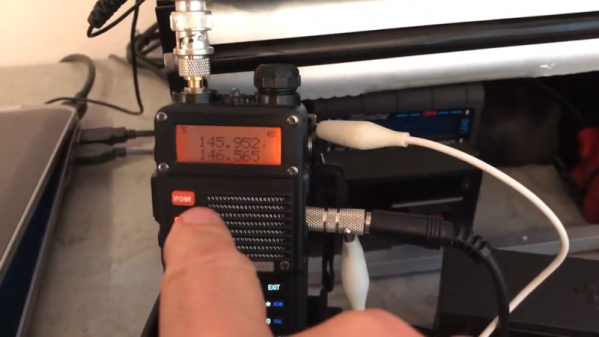
Both grizzled hams and potential future amateur radio operators are well-served by the market these days. Powerful and capable UHF and VHF handheld transceivers can now be had for well under $100, something unimaginable as recently as 20 years ago. Of course, a major part of the amateur radio scene used to be Morse code. Not to worry though, you can do that with a handheld, too!
The setup is simple but effective. A Morse code training unit generates tones in response to input from a Morse keyer. This audio is passed into the headset port of a Baofeng handheld transmitter. A toggle switch is wired up to the Push-To-Transmit circuit of the Baofeng to trigger transmission when required.
It’s a little different from the more typical constant-wave transmission methods that are so seldom used nowadays, but it gets the job done. Morse code has always been appreciated in situations where voice transmission is difficult due to low bandwidth or interference, and now it’s easy for new hams to give it a try.
For years I’ve been trying to wrap my mind around how silicon chips actually work. How does a purposefully contaminated shard of glass wield control over electrons? Every once in a while, someone comes up with a learning aid that makes these abstract concepts really easy to understand, and this was the case with one of the booths at Maker Faire Bay Area. In addition to the insight it gave me (and hundreds of Faire-goers), here is an example of the best of what Maker Faire stands for. You’ll find a video of their presentation embedded below, along with closeup images of the props used at the booth.
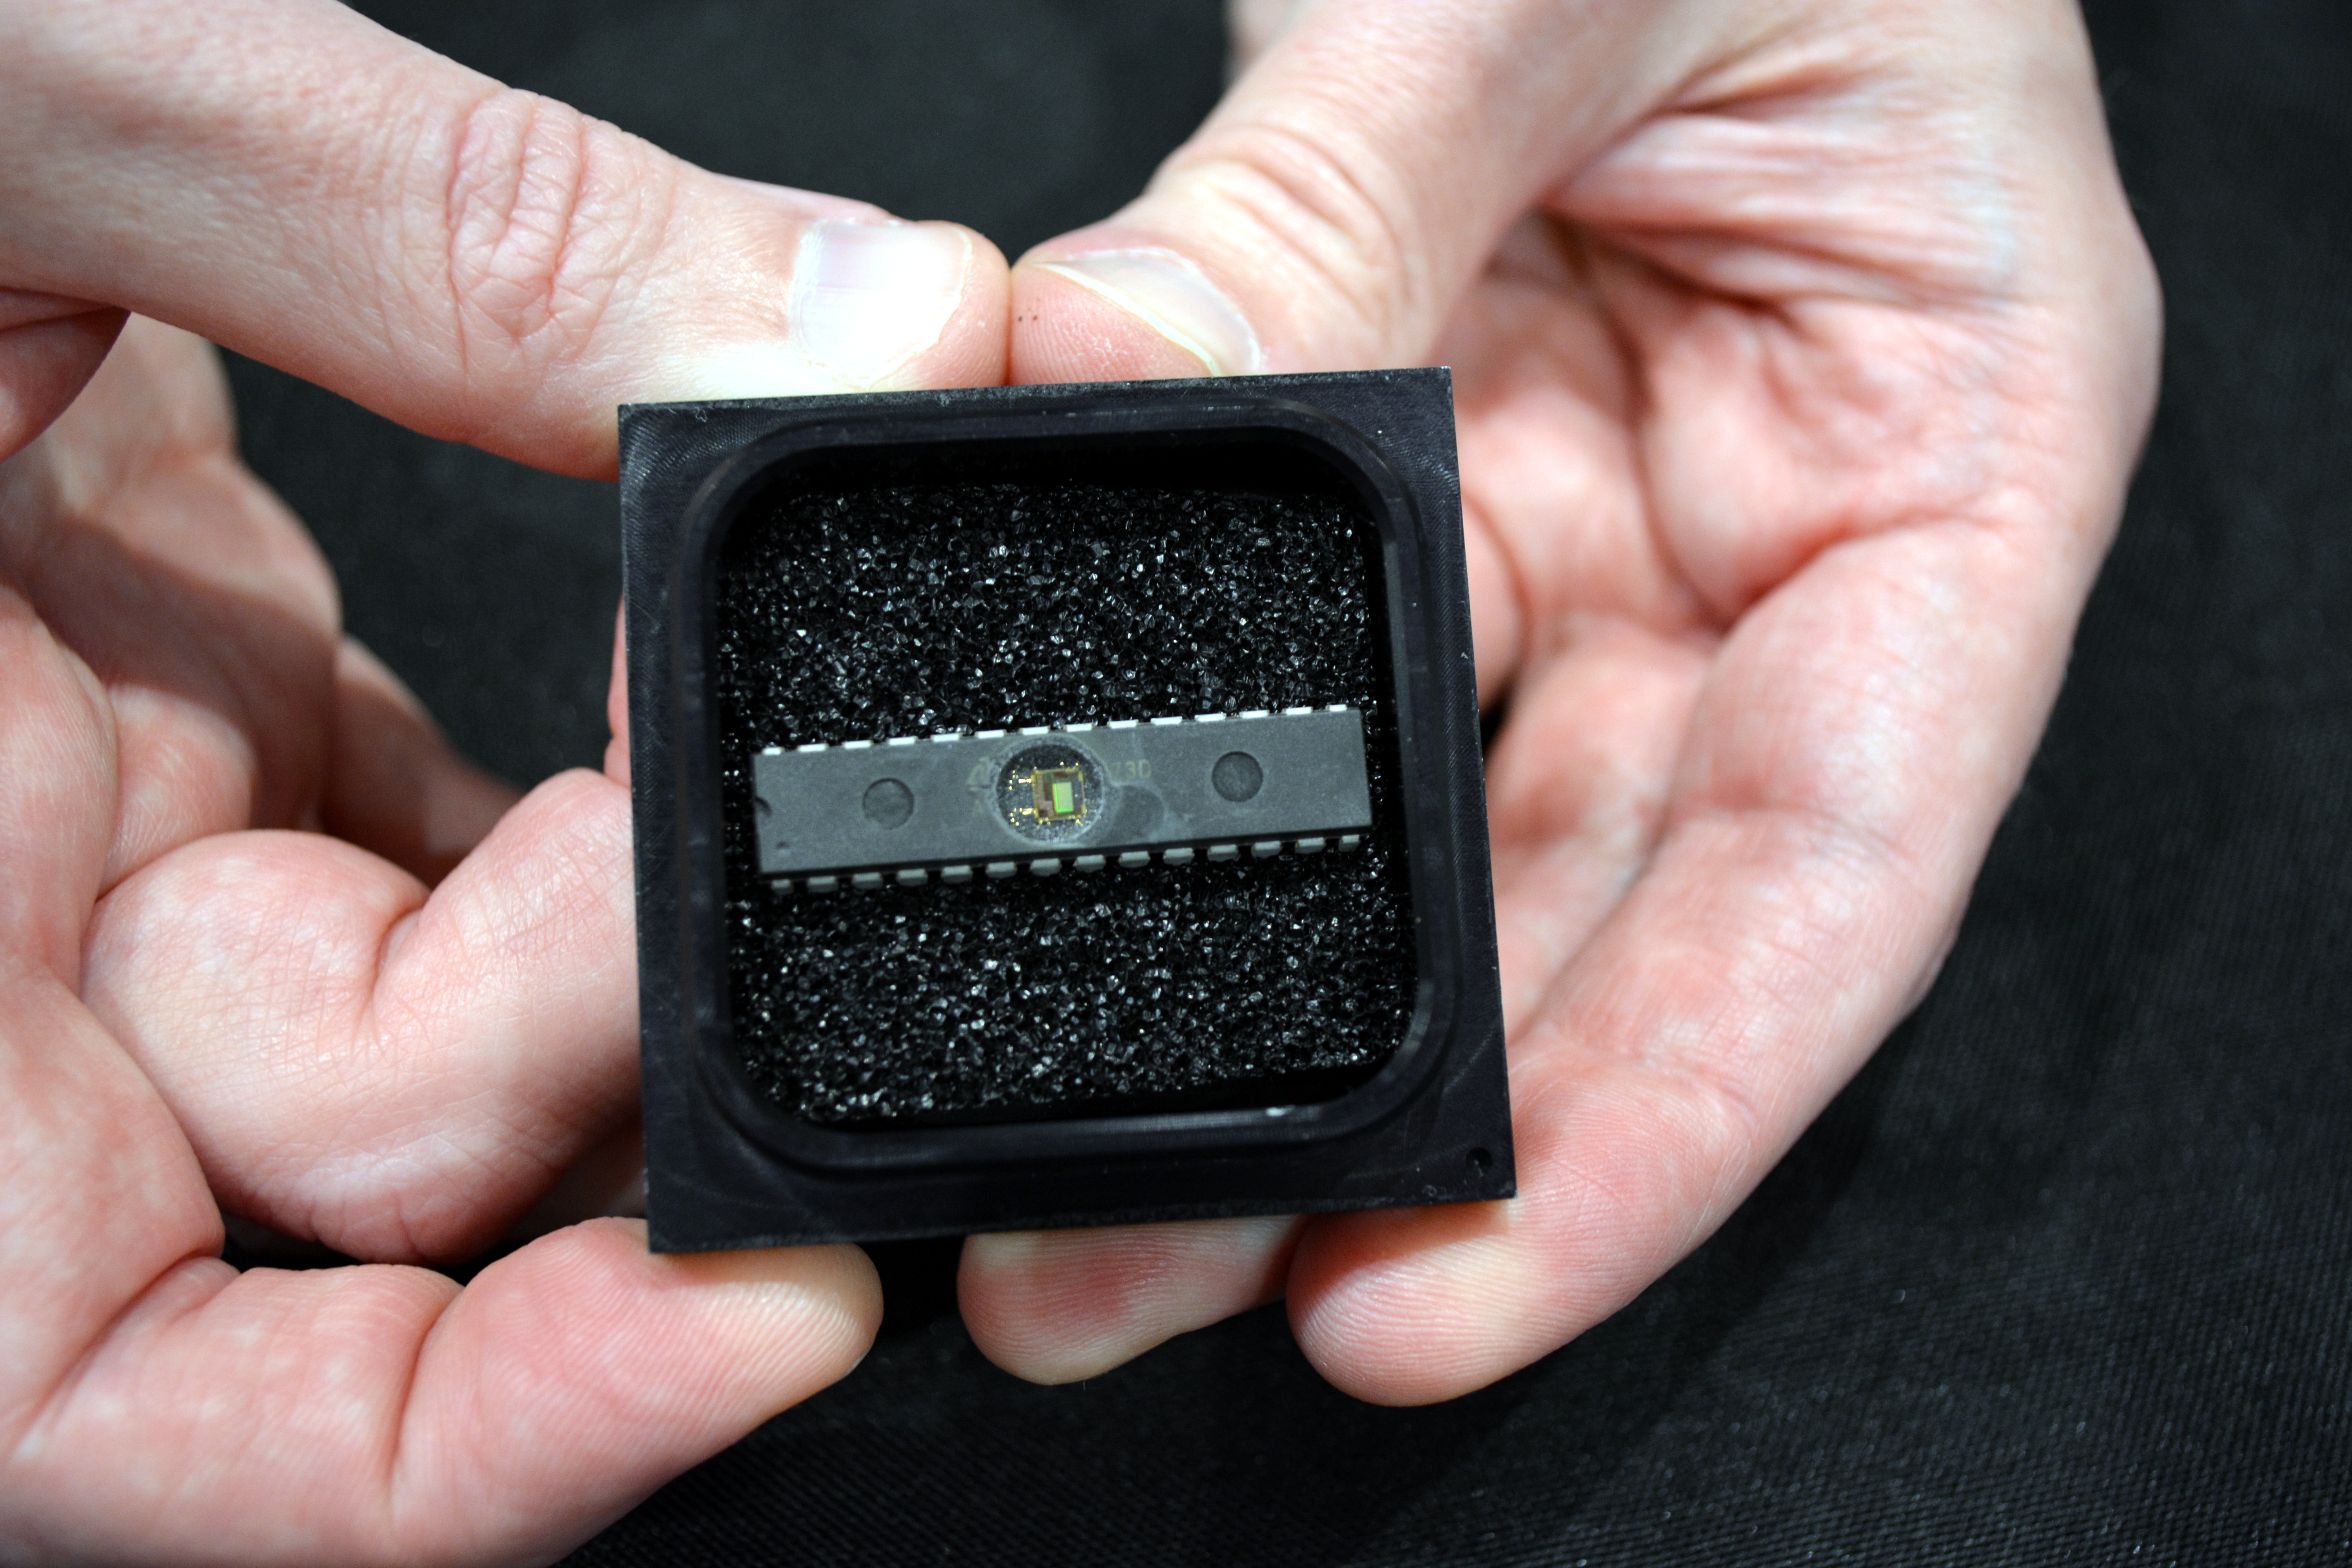
The Uncovering the Silicon booth had a banner and a tablecloth, but was otherwise so unassuming that many people I spoke with missed it. Windell Oskay, Lenore Edman, Eric Schlepfer, John McMaster, and Ken Shirriff took a 50-year-old logic chip and laid it bare for anyone who cared to stop and ask what was on display. The Fairchild μL914 is a dual NOR gate, and it’s age matters because the silicon is not just simple, it’s enormous by today’s standards making it relatively easy to peer inside with tools available to the individual hacker.
ATmega328 decapped by John McMaster was also on display at this booth
The first challenge is just getting to the die itself. This is John McMaster’s specialty, and you’re likely familiar from his Silicon Pr0n website. He decapped the chip (as well as an ATmega328 which was running the Arduino blink sketch with it’s silicon exposed). Visitors to the booth could look through the microscope and see the circuit for themselves. But looking doesn’t mean understanding, and that’s where this exhibit shines.
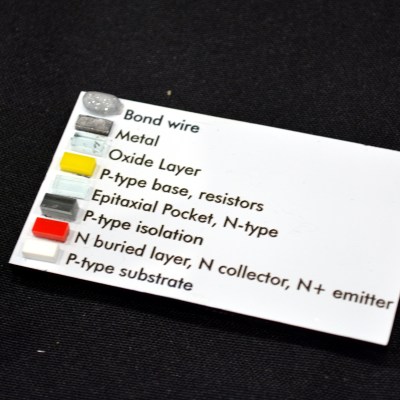
To walk us through how this chip works, a stack-up of laser-cut acrylic demonstrates the base, emitter, and collector of a single transistor. The color coding and shape of this small model makes it easy to pick out the six transistors of the 941 on a full model of the chip. This lets you begin to trace out the function of the circuit.
For me, a real ah-ha moment was the resistors in the design. A resistive layer is produced by doping the semiconductor with impurities, making it conduct more poorly. But how do you zero-in on the desired resistance for each part? It’s not by changing the doping, that remains the same. The trick is to make the resistor itself take up a larger footprint. More physical space for the electrons to travel means a lower resistance, and in the model you can see a nice fat resistor in the lower right. The proof for these models was the final showpiece of the exhibit as the artwork of the silicon die was laid out as a circuit board with discrete transistors used to recreate the functionality of the original chip.
Windell takes us through the booth presentation in the video below. I think you’ll be impressed by the breakdown of these concepts and how well they aid in understanding. This was a brilliant concept for an exhibit; it brought together interdisciplinary experts whom I respect and whose work I follow, and sought to invite everyone to gain a better understanding of the secrets hiding in the chips that underpin this technological age. This is exactly the kind of thing I love to see at a Maker Faire.
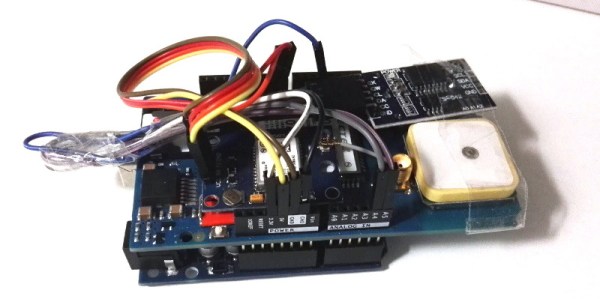
For his entry into the 2019 Hackaday Prize, [Marin Vukosav] is working on an ambitious project to create a small GPS tracking device which utilizes Narrowband IoT (NB-IoT) for long range communications. Rather than using a GSM modem which would suck the batteries dry in short order, NB-IoT can theoretically maintain a connection within a 10 to 15 kilometer range while keeping the energy consumption low enough that the tracker could go up to a year before needing to be recharged.
At this point, the hardware is still in the proof of concept phase. [Marin] is using an Arduino with a GPS shield and a SIM7000 NB-IoT module to experiment with the concept, but ultimately says he wants to shrink the hardware down to the point it could fit inside of a bike light. Looking even farther ahead, he’d like to make deals with bike manufacturers so the module could be integrated into the frame itself, where a thief wouldn’t be able to access it at all.
Of course, nothing says this technology has to be limited to bikes. If [Marin] can get it small enough, and reach even half of his goal battery life, he’d have a very compelling product on his hands. Who wouldn’t want to add something like this to their long-range drone in case it gets lost?
There’s still a long way to go on this project, and it’s not all hardware. [Marin] will also have to create the software side of things, a site where you can register your tracker and be able to view its near real-time position on the map. It’s a lot of work, especially if you’re planning on turning it into a commercial product, and we’re very interested to follow along and see where the project goes throughout the year.
Join us Thursday at noon Pacific time for the Flexible PCBs Hack Chat with Drew and Chris from OSH Park! Note the different day from our usual Hack Chat schedule!
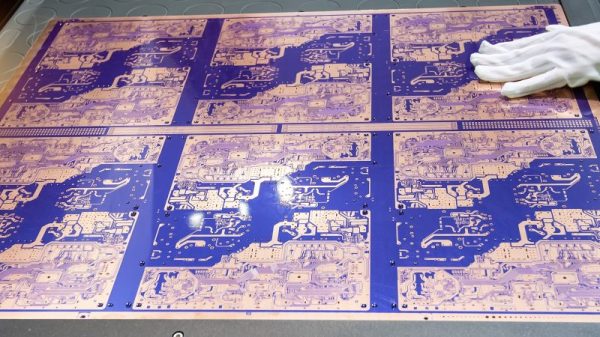
Printed circuit boards have been around for decades, and mass production of them has been an incalculable boon to the electronics industry. But turning the economics of PCB production around and making it accessible to small-scale producers and even home experimenters is a relatively recent development, and one which may have an even broader and deeper impact on the industry in the long run.
And now, as if professional PCBs at ridiculous prices weren’t enough, the home-gamer now has access to flexible PCBs. From wearables to sensor applications, flex PCBs have wide-ranging applications and stand to open up new frontiers to the hardware hacker. We’ve even partnered with OSH Park in the Flexible PCB Contest, specifically to stretch your flexible wings and get you thinking beyond flat, rigid PCBs.
Click that speech bubble to the right, and you’ll be taken directly to the Hack Chat group on Hackaday.io. You don’t have to wait until Thursday; join whenever you want and you can see what the community is talking about.