IoT Air Purifier Makes A Great Case Study In Reverse Engineering

Here at Hackaday, about the only thing we like more than writing up tales of reverse engineering heroics is writing up tales of reverse engineering heroics that succeed in jailbreaking expensive widgets from their needless IoT dependency. It’s got a real “stick it to the man” vibe that’s hard to resist.

The thing is, we rarely see a reverse engineering write-up as thorough as the one [James Warner] did while integrating an IoT air purifier into Home Assistant, so we just had to make sure we called this one out. Buckle up; it’s a long, detailed post that really gets down into the weeds, but not unnecessarily so. [James] doesn’t cloud-shame the appliance manufacturer, so we can’t be sure who built this, but it’s someone who thought it’d be a swell idea to make the thing completely dependent on their servers for remote control via smartphone. The reverse engineering effort started with a quick look at the phone app, but when that didn’t pay off in any useful way, [James] started snooping on what the device was talking about using Wireshark.

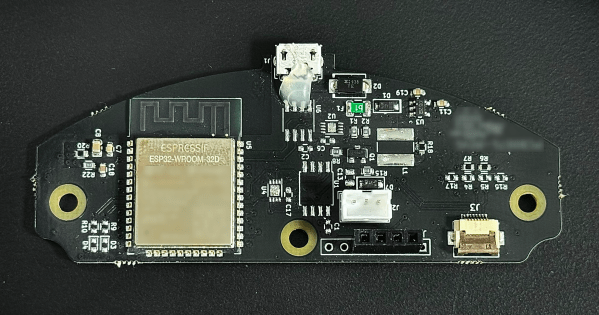
One thing led to another, wires were soldered to the serial pins on the ESP32 on the purifier’s main board, and with the help of a FlipperZero as a UART bridge, the firmware was soon in hand. This gave [James] clues about the filesystem, which led to a whole Ghidra side quest into learning how to flash the firmware. [James] then dug into the meat of the problem: figuring out the packet structure used to talk to the server, and getting the private key used to encrypt the packets. This allowed a classic man-in-the-middle attack to figure out the contents of each packet and eventually, an MQTT bridge to let Home Assistant control the purifier.

If it sounds like we glossed over a lot, we know — this article is like a master class on reverse engineering. [James] pulled a lot of tools out of his kit for this, and the write-up is clear and concise. You may not have the same mystery fan to work with, but this would be a great place to start reverse engineering just about anything.

Thanks to [ThoriumBR] for the tip.

Retrotechtacular: The Master Hands Of The Early Automotive Industry

When motion pictures came along as a major medium in the 1920s or so, it didn’t take long for corporations to recognize their power and start producing promotional pieces. A lot of them are of the “march of progress” genre, featuring swarms of workers happy in their labors and creating the future with their bare hands. If we’re being honest, a lot of it is hard to watch, but “Master Hands,” which shows the creation of cars in the 1930s, is somehow more palatable, mostly because it’s mercifully free of the flowery narration that usually accompanies such flicks.

“Master Hands” was produced in 1936 and focuses on the incredibly labor-intensive process of turning out cars, which appear to be the Chevrolet Master Deluxe, likely the 1937 model year thanks to its independent front suspension. The film is set at General Motors’ Flint Assembly plant in Flint, Michigan, and shows the entire manufacturing process from start to finish. And by start, we mean start; the film begins with the meticulous work of master toolmakers creating the dies and molds needed for forging and casting every part of the car. The mold makers and foundrymen come next, lighting their massive furnaces and packing the countless sand molds needed for casting parts. Gigantic presses stamp out everything from wheels to frame rails to body panels, before everything comes together at the end of the line in a delicate ballet of steel and men.

Continue reading “Retrotechtacular: The Master Hands Of The Early Automotive Industry”

Human-Interfacing Devices: Packing For The Descriptor Heist

We started with figuring out HID descriptors a week ago, and I’ve shown you how to send raw HID packets using a MicroPython fork. We do still have the task in front of us – making a touchscreen device. For that, let’s give you the tools to capture an existing descriptor from a touchscreen, then show you how to tweak it and how it turns out in the end.

Packing For The Heist

When it comes to this kind of adventure, we can’t go without tools and weapons – it could be dangerous! Without them, you could even abandon your project halfway! Here’s enough high-precision tools and ammunition to last you through whatever obstacles you might encounter. Except for the web-based tools, these tools are for Linux, but please remember that you can always use a virtual machine or a Raspberry Pi. Nobody would use Windows for a heist anyway, what’s with all the telemetry and such.

The first tool is for reading descriptors – we need one to learn from, it’s just like a keycard you can flash to a security guard and scan at the vault entry. Of course, with RFID, you want to have enough examples, compare bits between a few cards and all. For now, HID descriptors don’t have authenticity checks, but it looks like that might just change in the future. Leave it to Apple and Microsoft to add them, as usual. On Linux, seeing descriptors is simple – as root, go into /sys/bus/usb/devices/, find your device by its lsusb device tree path, then follow the directory with the VID/PID in it. That directory will contain a report_descriptor file – hexdump it. The entire command could look like this:

sudo hexdump -v -e '/1 "%02X "' /sys/bus/usb/devices/3-6.2/3-6.2\:1.1/0003\:0C40\:8000.0022/report_descriptor

Again, you might need root to even find this path, so use sudo -i if you must. The format string in the hexdump command gives you parser-friendly output. Specifically, for parsing, I use this webpage – it’s wonderful, even adding tabs that delineate different sections of the descriptor, making its output all that more readable! You can also save this webpage locally, it’s a very neat tool. Other than that, you can try other local tools like this one!

Continue reading “Human-Interfacing Devices: Packing For The Descriptor Heist”

It Wasn’t DOOM That Killed The Amiga

If you were the type of person who might have read Hackaday had we been around in the late 1980s or early 1990s, it’s a reasonable guess that you would have had a 16-bit home computer on your desk, and furthermore that it might have been a Commodore Amiga. These machines gave the best bang for the buck in those days with their impressive multimedia capabilities, and they gained a fervent following which persists to this day. [Carl Svensson] was one of them, and he’s penned a retrospective on the demise of the platform with the benefit of much hindsight.

The heyday of the Amiga from its 1985 launch until the days of the A1200 in the early-to-mid 1990s saw Moore’s Law show perhaps its fastest effects for the consumer. In that decade the PC world jumped from the 8088 to the Pentium, and from a PC speaker and CGA if you were lucky, to a Sound Blaster 16 and accelerated SVGA. By comparison the Amiga didn’t change much except in model numbers and a few extra graphics modes, and when a faster processor came it was far to little too late.

Defender of the Crown, released in 1986

There’s a well-worn path with some justification of blaming Commodore-s notoriously awful management for the debacle, but the piece goes beyond that into the mid ’90s. His conclusion is that what really killed the Amiga was that the CPU price reductions which defined the x86 world at that time never came to 68k or PowerPC lines, and that along with the architecture zealotry of the fan base meant that there would never be the much-longed-for revival.

He also takes a look at the other home computer platforms of the era, including the “all its killer architecture managed to kill was, sadly, Atari itself” Atari Falcon, and the Acorn Archimedes, which also lives on for enthusiasts and is perhaps the most accessible survivor. From here having also the benefit of hindsight we can’t disagree with him on his assessment, so perhaps it’s best to look at the Amiga not as the platform we should rightfully still be using, but the great stepping stone which provided us a useful computer back in t he day without breaking the bank.

They Want To Put A Telescope In A Crater On The Moon

When we first developed telescopes, we started using them on the ground. Humanity was yet to master powered flight, you see, to say nothing of going beyond into space. As technology developed, we realized that putting a telescope up on a satellite might be useful, since it would get rid of all that horrible distortion from that pesky old atmosphere. We also developed radio telescopes, when we realized there were electromagnetic signals beyond visible light that were of great interest to us.

Now, NASA’s dreaming even bigger. What if it could build a big radio telescope up on the Moon?

Continue reading “They Want To Put A Telescope In A Crater On The Moon”

3D Printed Pelvis And Femur Implants For Bone Cancer Treatment

On December 22nd of 2023, a Vietnamese patient underwent hours-long surgery in order to remove part of his pelvis and femur, as per the usual treatment for bone cancer. What was special here was that the bone was replaced with 3D-printed replicas, to restore the shape and function of the parts that were removed. A long time before this surgery, [Mr. Le Dinh Thuan] was diagnosed with lung cancer, for which he received surgery. Yet not long after this surgery it was discovered due to sudden hip pain that the cancer had spread to one hip joint, which is quite uncommon, but requires that the affected bone is removed. This replacement with a prosthetic was a first for cancer treatments in Vietnam. Continue reading “3D Printed Pelvis And Femur Implants For Bone Cancer Treatment”

Open-Source Solar Modules

As the price of solar panels continues to fall, more and more places find it economical to build solar farms that might not have been able to at higher prices. High latitude locations, places with more clouds than sun, and other challenging build sites all are seeing increased green energy development. The modules being used have one main downside, though, which is that they’re essentially a black box encased in resin and plastic, so if one of the small cells fails a large percentage of the panel may be rendered useless with no way to repair it. A solar development kit like this one from a group called Biosphere Solar is looking to create repairable, DIY modules that are completely open source, to help solve this issue.

The modular solar panel is made from a 3D printed holster which can hold a number of individual solar cells. With the cells placed in the layout and soldered together, they are then sandwiched between a few layers of a clear material like acrylic or glass with a seal around the exterior to prevent water intrusion. Since the project is open-source any number of materials can be used for the solar cell casing, and with the STL file available it’s not strictly necessary to 3D print the case as other manufacturing methods could be used. The only thing left is to hook up a DC/DC converter if you need one, and perhaps also a number of bypass and/or blocking diodes depending on your panel’s electrical layout.

The project is still in active development, and some more information can be found at the project’s website. While the “recyclability” of large-scale solar farms is indeed a problem, it’s arguably one which has been overblown by various interests who are trying to cast doubt on green energy. A small build like this won’t solve either problem anytime soon, so the real utility here would be for home users with small off-grid needs who want an open-source, repairable panel. It’s a great method to make sure solar technology is accessible and repairable for anyone that wants it, and in a way this approach to building hardware reminds us a lot of the Framework laptops.