Drone-enium Falcon

If you own a quadcopter chances are you own more than one. It’s kind of an addictive thing in that way. So dig out that dinged up model and build something awesome around it. We’d suggest making it look exactly like a Millenium Falcon. Okay, to be fair this is built around a custom quadcopter originally designed to carry a camera and GPS but removed for this project. We’re not sure if stock models have enough extra umph to lift a fancy fuselage like this (maybe you’ll weigh in on that in the comments?).

As with any great build this started with a scale drawing. The drawing was printed for use as a cutting template for the expanded polystyrene. Part of what makes it look so fantastic is that the fuselage isn’t 2-dimensional. There is depth in the places that matter and that’s all because of near-mythical foam cutting/shaping skills on [Olivier’s] part.

Final touches are LEDs on front and to simulate the curved engine on the tail. You can almost see this thing picking up a handless [Luke] below Bespin’s floating city. This Falcon flies like… a quadcopter (what did you expect? The Kessel Run in 12 parsecs?), which you can see in the videos after the break. The second clip shows how easy it is to remove the foam body from the quad frame, yet another nice touch!

Of course if Star Wars isn’t your thing you can give trolling the skies as a flying body a shot.

Continue reading “Drone-enium Falcon”

Sentiment

Display Your City’s Emotional State With Illuminated Snow

[Hunter] wanted to do something a bit more interesting for his holiday lights display last year. Rather than just animated lights, he wanted something that was driven by data. In this case, his display was based on the mood of people in his city. We’ve seen a very similar project in the past, but this one has a few notable differences.

The display runs off of an Arduino. [Hunter] is using an Ethernet shield to connect the Arduino to the Internet. It then monitors all of the latest tweets from users within a 15 mile radius of his area. The tweets are then forwarded to the Alchemy Sentiment API for analysis. The API uses various algorithms and detection methods to identify the overall sentiment within a body of text. [Hunter] is using it to determine the general mood indicated by the text of a given tweet.

Next [Hunter] needed a way to somehow display this information. He opted to use an LED strip. Since the range of sentiments is rather small, [Hunter] didn’t want to display the overall average sentiment. This value doesn’t change much over short periods of time, so it’s not very interesting to see. Instead, he plots the change made since the last sample. This results in a more obvious change to the LED display.

Another interesting thing to note about this project is that [Hunter] is using the snow in his yard to diffuse the light from the LEDs. He’s actually buried the strip under a layer of snow. This has the result of hiding the electronics, but blurring the light enough so you can’t see the individual LEDs. The effect is rather nice, and it’s something different to add to your holiday lights display. Be sure to check out the video below for a demonstration. Continue reading “Display Your City’s Emotional State With Illuminated Snow”

Build Your Own Gear VR

With Samsung’s new Gear VR announced, developers and VR enthusiasts are awaiting the release of the smartphone connected VR headset. A few people couldn’t wait to get their hands on the platform, so they created, OpenGear, a Gear VR compatible headset.

The OpenGear starts off with a Samsung Galaxy Note 4, which is the target platform for the Gear VR headset. A cardboard enclosure, similar to the Google Cardboard headset, holds the lenses and straps the phone to your face.

The only missing part is the motion tracking electronics. Fortunately, ST’s STM32F3 Discovery development board has everything needed: a microcontroller with USB device support, a L3GD20 3 axis gyro, and a LSM303DLHC accelerometer/magnetometer. These components together provide a USB inertial measurement unit for tracking your head.

With the Discovery board strapped to the cardboard headset, an open-source firmware is flashed. This emulates the messages sent by a legitimate Oculus Rift motion tracker. The Galaxy Note 4 sees the device as a VR headset, and lets you run VR apps.

If you’re interested, the OpenGear team is offering a development kit. This is a great way for developers to get a head start on their apps before the Gear VR is actually released. The main downside is how you’ll look with this thing affixed to your face. There’s a head-to-head against the real Gear VR after the break.

[via Road To VR]

Continue reading “Build Your Own Gear VR”

DIY SMD Twofer: Manual Pick-and-Place And The Beak

Populating a board with tiny SMT parts can be really tricky, and we’ll take all the help we can get. If you’re in the same boat, [vpapanik] has two devices you should check out.

First up is the manual pick-and-place machine. Wait, what? A manual pick-and-place? It’s essentially an un-driven 2-axis machine with a suction tip and USB inspection microscope on the stage. The picker apparatus is the “standard” needle-plus-aquarium-pump design, and the rails are made from angle aluminum and skateboard bearings.

Yeah, yeah, yeah. It’s not a robot. But sometimes the right jig or tool makes all the difference between a manual procedure being fiddly and being graceful. And we couldn’t help but laugh at the part in the video where he demonstrates the “machine” moving in a circular pattern.

Continue reading “DIY SMD Twofer: Manual Pick-and-Place And The Beak”

DIY Camera Light Ring

Inexpensive Ring Light Makes Macro Photos Easy

[edyb] uses his relatively inexpensive Cannon camera quite a bit. However, in dark areas or extreme closeups, the camera’s image quality leaves something to be desired. [edyb] hopped on the ‘net and found out that a ring light may cure his photo faux pas. Ring lights are nothing new but nothing existed for his lower-end point and shoot camera. With a USB-powered lamp and a spare AA battery pack kicking around, [edyb] decided to make his own.

First, the USB lamp was disassembled, luckily the LEDs were already laid out in a ring shape. The clear protective housing and gooseneck were discarded and the remaining PCB ring was glued directly to the camera. A female USB jack was then glued to the top of the camera and soldered to the two leads connected to the lamp’s PCB. The AA battery holder received a small switch and a male USB plug, also courtesy of a few dabs of glue. The now-assembled battery pack plugs directly into the camera via the USB connector and is its only method of attachment.

DIY Camera Light RingThe utilitarian modification may look crude but the results are anything but. Check out this close-up macro shot of a Canadian penny. Not too bad.

[edyb] has done some similar mods to other cameras, attaching components with magnets and even using an old Blackberry battery to power the LEDs showing that there is no one way to solve a problem. Check out the video after the break…

Continue reading “Inexpensive Ring Light Makes Macro Photos Easy”

DJ Light Box Grooves To The Beat

During a Product Design class, [Oscar de la Hera] designed and built an LED light box that responds to music — and looks good doing it!

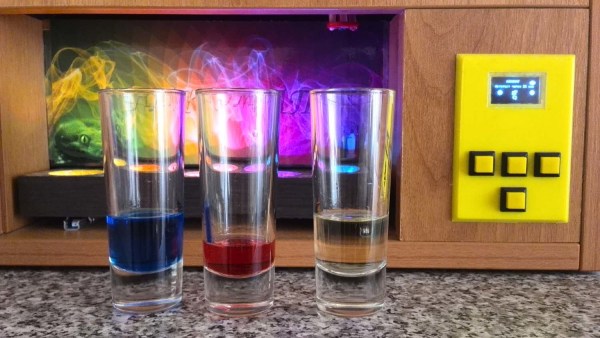
He carefully constructed the box out of Oak with a one-way mirror top, enclosing a 6 x 6 matrix array of NeoPixels. Behind the panel is an Arduino Uno which uses an MSGEQ7 chip and two audio jacks to take in an audio signal and create a light show. When the lights are off, it looks like a fancy little mirror — but when you turn on the music it becomes alive.

If you’re curious on how it was made, or if you want to make your own, there’s a full tutorial on how to make your own over at Instructables — and don’t forget to take a look at it in action after the break!

Continue reading “DJ Light Box Grooves To The Beat”

SuperBowlLamp

Super Bowl Football Lamp Keeps You Informed

[David] loves to watch football. After his preferred team lost the playoffs, he wanted another reason to watch the big game last Sunday. He ended up building himself a football-shaped lamp that changes color based on who scored last.

[David] started with a Spark Core and a Spark Button. The Spark is the primary microcontroller and includes WiFi. The Spark Button is essentially a shield for the Spark that includes an accelerometer, some LEDs, and a few push buttons. The other part of this build was the housing. [David] used a toy football he got for free as swag from a parade.

As for the code, [David] started by first learning how to control the LEDs on the Spark Button. Then he wrote his own touchdown function to illuminate the football a specific color. Since the Spark uses the REST API, [David] is able to trigger this function by simply visiting the URL of his Spark. This makes it very simple to trigger the event.

The final part of this build was made easy thanks to IfThisThenThat (IFTTT). This is a web service that allows you to monitor and interact with various online web services. It can monitor one service, and then interact with another based on events that happen in the first service. In this case, [David] is using a “channel” added to IFTTT by ESPN. This channel can trigger when certain events happen for whatever team you specify. For this project [David] is monitoring touchdowns.

After combining all of these various services, [David] had a working light that would change colors based on which team scored. He did notice that IFTTT has anywhere between a 1 and 15 minute delay, and he hopes to improve upon this design by hooking directly to an API and skipping the extra service altogether.