Most 3D printers come with a pretty basic filament holder — often little more than a bar to hang the spool on. [Ivan Miranda]’s 3D printers run bigger spools than most, though, so he had to craft an altogether more serious solution.
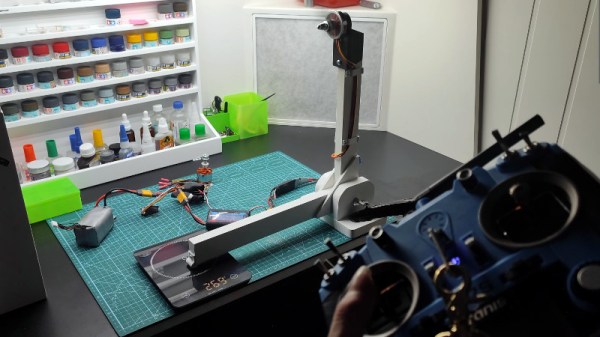
Unlike most of [Ivan]’s creations, the spool holder isn’t actually 3D printed. For this job, he turned to a laser cutter instead, cutting the parts out of 5 mm plywood. A handful of layers of wood bolt together to form the frame. The frame holds several bearings for the outer rims of the spool itself to ride on, allowing it to spin freely as the extruder tugs on the filament. Reducing the rolling resistance of the spool is key when working with such large, heavy spools, and reduces the chances of the filament not feeding properly.
The phrase “Lego Guitar” can be a stressful one to hear. You might imagine the idea of strings under tension and a subsequently exploding cloud of plastic shrapnel. This build from the [Brick Experiment Channel] eschews all that, thankfully, and is instead a digital synth that only emulates a guitar in its rough form factor.
The heart of the build is a Lego Mindstorms EV3 controller. It’s acts as the “body” of the guitar, and is fitted with a Lego “fretboard” of sorts. A slide is moved up and down the fretboard by the player. The EV3 controller detects the position of the slide via an ultrasonic sensor, and uses this to determine the fret the user is trying to play. The button the user presses on the controller then determines which of five “strings” the user is playing, and the selected note is sounded out from the EV3’s internal speaker. It’s strictly a monophonic instrument, but three different sounds are available: a bass guitar, a rock guitar, and a solo guitar, with all the fidelity and timbre of a 90s Casio keyboard.
It’s a fun and silly instrument, and also kind of difficult to play. The slide mechanism doesn’t offer much feedback, nor are the EV3 buttons intended for dynamic musical performance. Regardless, the player belts out some basic tunes to demonstrate the concept. We doubt you’d ever be able to play Through The Fire and Flames on such a limited instrument, but [Brick Experiment Channel] used their editing skills to explore what that might sound like regardless.
In case you thought that cameras, LiDAR, infrared sensors, and the like weren’t enough for Big Brother to track you, researchers from Carnegie Mellon University have found a way to track human movements via WiFi. [PDF via VPNoverview]
The process uses the signals from WiFi routers for an inexpensive way to determine human poses that isn’t hampered by lack of illumination or object occlusion. The system produces UV coordinates of human bodies by analyzing signal strength and phase data to generate a 2D feature map and then feeding that through a modified DensePose-RCNN architecture which corresponds to 3D human poses. The system does have trouble with unusual poses that are not in the training set or if there are more than three subjects in the detection area.
While there are probably applications in Kinect-esque VR Halo games, this will probably go straight into the toolbox of three letter agencies and advertising-fueled tech companies. The authors claim this to use “privacy-preserving algorithms for human sensing,” but only time will tell if they’re correct.
Most of us learn to read digital clocks first, which display the time in obvious numbers. Analog clocks are often learned later, with the hands taking our young brains a little longer to figure out. Once you’ve grown into a 1337h4XX0r, though, you’re ready to learn how to read a binary watch. Then you can build your own, just like [taifur] did.
The watch rocks a simplistic, bare bones design with the PCB acting as the body of the device itself. It’s not great for water resistance, or even incidental contact, but it’s a sharp look with the golden traces on display. The heart of the operation is a ATmega328P, as seen in the popular Arduino Uno, and it’s paired with a DS3231M real-time clock module to keep accurate time. 13 SMD LEDs are charged with displaying the time in binary format, with [taifur] choosing to spec a classic red color for the build. The watch is powered via a CR2032 coin cell, which you’re best advised not to swallow. So far, [taifur] has found the watch will last for over a month before the battery is tapped out.
It’s a fun build, and one that looks good when paired with a classic NATO watch strap in green. If, however, you desire a watch that definitely won’t last a month on a single coin cell, you can always build a Nixie watch instead. Video after the break.
If you play games on multiple consoles, you’re probably familiar with the occasional bout of uncertainty that comes with each system’s unique button arrangement. They’re all more or less in the same physical location, but each system calls them something different. Depending on who’s controller you’re holding, the same button could be X, A, or B. We won’t even get started on colors.
Overhearing her partner wish the buttons on his Steam Deck matched the color scheme of the Xbox, [Gina Häußge] (of OctoPrint fame) decided to secretly create a set of bespoke buttons for the portable system. There was only one problem…she had no experience with the silicone molding process or epoxy resins which would be required for such an operation.
Luckily we have the Internet, and after researching similar projects that focused on other consoles, [Gina] felt confident enough to take apart Steam’s handheld and extract the original plastic buttons. These went into a clever 3D printed mold box, which was small enough to put into a food vacuum container for degassing purposes. The shape of the buttons necessitated a two-piece mold, into which [Gina] embedded two channels: one to inject the resin, and another that would let air escape.
The red, green, blue, and yellow resins were then loaded into four separate syringes and forced into the mold. It’s critically important to get the orientation right here, as each button has a slightly different shape. It sounds like [Gina] might have mixed up which color each button was supposed to be during an earlier attempt, so for the final run she made a little diagram to keep track. After 24 hours she was able to peel the mold apart and get a look at the perfectly-formed buttons, but it took 72 hours before they were really cured enough to move on to the next step.
[Gina] applied the legends with a sheet of rub-on lettering, which we imagine must have been quite tricky to get lined up perfectly. Since the letters would get worn off after a few intense gaming sessions without protection, she finally sealed the surface of each button by brushing on a thin layer of UV resin and curing it with a flashlight of the appropriate wavelength.
In the news among aviation enthusiasts, the ADS-B data aggregation and aircraft tracking site ADSB-Exchange has been sold by its founder to JETNET for a reported $20,000,000. This type of routine financial news is more at home in the business media than on Hackaday, but in this case there’s something a little different at play. ADS-B Exchange is a community driven site whose data comes from thousands of enthusiasts worldwide connecting their ADS-B receivers to its feed API. The sale to a commercial flight data company has not gone down well with this community who are unsurprisingly unimpressed that their free contributions to the website have been sold.
This certainly isn’t the first time a site built on community data has flipped into big business, and while it’s unclear whether JETNET will do a full CDDB and boot out anyone not paying to play, we can understand the users feeling that their work has been sold from under them. On the other hand, how many of us can truly claim their open source beliefs wouldn’t start to buckle once somebody slides a $20m check across the table?
It’s evidently too late for anyone aggrieved by their ADS-B data being sold, but perhaps there’s something else to think about here. We have an established way to recognize open source software in the many well-known software libre licences, but we don’t for crowd-sourced data. Perhaps it’s time for the open-source community to consider this problem and come up with something for future sites like ADS-B Exchange whatever field they may be in, a licence which clearly defines the open terms under which contributors provide the data and those under which site owners can use it. Otherwise we’ll be here again in a few years writing about another aggrieved community, and we think that doesn’t have to happen.
Talking about high-quality USB-C implementations, there’s a product that has multiple selling points designed around USB-C, and is arguably a shining example of how to do USB-C right. It’s the Framework laptop, where the USB-C expansion cards take the center stage.
Full disclosure – this article is being typed on a Framework laptop, and I got it free from Framework. I didn’t get it for Hackaday coverage – I develop Framework-aimed hardware as hobby, specifically, boards that hack upon aspects of this laptop in fun ways. As part of their community developer support effort, they’ve provided me with a laptop that I wouldn’t otherwise be able to get for such a hobby. By now, I’m part of the Framework community, I have my own set of things I like about this laptop, and a set of things I dislike.
This is not an article about how I’m satisfied or dissatisfied with the Framework laptop – there’s plenty of those around, and it would not be fair for me to write one – I haven’t paid for it in anything except having lots of fun designing boards and hanging out with other people designing cool things, which is something I do willingly. I’m an all-things-laptops enthusiast, and the reason I’d like to talk about Framework is that there is no better example of USB-C, and everything you can do with it, in the wild. Continue reading “All About USB-C: Framework Laptop”→