Retro Flip Clock Gets A Retrofit

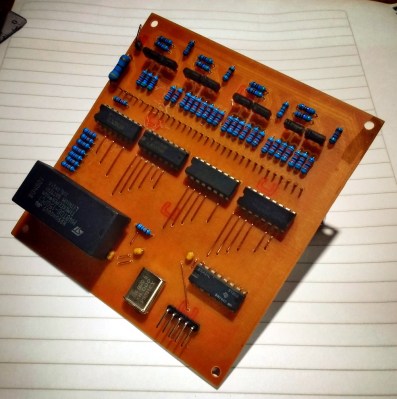
Retro tech is almost always ripe for the hacking — be it nostalgia, an educational teardown, or acknowledging and preserving the shoulders upon which we stand. Coming across an old West-German built flip clock, YouTuber [Aaron Christophel] retrofitted the device while retaining its original mechanical components!

No modern electronics are complete without LEDs of some kind, so he has included a strip in the base of the clock face for visibility and cool factor. He doesn’t speak to the state of the clock beforehand, but he was able to keep the moving bits of the clock working for its second shot at life.

Continue reading “Retro Flip Clock Gets A Retrofit”

Color Changing Clock Gets A Pi Zero Heart

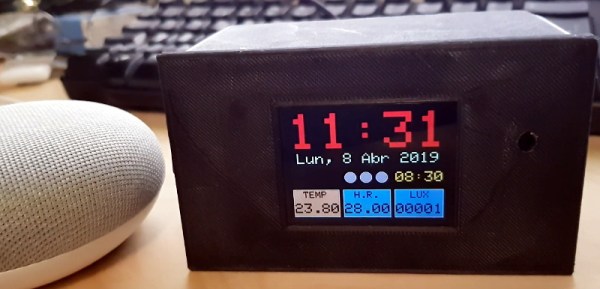
Hackaday reader [Don] dropped by the tip line recently to let us know about the latest version of his color-changing LCD clock project. This is his second version of the hardware which makes some pretty big improvements over the original, including moving from the Pi B to the Pi Zero and an internal simplification of the wiring. He mentions the next revision of the project will focus on Google Home integration, which should be interesting to see.

As a father of two pre-school age children, he was looking for a way to help his kids understand the concept of time and scheduled activities. Colors and shapes come fairly easy to children of this age, but time and how it relates to the day is a bit more difficult for them especially as their comprehension of numbers is still developing. [Don] reasoned that even if they couldn’t read the numbers on the clock yet, if he had the display change colors to indicate different periods of the day (sleep, play, cleanup, etc), it would not only keep them on schedule, but reinforce the meaning of the numbers on the screen.

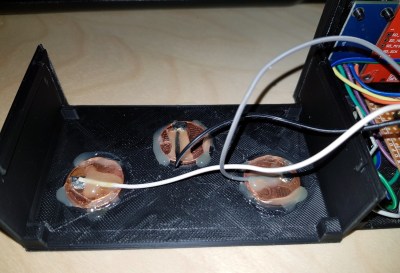
ShiftBrite installed in the projector.

The project was made infinitely easier by a lucky find at a local retailer. For $10 he got a kid-friendly looking clock that utilized a simple projector to backlight the LCD display. This meant [Don] would just need to swap out the stock lighting module for a controllable RGB LED, and the hardware modifications would essentially be complete.

Even the Pi Zero fits perfectly inside the case of the clock, the only modification necessary was cutting a little hole in the back for the Pi’s micro USB port. His earlier version used an external Pi B connected to the clock via CAT5, so getting it all integrated into the one device is a huge improvement, especially when little kids are involved. Moving the Pi and its 5 V pins into the clock itself also allowed [Don] to drop the voltage regulator required previously.

With the basic hardware for a color changing LCD clock together, the rest of the project was just a matter of software. After some research, [Don] came across RPi-ShiftBrite by [Hive13] and made his own fork which added some features necessary for his project, namely the ability to quickly set the ShiftBrite to a specific color on the command line. To schedule the color changes, he used the very slick minicron: a web-based tool to create and monitor Linux cron jobs.

The Pi itself does not actually interface with the clock, and with no onboard RTC it’s necessary to keep it updated with NTP or else the times will become desynchronized. It can be necessary to sync the Pi’s clock to the Internet as often as every hour to make sure the colors shift at the appropriate times. The addition of a RTC module like the DS1307 could alleviate this issue and might be something to consider for a future revision.

All told, a fantastic project and something we’ll be sure to keep our eyes on as it progresses. We’ve seen our share of unique Raspberry Pi powered clocks, and even a few color changing ones, but this approach is easily the most straight-forward we’ve seen.

Continue reading “Color Changing Clock Gets A Pi Zero Heart”

Star Chart Watch Is A Romantic Tragedy

It’s becoming abundantly clear that [Colin Merkel] doesn’t know the definition of “good enough”. Not only has he recently completed his third (and most impressive) wristwatch build, but he also managed to put together one of the most ridiculously romantic gifts ever conceived. While some of us are giving our significant others a gift card to Starbucks, he made his girlfriend a watch with a chart on the face representing the position of the stars at the time and place of their first meeting.

As per his usual style, the documentation on this build is phenomenal. If paging through his gallery of build images doesn’t make you want to get a lathe and start learning metal working, nothing will. A chunk of stainless steel rod miraculously becomes a gorgeous wrist watch over the course of a few dozen images, perfectly encapsulating that old adage of “making it look easy”.

All you have to do is turn this into that. Easy.

Certainly the highlight of this build is the star chart on the face. To make it, he used PyEphem to plot the position of the brightest stars that were visible at the time and place of their first meeting. He then wrote a script to take those stars and convert their positions to G-Code the CNC could use to drill holes in the appropriate locations. The depth of the hole even corresponds to the magnitude (brightness) of each star, giving the chart a subtle 3D effect.

Unfortunately, [Colin] made a couple of mistakes during this build, to the point that he’s not exactly sure how to proceed. He mentions he might even be forced to start over from scratch. It’s hard to imagine how something that looks this good could ever end up being a failure, but the world of watch making is unkind.

To start with, he used 304 stainless instead of 303. This made machining the case much more difficult, and from his very first cut he realized it was going to be a problem. While it was an annoyance he mentions a couple times during the build log, he was at least was able to work through it.

The real problem came at the end, when he put the watch together. He originally made his designs assuming a front glass which was 0.5 mm thick, but in actuality used a piece that is 0.8 mm thick. This slight difference is just enough to cause the seconds hand to rub up on the glass, putting drag on the movement. The end result is that the battery dies extremely quickly, effectively rendering the watch useless.

We can’t imagine the heartbreak [Colin] felt when he realized what happened; we felt bad just reading about it. But given his track record, we have no doubt he’ll get the issue sorted out. It would be a shame to start over completely, but there’s some consolation in knowing it’s part of the learning process: you don’t become a master of your craft without making a couple mistakes along the way.

The predecessor to this watch was covered here at Hackaday last year, and made quite an impression. It’s interesting to see the improvements made between the two, and we’re certainly excited to see his next build.

Edgytokei

Edgytokei’s Incredible Mechanism Shows Time Without A Face

Taking inspiration from Japanese nunchucks, [ekaggrat singh kalsi] came up with a brilliant clock that tells time using only hour and minute hands, and of course a base for them to sit on. The hands at certain parts of the hour seem to float in the air, or as he puts it, to sit on their edges, hence the name, the Edgytokei, translating as “edge clock”.

The time is a little difficult to read at first unless you’ve drawn in a clock face with numbers as we’ve done here. 9:02 and 9:54 are simple enough, but 9:20 and 9:33 can be difficult to translate into a time at first glance. Since both hands have to be the same length for the mechanism to work, how do you tell the two hands apart? [ekaggrat] included a ring of LEDs in the hub at the base and another at the end of one of the hands. Whichever ring of LEDs is turned on, indicates the tip of the minute hand. But the best way to get an idea of how it works is to watch it action in the video below.

We have to admire the simplicity and cleanliness of his implementation. The elbow and the hub at the base each hide a stepper motor with attached gear. Gear tracks lining the interior of the hands’ interact with the motor gears to move the hands. And to keep things clean, power is transferred using copper tape lining the exteriors.

On the Hackaday.io page [ekaggrat] talks about how difficult it was to come up with the algorithms and especially the code for homing the hands to the 12:00 position, given that homing can be initiated while the hands can be in any orientation. The hand positions are encoded in G-code, and a borrowed G-code parser running on an Arduino Nano in the base controls it all.

Continue reading “Edgytokei’s Incredible Mechanism Shows Time Without A Face”

Two Factor Authentication With The ESP8266

Google Authenticator is a particularly popular smartphone application that can be used as a token for many two factor authentication (2FA) systems by generating a time-based one time password (referred to as TOTP). With Google Authenticator, the combination of your user name and password along with the single-use code generated by the application allows you to securely authenticate yourself in a way that would be difficult for an attacker to replicate.

That sounds great, but what if you don’t have a smartphone? That’s the situation that [Lady Ada] recently found herself in, and rather than going the easy route and buying a hardware 2FA token that’s compatible with Google Authenticator, she decided to build one herself based on the ESP8266. With the hardware and source documented on her site, the makings of an open source Google Authenticator hardware token are available for anyone who’s interested.

Generated codes can also be viewed via serial.

For the hardware, all you need is the ESP8266 and a display. Naturally [Lady Ada] uses her own particular spin on both devices which you can purchase if you want to create an identical device, but the concept will work the same on the generic hardware you’ve probably already got in the parts bin. Software wise, the code is written in CircuitPython, a derivative of MicroPython, which aims to make microcontroller development easier. If you haven’t tried MicroPython before, grab an ESP and give this a roll.

Conceptually, TOTP is relatively simple. You just need to know what time it is, and run an SHA1 hash. The time part is simple enough, as the ESP8266 can connect to the network and get the current time from NTP. The calculation of the TOTP is handled by the Python code once you’ve provided it with the “secret” pulled from the Google Authenticator application. It’s worth noting here that this means your 2FA secrets will be held in clear-text on the ESP8266’s flash, so try not to use this to secure any nuclear launch systems or anything, OK? Then again, if you ever lose it the beauty of 2-factor is you can invalidate the secret and generate a new one.

We’ve covered the ins and outs of 2FA applications before here at Hackaday if you’d like to know more about the concept, in addition to previous efforts to develop a hardware token for Google Authenticator.

Celebrate Display Diversity For A Circuit Circus Clock

There’s a lot to be said for nice, tidy projects where everything lines up and looks pretty. Seeing straight lines and pleasing proportions speaks to our obsessive-compulsive tendencies, and tends to soothe the mind and calm the spirit. But disorder is not without its charm, and mixing it up a little from time to time, such as with this mixed-media digital clock, can be a good idea.

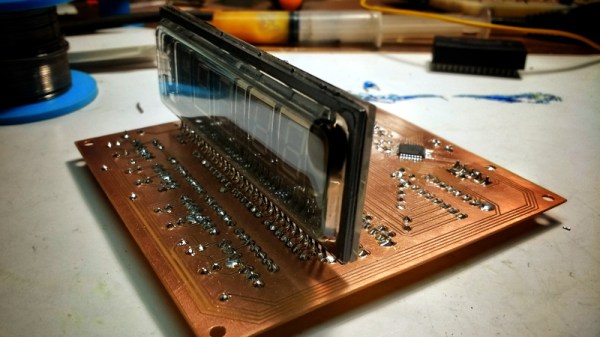
Now, we know what you’re thinking — yet another Nixie clock. True, but that’s only half the story — or more accurately, one-sixth. There’s but a single Nixie in [Fuselage]’s circus-punk themed clock, used for the least significant digit in the hours part of the display. The other digits are displayed with four seven-segment devices — a Numitron, a vacuum fluorescent display, and an LED dot display — plus a real oddball, an old electromechanical display with individual slides for each character and a rear-screen projector. The RTC part of the project is standard Arduino fare, but as you can imagine the power supply needed for such a diversity of displays is pretty complex and has to provide everything from +5 to -270 volts. Each display needs its own driver, too, making this more of a zoo than a circus. The mixed up look just works with the circus theme, too. We’d really like more information on the projector display, though.

Looking for a real statement for your next clock build? Check out the rare as hens’ teeth NIMO tube.

Continue reading “Celebrate Display Diversity For A Circuit Circus Clock”

Have Your Own 200 Water Street Digital Clock

On the front of a building in New York City, above a branch of the ubiquitous Starbucks coffee chain, there is a clock. It is no ordinary clock, the 200 Water Street clock is an art installation created by the artist [Rudolph de Harak], and consists of 72 lighted numbers which are illuminated in sequence to show hours, minutes, and seconds. It is a landmark of sufficient fame that [Jason Ben Nathan] and [Eldar Slobodyan], Cornell University students of [Bruce Land], decided to make their own tribute to it as their course project.

Water Street clock at night
Water Street clock at night [via NYC ♥ NYC]
It’s a fairly straightforward build, thanks to the use of Adafruit Dotstar multicolour LED strips which are populated with APA102 pixels. Behind the scenes is a PIC32 microcontroller, and the time information comes from an off-the-shelf 60kHz WWVB time signal receiver. There is also a temperature sensor, for a handy second function.

The front panel is a piece of ply with the required numbers nicely laser-cut. All the schematics and code are available, should you fancy your hand at building your own version of the clock.

If you are curious about the real-life clock here’s an image. But you get a much more interesting perspective if you stand in front of it. If you just can’t go there, get an approximation through the wonders of Google Street View.