Empty Can Upcycled Into Portable Speaker

We aren’t suggesting you go digging through the trash looking for empty cans, but if you’ve already got some empty cans in the privacy of your own home, you could certainly do worse than turning them into unique enclosures for your electronics projects. Better than sitting in the landfill, surely.

This hack from [Robin Hartley] turns an empty Cadbury hot chocolate can into a portable speaker that’s sure to get some attention. But don’t be fooled: a surprisingly amount of engineering went into this project in the form of a 3D printed structure on the inside of the can. Even if you aren’t big on the idea of putting your next project into a piece of literal trash, there’s something to be said for how professionally everything fits together in this build.

The key to this build is the 3D printed “skeleton” that holds the speaker and circuit board in place. An especially nice touch is how [Robin] designed the mount for the speaker: as it had no flange to attach to, he made a two piece clamp that screws together around the rear of the speaker and holds it in place.

You may wonder why somebody who’s clearly as well versed in CAD and 3D printing as [Robin] is might want to use an empty can as an enclosure; surely he could just design and print a case? Undoubtedly. But the goal here is to reuse what would otherwise be trash, and that occasionally means taking the “scenic” route as it were.

To take this concept to the next level, check out the upcycled speaker box we recently covered. We’ve seen some gorgeous home audio builds that started as a curbside find, but depending on how lucky you are, it’s almost like cheating.

Continue reading “Empty Can Upcycled Into Portable Speaker”

SCCSI2SD card in a sound board

Making A Vintage 1990s Sound Board Do Rapid Fire Silently

Sometimes a mix of old and new is better than either the old or new alone. That’s what [Brad Carter] learned when he was given an old 1990s sound board with a noisy SCSI drive in it. In case you don’t know what a sound board is, think of a bunch of buttons laid out in front of you, each of which plays a different sound effect. It’s one way that radio DJ’s and podcasters intersperse their patter with doorbells and car crash sounds.

Before getting the sound board, [Brad] used a modern touchscreen table but it wasn’t responsive enough to get a machine gun like repetition of the sound effect when pressing an icon in rapid succession. On the other hand, his 1990s sound board had very responsive physical buttons but the SCSI hard drive was too noisy. He needed the responsiveness of the 1990s physical buttons but the silence of modern solid state storage.

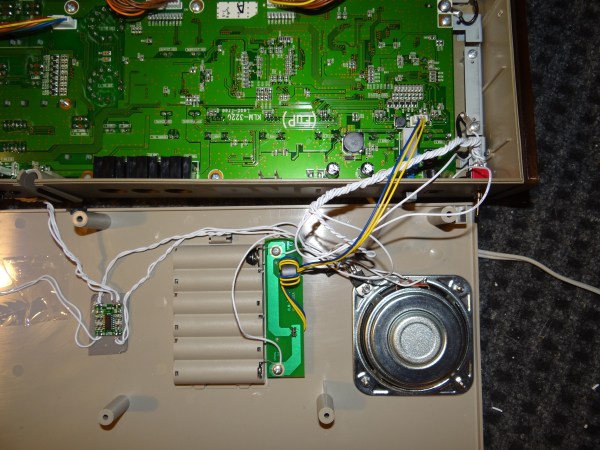
And so he replaced the sound board’s SCSI drive with an SD card using a SCSI2SD adaptor. Of course, there was configuration and formatting involved along with a little trial and error to get the virtual drive sizes right. To save anyone else the same difficulties, he details all his efforts on his webpage. And in the video below you can see and hear that the end result is an amazing difference. Pressing the physical buttons gives instant sound and in machine gun fashion when pressed in rapid succession, all with the silence of an SD card.

A SCSI2SD card is a nice off-the-shelf solution but if you want something a little more custom then there’s a Raspberry Pi SCSI emulator and one which uses a Teensy with a NCR5380 SCSI interface chip.

Continue reading “Making A Vintage 1990s Sound Board Do Rapid Fire Silently”

Cross-Correlation Makes Quick Work Of Ads

Once relegated to the proverbial Linux loving Firefox user, ad blocking has moved into public view among increased awareness of privacy and the mechanisms of advertising on the internet. At the annual family gathering, when That Relative asks how to setup their new laptop, we struggle through a dissertation on the value of ad blockers and convince them to install one. But what about mediums besides the internet? Decades ago Tivo gave us one button to jump through recorded TV. How about the radio? If available, satellite radio may be free of The Hated Advertisement. But terrestrial radio and online streams? [tomek] wasn’t satisfied with an otherwise sublime experience listening streaming Polish Radio Three and decided to build a desktop tool to detect and elide ads from the live audio stream.

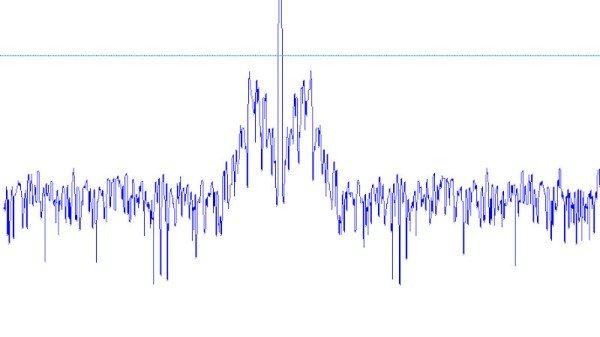
[tomek] was aware of this hip knowledge domain called Digital Signal Processing but hadn’t done any of it themselves. Like many algorithmic problems the first step was to figure out the fastest way to bolt together a prototype to prove a given technique worked. We were as surprised as [tomek] by how simple this turned out to be. Fundamentally it required a single function – cross-correlation – to measure the similarity of two data samples (audio files in this case). And it turns out that Octave provides it in the box. After snipping the start-of-ad jingle out of a sample file and comparing it to a radio program [tomek] got the graph at the left. The conspicuous spike is the location of the jingle in the audio file.

At this point all that was left was packaging it all into a one click tool to listen to the radio without loading an entire analysis package. Conveniently Octave is open source software, so [tomek] was able to dig through its sources until they found the bones of the critical xcorr() function. [tomek] adapted their code to pour the audio into a circular buffer in order to use an existing Java FFT library, and the magic was done. Piping the stream out of ffmpeg and into the ad detector yielded events when the given ad jingle samples were detected.

[tomek] packaged that tool into a standalone executable, but the gem here is the followup post. After removing ads in the online stream they adapted a RaspberryPi to listen to an FM receiver and remote control their Yamaha tuner over the network. So when the tuner is playing Radio Three the Pi notices and ducks the audio appropriately to avoid those pesky ads. Video of this after the break.

Continue reading “Cross-Correlation Makes Quick Work Of Ads”

Rewinding Live Radio

Even though it’s now a forgotten afterthought in the history of broadcasting technology, we often forget how innovative the TiVo was. All this set-top box did was connect a hard drive to a cable box, but the power was incredible: you could pause live TV. You could record shows. You could rewind TV. It was an incredible capability, that no one had ever seen before. Of course, between Amazon and Netflix and YouTube, no one watches TV anymore, and all those platforms have a pause button, but the TiVO was awesome.

There is one bit of broadcasting that still exists. Radio. For his Hackaday Prize entry, [MagicWolfi] is bringing the set-top box to radio. He’s invented the Radio Rewind Button, and it does exactly what you would expect: it rewinds live radio a few minutes.

To have a pause or rewind button on a TV or radio, the only real requirement is a bunch of memory. The TiVO did this with a hard drive, and [MagicWolfi] is doing this with 256 MB of SDRAM. That means he needs to access a ton of RAM, and for that he’s turning to the Digilent ARTY S7 board. Yes, it’s an FPGA, but actually a fairly simple solution to the problem.

The rest of the circuit is an FM receiver chip and an I2S audio codec on an Arduino-shaped daughterboard. The main controller for this project is a big red button that will simply rewind the audio stream a few minutes. There’s no telling exactly how long [MagicWolfi] will be able to rewind the audio stream, but 256 MB is a ton in the audio world.

The Engineering Of An Ultrasonic Phased Array

Ultrasonic phased arrays are one of the wonders of the moment, with videos of small items being levitated by them shared far and wide. We’ve all seen them and some of us have even wondered about building them, but what about the practical considerations? Just how would you drive a large array of ultrasonic transducers, and how would you maintain a consistent phase relationship between their outputs? It’s a problem [Niklas Fauth] has been grappling with over the three iterations so far of his ultrasonic phased array project, and you can follow his progress on the latest build.

The arrays themselves are a 16 by 16 grid of cheap ultrasonic transducers on a PCB, fed by HV583 high-voltage shift registers. These chips have proven to be particularly problematic, their drivers having a relatively high internal resistance which leaves them prone to overheating.

An interesting solution to a problem comes from the transducers having a polarity, but because it doesn’t matter in their usual application, that polarity not being marked. He’s overcome this by using the STM32 he has managing power alongside his BeagleBone to listen through a sensor as the ‘Bone supplies each transducer in turn with a known phase. An internal map can then be created, such that the appropriate phase can be applied on a transducer-by-transducer basis.

It’s the fascination with the subject that we find appealing, this is version three and version two worked. Most of us would make one and call it a day. It’s something we’ve seen before from [Niklas], after all this is someone who plays with turbomolecular pumps for fun. Meanwhile if you would like to learn more about ultrasonic arrays and acoustic levitation, it was the subject of one of this year’s Hackaday Belgrade talks.

The VU Meter And How It Got That Way

Given its appearance in one form or another in all but the cheapest audio gear produced in the last 70 years or so, you’d be forgiven for thinking that the ubiquitous VU meter is just one of those electronic add-ons that’s more a result of marketing than engineering. After all, the seemingly arbitrary scale and the vague “volume units” label makes it seem like something a manufacturer would slap on a device just to make it look good. And while that no doubt happens, it turns out that the concept of a VU meter and its execution has some serious engineering behind that belies the really simple question it seeks to answer: How loud is this audio signal?

Continue reading “The VU Meter And How It Got That Way”

Shell Script Synthesizer Knocks Your SoX Off

Sound eXchange, or SoX, the “Swiss Army knife of audio manipulation” has been around for as long as the Linux kernel, and in case you’re not familiar with it, is a command line tool to play, record, edit, generate, and process audio files. [porkostomus] was especially interested about the generating part, and wrote a little shell script that utilizes SoX’s built-in synthesizer to compose 8-bit style music.

The script comes with a simple yet straightforward user interface to record the lead and bass parts into a text file, and play them back later on. Notes from C2 to C5 are currently supported, and are mapped to the keyboard in a two-row piano layout. The output file format itself is just a plain text listing of the played note, wave form, and note length. This lets you easily edit the song or even generate it from an alternative source, for example MIDI. Also note that there are no initial audio files required here, SoX will generate them as needed.

Admittedly, the command line interface may not be the most convenient way to create music, but nevertheless, it is a way — and that is [porkostomus]’s main mission here. Also, SoX is fun — and versatile, you can apply its audio effects even on images, or decode strange signals sent from a helicopter with it.