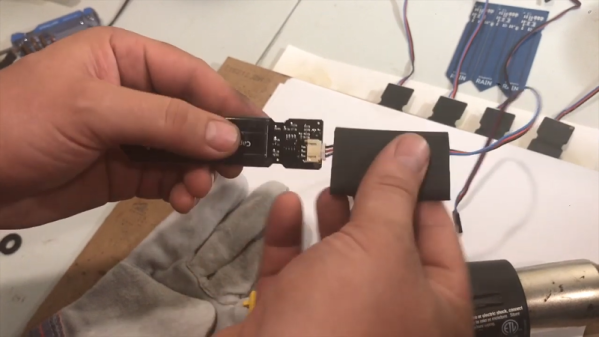
[Adosia] has some interesting videos about their IoT platform controlling self-watering plant pots. However, the video that really caught our eye was the experience in sealing up sensors that are going to be out in the field. Even if you aren’t using the exact sensors, the techniques are useful.
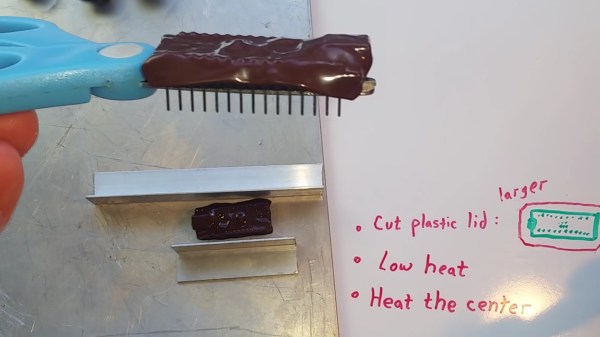
We would have expected to see potting compound, but that’s messy and hard to use so their process is simpler. First, a few coats of clear urethane sealant goes over the electronics. Next, heat shrink goes over the assembly. It isn’t ordinary heat shrink though, instead it’s the kind that has heat-activated adhesive inside.
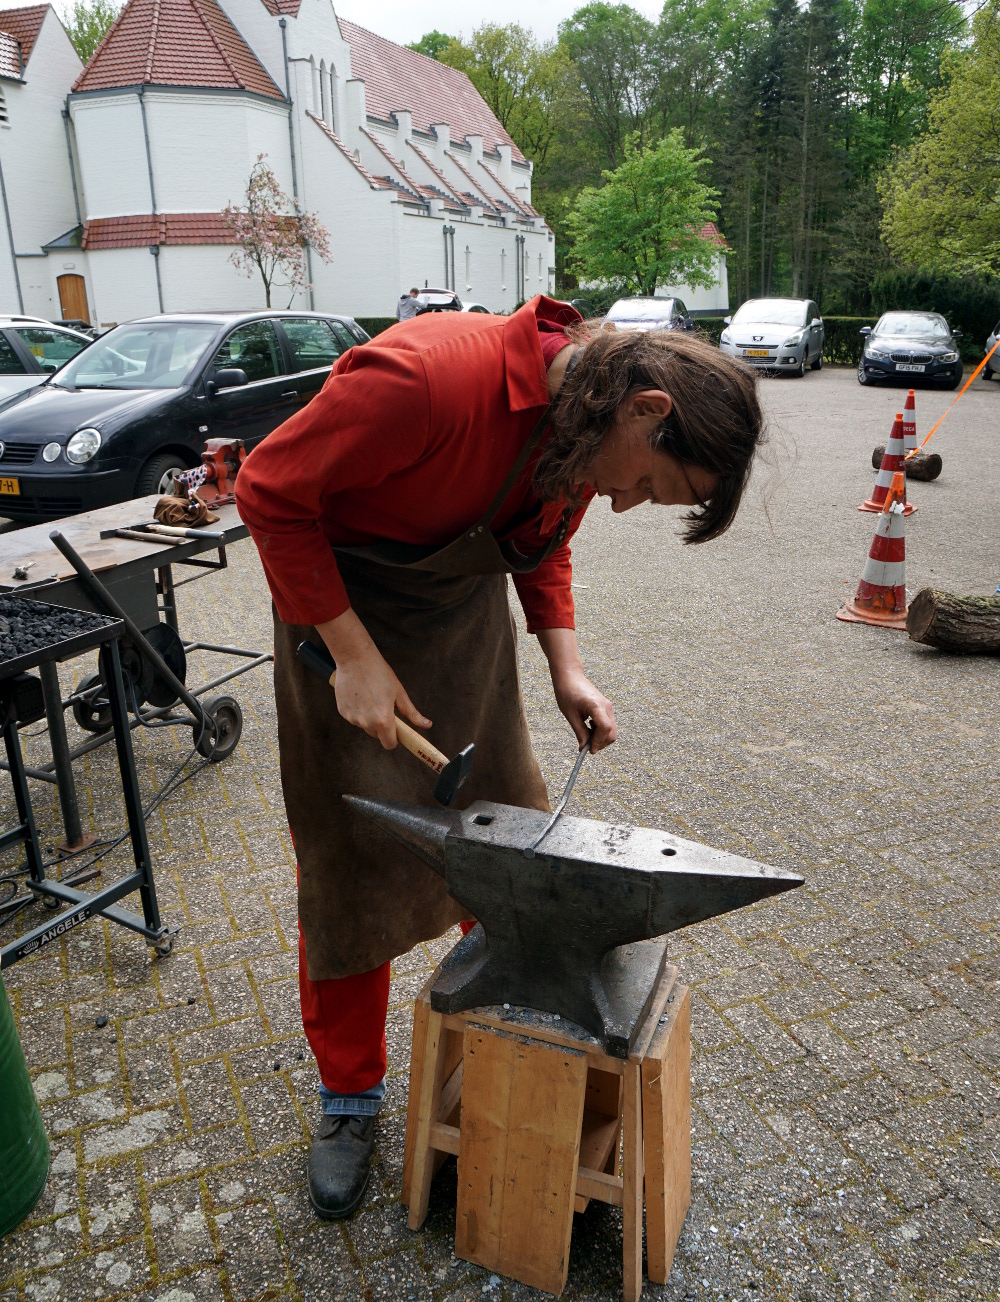
For the past few months we’ve been running this series of Blacksmithing For The Uninitiated posts, exploring the art of forge work for a novice. It’s based upon my experience growing up around a working blacksmith’s business and becoming an enthusiastic if somewhat inexpert smith, and so far we’ve spent our time looking at the equipment you might expect to need were you embarking on your own blacksmith work. Having assembled by now a basic forge of our own it’s now time to fire it up and take to the anvil for our first bit of smithing.
Lighting a forge is easy enough. Some people do it with a gas torch, but I break a piece of firewood into sticks using a hammer with the fuller set in the hardy hole on the anvil as an impromptu splitter. Making a small fire by lighting some paper under my pile of sticks placed on the hearth next to the tuyere I start the blower and then pile coke on top of the resulting conflagration. After about ten minutes I will have a satisfying roar and a heap of glowing coals, and as they burn there will be some slag collecting in the bottom of the fire that I will eventually need to rake out. Continue reading “Blacksmithing For The Uninitiated: Your First Time At The Anvil”→
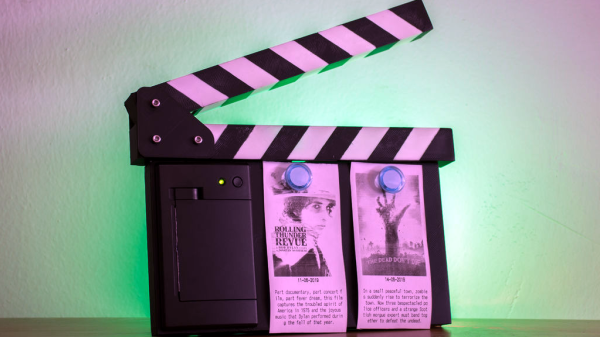
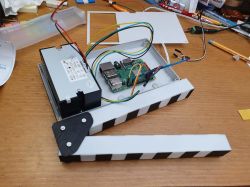
The clapperboard is a device used in video to synchronize audio and video. Its role in movies is well known and its use goes back in one form or another to the 1920s. [Gocivici] is a big movie fan and created a clapperboard that is able to print out posters of recently announced movies when the clapper is clapped.
The poster is not a big, full color job, but rather a black and white one, roughly the size of a movie ticket. [Gocivici] keeps his movie tickets in a journal and wanted to be able to keep small posters in there along with them. A thermal printer is used to print the poster along with the title, the release date, and some information about the movie. In addition to the printer, the hardware involved is a Raspberry Pi, a switch, and an LED. The clapperboard itself is 3d printed and then painted. A bit of metal is used to keep the clappers apart and give a bit of resistance when pressing them together. A nice touch is a metal front, so you can use magnets to keep your posters on the board.
[Gocivici] has detailed build instructions up along with a video (available after the break) showing the printer in action. The 3d models are available as well as the code used to create the posters after grabbing data from TMDb. If you need your clapperboard to be as accurate as possible, take a look at this atomic clock clapperboard.
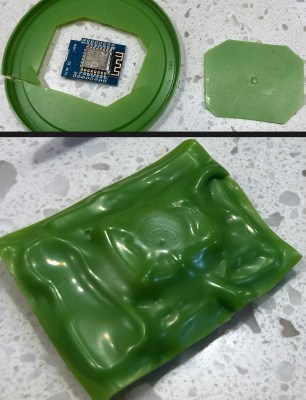
An errant wire snipping across the wrong electrical pins spells the release of your magic smoke. Even if you are lucky, stray parts are the root of boundless malfunctions from disruptive to deadly. [TheRainHarvester] shares his trick for covering an Arduino Nano with some scrap plastic most of us have sitting in the recycling bin. The video is also after the break. He calls this potting, but we would argue it is a custom-made cover.
The hack is to cut a bit of plastic from food container lids, often HDPE or plastic #2. Trim a piece of it a tad larger than your unprotected board, and find a way to hold it in place so you can blast it with a heat gun. When we try this at one of our Hackaday remote labs and apply a dab of hot glue between the board and some green plastic it works well. The video suggests a metal jig which would be logical when making more than one. YouTube commenter and tip submitter [Keith o] suggests a vacuum former for a tighter fit, and we wouldn’t mind seeing custom window cutouts for access to critical board segments such as DIP switches or trimmers.
We understand why shorted wires are a problem, especially when you daisy-chain three power supplies as happened in one of [TheRainHarvester]’s previous videos.
If you want to measure resistance and you know Ohm’s law, it seems like you have an easy answer, right? Feed a known current through the thing you want to measure and read the voltage required. A little math, and that’s it. Or is it? If you are measuring reasonably large resistance and you don’t mind small inaccuracies, sure. But for tiny measurements or highly accurate measurements, you’d be better off using the four-wire method. What’s more is, understanding why you want to use the four-wire method is a great example of using an understanding of electronics to find solutions to problems. Continue reading “Circuit VR: Resistance Measurement With Four Wires”→
If you don’t have access to a 3D scanner, you can get a lot done with photogrammetry. Basically, you take a bunch of pictures of an object from different angles, and then stitch them together with software to create a 3D model. For best results, you need consistent, diffuse lighting, an unchanging background, and a steady camera.
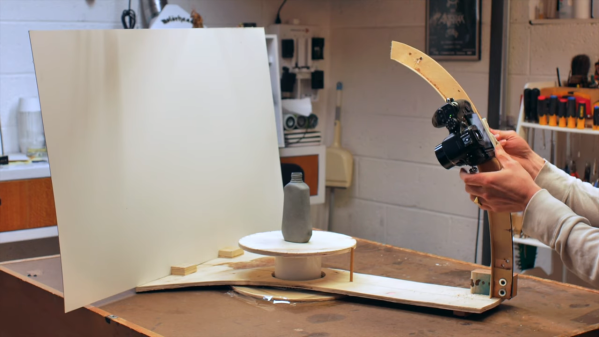
Industrial designer [Eric Strebel] recently made an Intro to Photogrammetry video wherein he circled an object taking photos with his bare hands. One commenter suggested a different method: build a donut-shaped turntable that circles the object, which sits on a stationary platform. Attach the camera to the donut, counterbalance the weight, and Bob’s your proverbial uncle. [Eric] thought it was a brilliant idea (because it is), and he built a proof of concept. This is that video.
[Eric] can move the camera up and down the arc of the boom to get all the Z-positions he wants. The platform has a mark every 10° and there’s a pointer in the platform to line them up against for consistent camera positioning. He was pleasantly surprised by the results, which we agree are outstanding.
We always learn a lot from [Eric]’s videos, and this one’s no exception. Case in point: he makes a cardboard mock-up by laying out the pieces, and uses that to make a pattern for the recycled plywood and melamine version. In the photogrammetry video, he covers spray paint techniques to make objects reflect as little light as possible so the details don’t get lost.
Regular readers will recognise this as the third part of a series exploring blacksmithing for those who have perhaps always fancied having a go but have never quite known where to start. It’s written from a position of the unusual experience of having grown up around a working forge, my dad may now be retired but he has a blacksmith specialising in architectural ironwork.
So far in this series we’ve looked in detail at the hearth and anvil that you might find in a typical forge, and delivered some pointers as to where you might look to find or even construct your own.Those are the signature pieces of equipment you’ll find in a forge, but with them alone you can still not be a blacksmith.
If I Had A Hammer…
An array of hammers of different weights and types.
Given an anvil, a hearth, and a vat of water to quench hot work in, and you’re almost set for your forge, but not quite. Most of a modern blacksmith’s workshop is the standard metalworking assortment of welders and angle grinders, but there is a set of tools that remain essential for blacksmithing alone. Your hammers are what connect you to the work, and can be as individual as the preferences of the blacksmiths themselves. There is no “right” answer to the question of what hammer you should use, instead you should use the one that works best for you. I instinctively favour a round-faced ball-peen hammer because that’s what my dad mostly used, but for example my Dutch friends use square faced cross-peen hammers. Blacksmiths will often make their own hammers to suit their needs, for example my dad made more than one using the high-quality steel of vehicle half-shafts as a starting point. Hardening them is a specialist skill in its own right, and I remember quite a few experiments before he perfected it.
It may well be stating the obvious, but the weight of the hammer influences how much energy it can impart to the work, and in turn the size of work that can be done. Casting an eye over my dad’s hammers the three workaday weights were 2 pound, 3 pound, and 4 pound (roughly 1 kg, 1.5 kg, and 2 kg), allowing a variety from fine work to heavier hitting of larger pieces. In a recent project, making a mediaeval nail, I selected an unsubtle lump hammer to draw out the larger square stock, and a much smaller one to finish it up, create the fine point, and relatively thin head. These are only a subsection of the hammers at his disposal though, like most blacksmiths he has a variety for all tasks, up to sledgehammers. I have frequently taken my turn either holding a piece with tongs while he used a sledgehammer, or on the sledgehammer myself.
Tongs, for Hot Gripping Moments
A selection of tongs, including some designed for very specific tasks. Our thanks to [Igor Nikolic] for making this picture possible.The constant companion to a blacksmith’s hammer is a pair of tongs. These can be bought from blacksmith’s suppliers, but making a pair can be a task within the reach of most smiths. Two identical sides are made from pieces of stock, with long thin handles, a flat piece to form the hinge, and whatever jaw piece is required. It feels like cheating to form the hole for the hinge on a drill press rather than on the anvil with a punch, but riveting it with a short piece of bar is a straightforward enough process. Blacksmiths will have a huge array of tongs with different jaws for specific jobs, built up over years as jobs demand it. If you cast your mind back to the Finnish smith pictured halfway down the first installment of this series, you’ll find several racks of tongs. A later episode of this series will look at making a set of tongs, though we can’t promise in advance the quality of the finished article.
A final moment for today should be spent on the subject of protective equipment. The hazards of blacksmithing are relatively uncomplicated, but some basic protective clothing is still very much worth having. The most obvious hazard is heat, you will be working in a noisy environment with red hot metal and fire. Though you will generate fewer sparks than you’d expect, I have a blacksmith’s leather apron and a set of fire-resistant overalls. Both of these are readily available from blacksmith’s supply stores, and are well worth the investment. There are also a lot of heavy and sharp items involved, not to mention hot particles on the floor. For that reason I also have a set of steel-toecapped workboots rated for hot particles. They aren’t the most elegant of footwear, but they have saved me from a few nasty moments.
I do not have any face protection specifically for blacksmithing, but depending on the work in hand there may be some sparks created. A polycarbonate face shield rated for hot particles should be available from any safety equipment supplier, and shouldn’t cost too much, and is an essential thing to own if you are doing any grinding or rotary wire brushing. Beyond that, there are also leather gloves designed for handling hot metal. I don’t use them because I prefer the feel of the hammer directly and am happy to use a pair of tongs to hold hot pieces of steel.
We’ve taken you through the basic workshop equipment of a blacksmith over the last few episodes of this series, and you should now have a basic idea of the safety kit you would be well advised to own. From this foundation we’ll next take you into the forge and start looking at a few blacksmithing techniques and simple projects, and along the way we’ll see some of the materials involved, too.

 your magic smoke. Even if you are lucky, stray parts are the root of boundless malfunctions from disruptive to deadly. [TheRainHarvester] shares his trick for

![A selection of tongs, including some designed for very specific tasks. Our thanks to [Igor Nikolic] for making this picture possible.](https://hackaday.com/wp-content/uploads/2019/04/tong-selection.jpg)